How to add emergency contacts to your account, via web or app
Managing your emergency contacts (edit information, or delete)
When and how Binance will communicate to your emergency contacts
You can now set up emergency contacts for your Binance account to prepare and safeguard against unforeseen circumstances. Depending on the given scenario, your emergency contacts may be eligible to inherit or receive ownership of your assets.
When you have saved at least one emergency contact, the emergency contact mechanism is activated. Using the contact information you’ve provided, Binance will contact you and your listed contact after a prolonged period of inactivity on your account.
How to add emergency contacts via Binance app
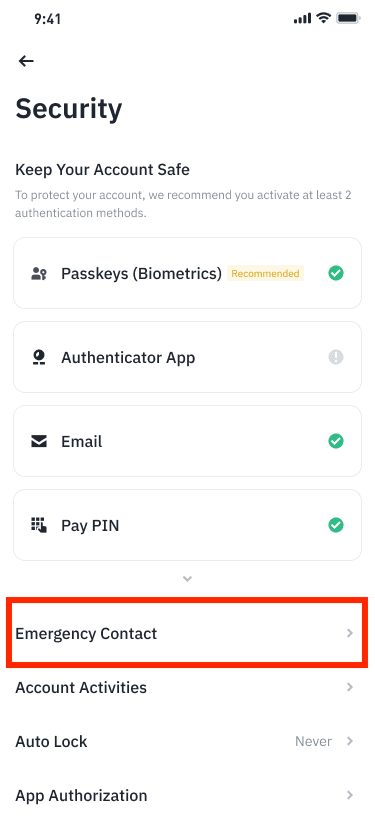
1. Log in to your Binance app and go to [Security] - [Emergency Contact].
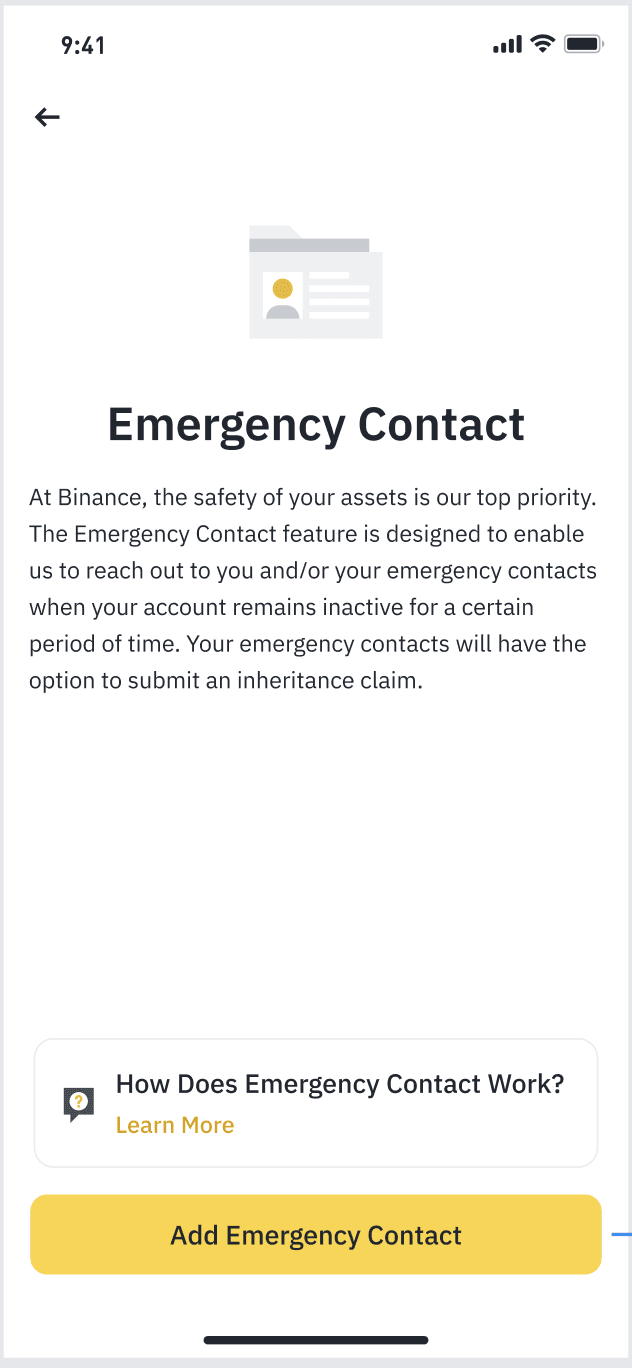
2. Read the note before tapping [Add Emergency Contact].
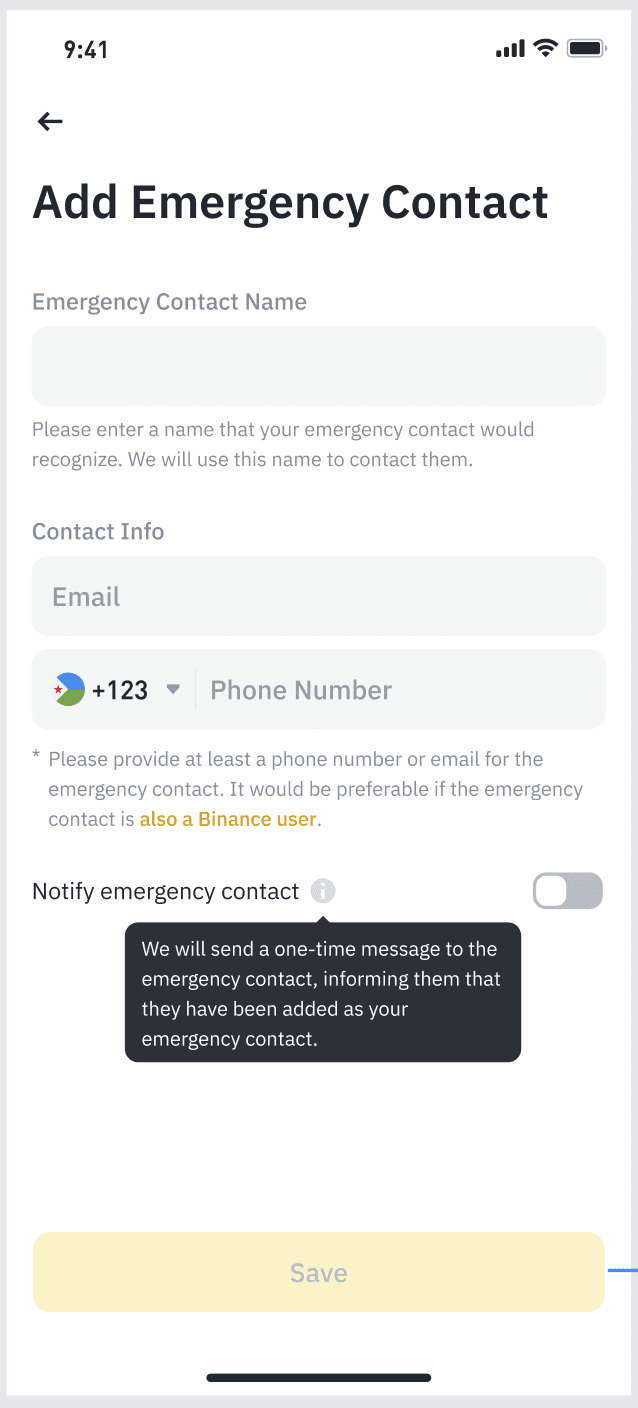
3. Fill in the details of the emergency contact (at least one email or phone number, or both). Then tap [Save].
Note, you can slide on the [Notify emergency contact] toggle to send a one-time message to the emergency contact to inform them they have successfully been added as your emergency contact.
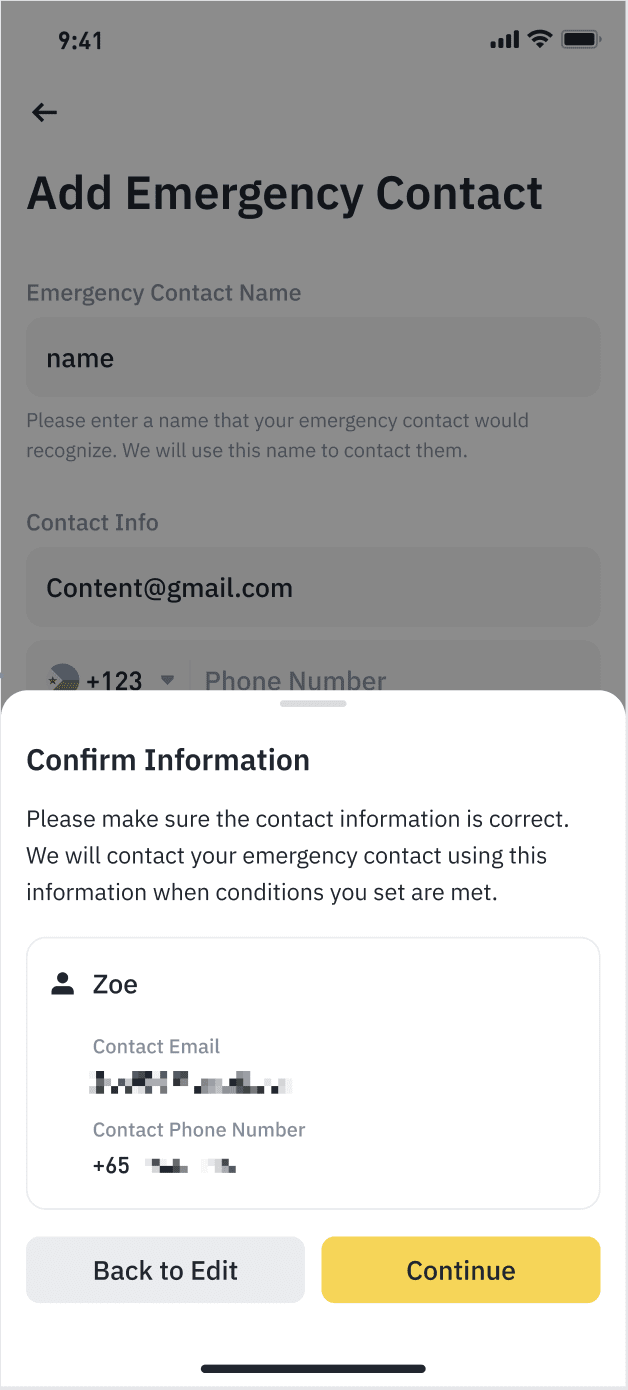
4. Double-check the emergency contact’s details and tap [Continue] to save.
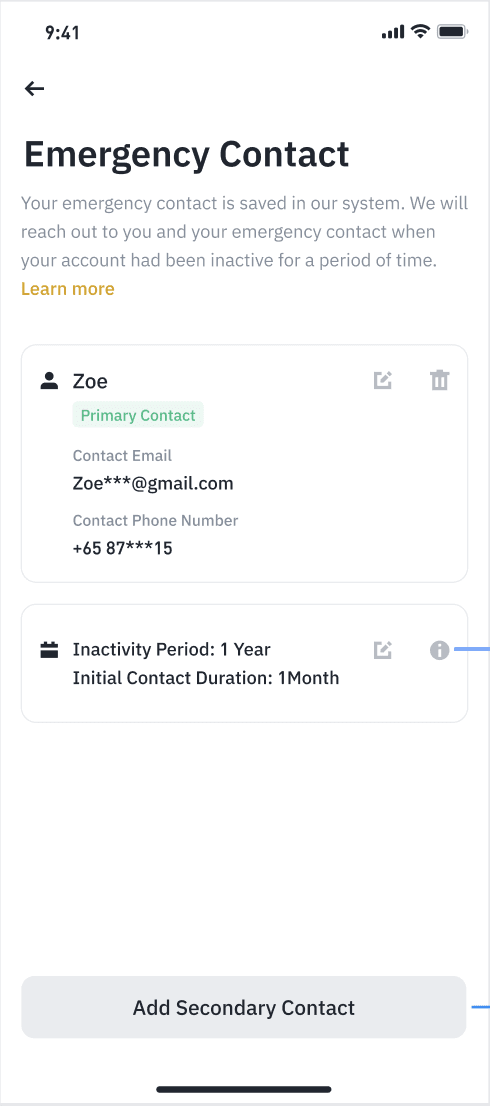
5. Once your emergency contact is successfully saved, you can choose to add a secondary contact by tapping the [Add Secondary Contact] button, which is optional.
How to manage (edit / delete) emergency contacts
Edit your emergency contacts’ information
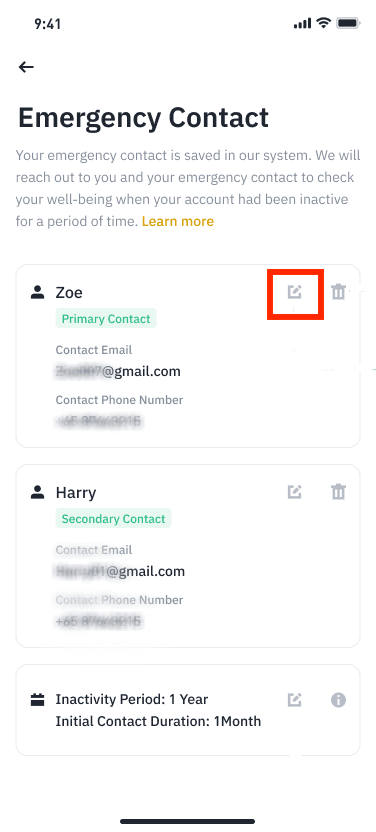
Go to [Security] - [Emergency Contact] and select the [Edit] icon beside the name of the emergency contact you’d like to edit information for.
Delete an emergency contact
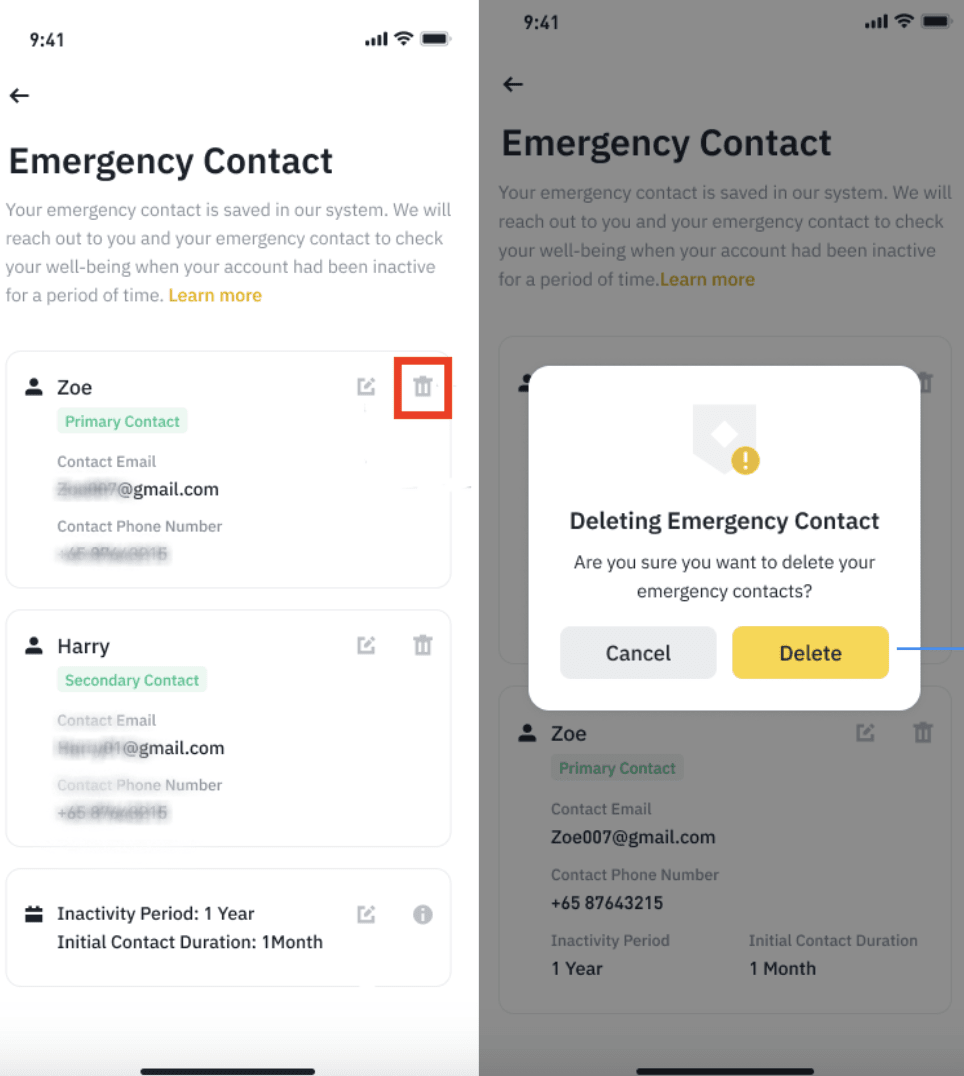
Go to [Security] - [Emergency Contact] and select the [Delete] icon beside the name of the emergency contact you’d like to delete.
Set the ‘Inactivity Period’ and ‘Initial Contact Duration’
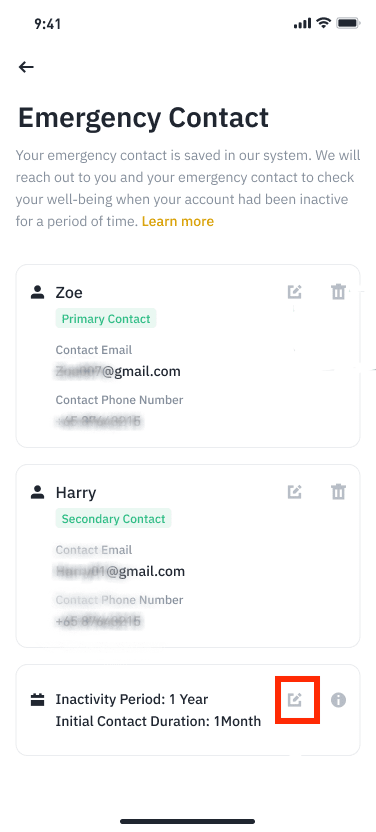
1. Go to the Emergency Contact page and select the [Edit] icon beside ‘Inactivity Period’.
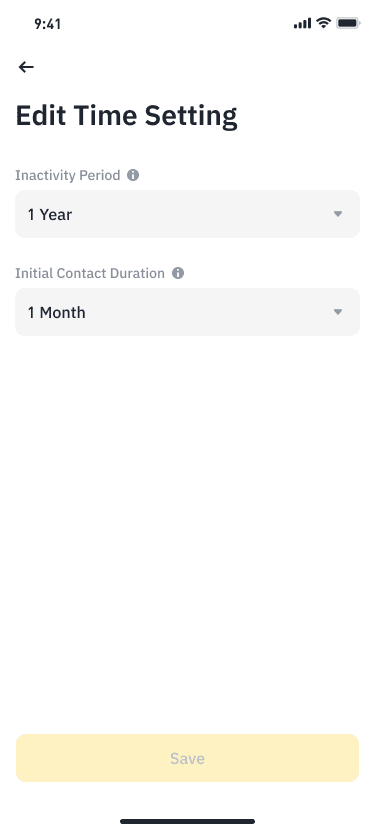
2. Select your preferences here ('Inactivity Period' and 'Initial Contact Duration').
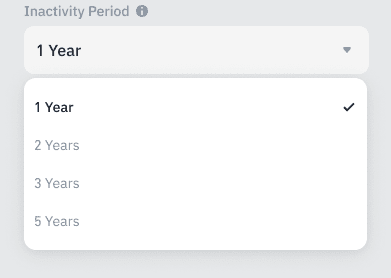
Inactivity Period: After your account has been inactive for this chosen period of time, we will start reaching out to you and your emergency contacts. The default is set to 1 Year, with options of 2, 3, and 5 Years.
Initial Contact Duration: We will try to contact you for this chosen period of time, before reaching out to your emergency contacts. The default is set at 1 Month, with options of 2 and 3 Months.
3. Tap [Save] to save your setting.
Communication to your emergency contacts
If your account’s inactivity period (based on the last login or session renewal) exceeds your chosen Inactivity Period, we will start contacting you. If you still have not logged into your account after the Initial Contact Duration, we will start contacting your emergency contacts (primary and secondary at the same time) via the contact methods provided.
Communication to your emergency contact will be done simultaneously via email and SMS. Messages are sent every 7 days from the first send.
You can now set up emergency contacts for your Binance account to prepare and safeguard against unforeseen circumstances. Depending on the given scenario, your emergency contacts may be eligible to inherit or receive ownership of your assets.
When you have saved at least one emergency contact, the emergency contact mechanism is activated. Using the contact information you’ve provided, Binance will contact you and your listed contact after a prolonged period of inactivity on your account.
How to add emergency contacts on the Binance website
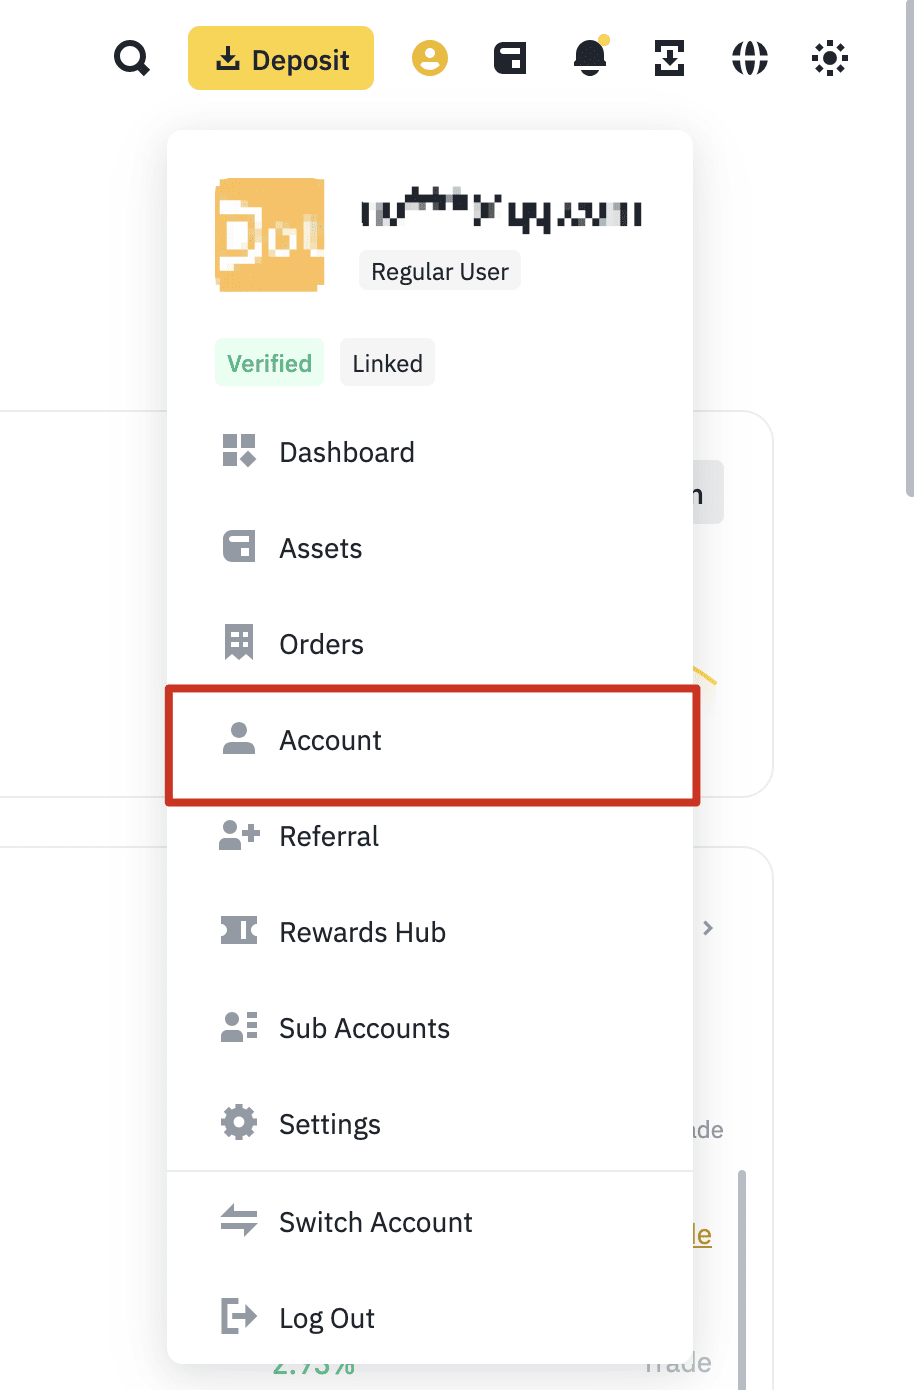
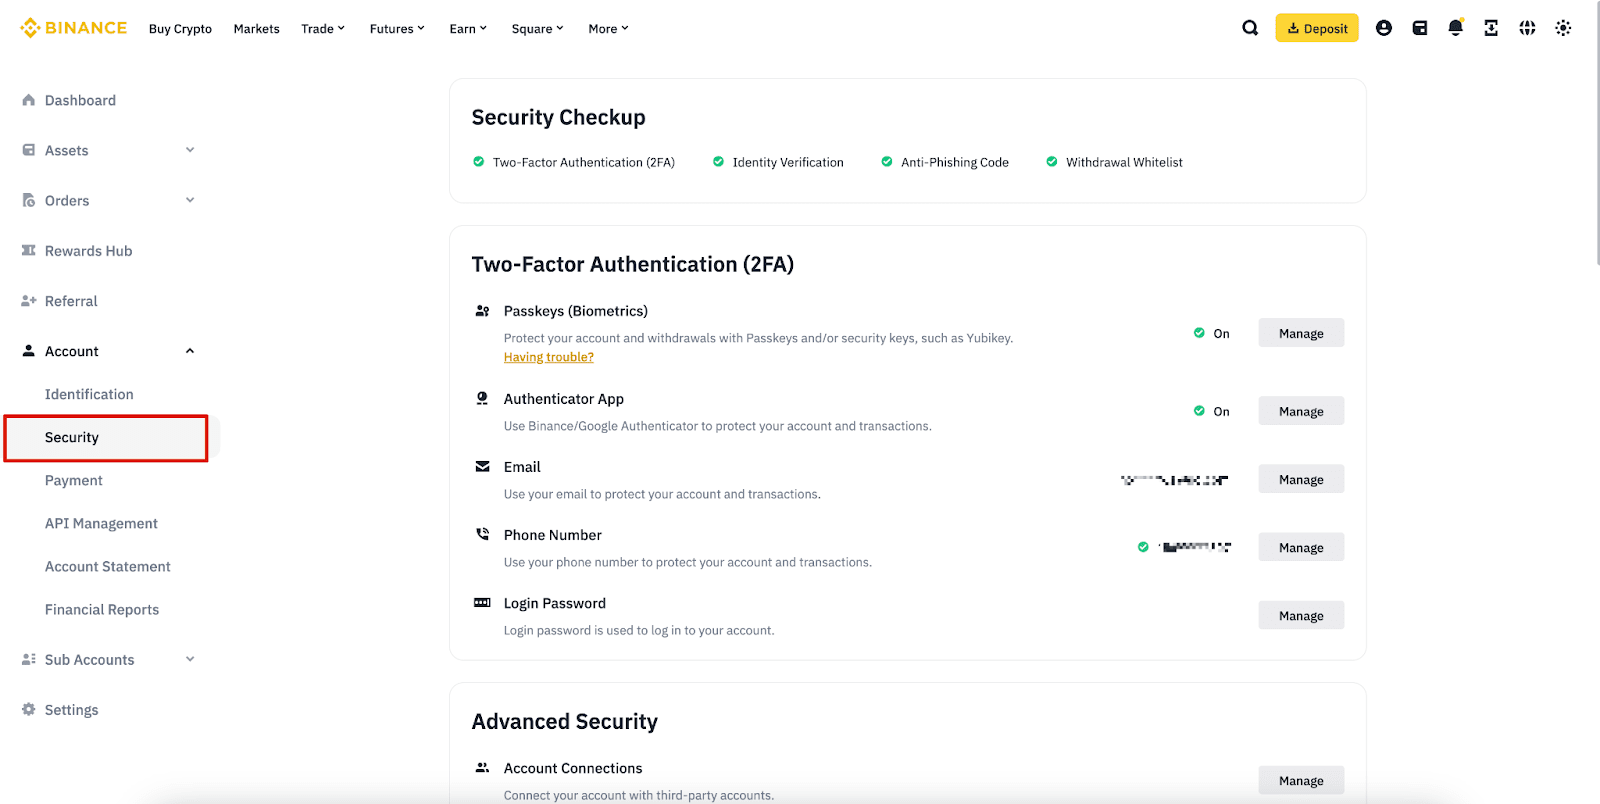
1. Log into your Binance account and go to [Account] - [Security].
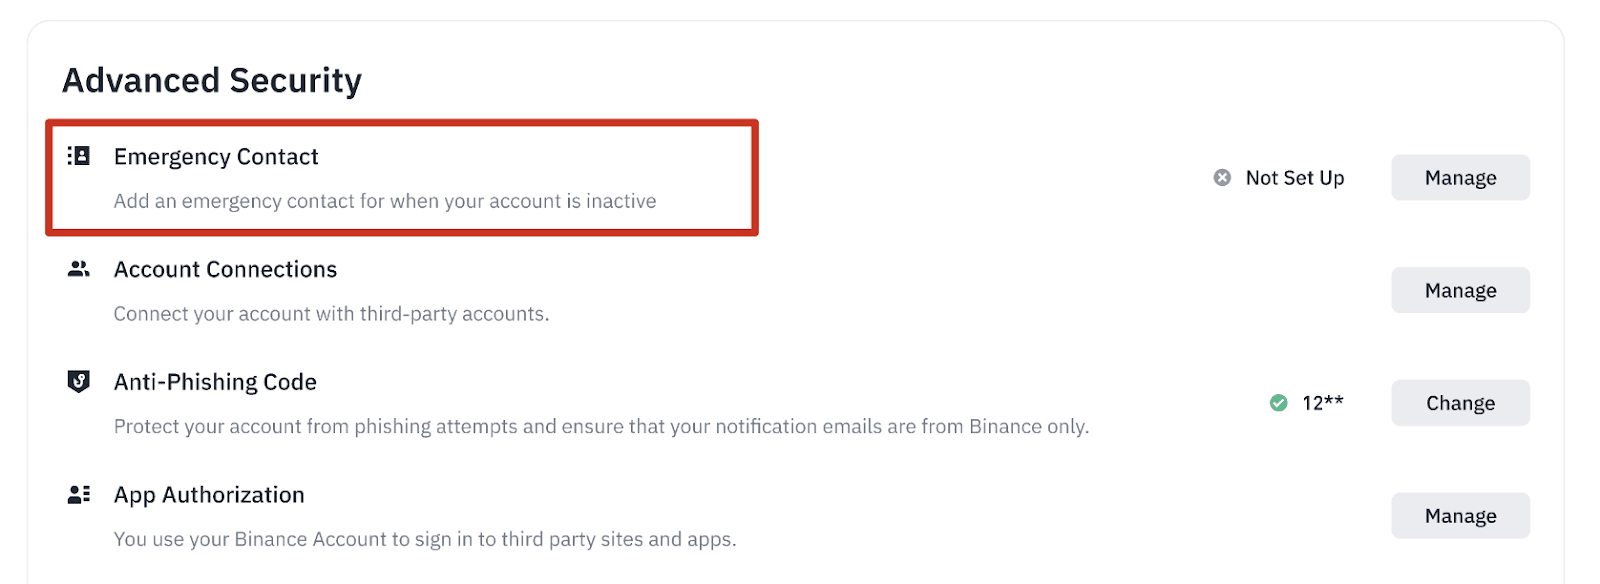
2. Under the 'Advanced Security' section, find 'Emergency Contact', then click [Manage].
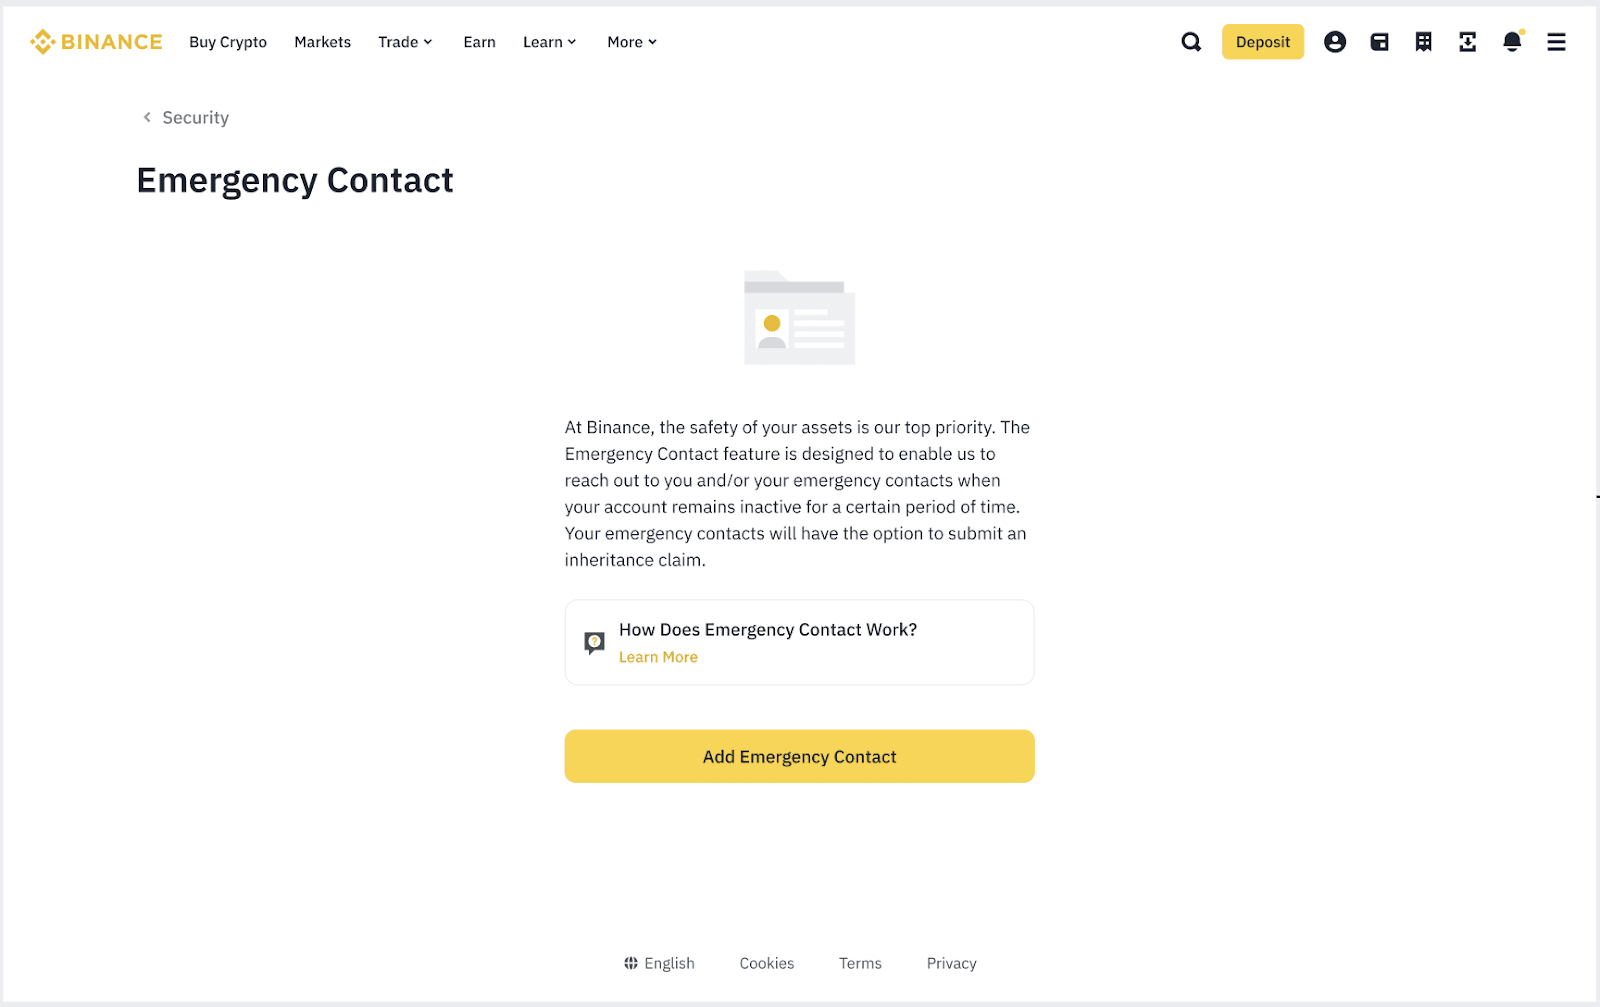
3. Read the note before clicking [Add Emergency Contact].
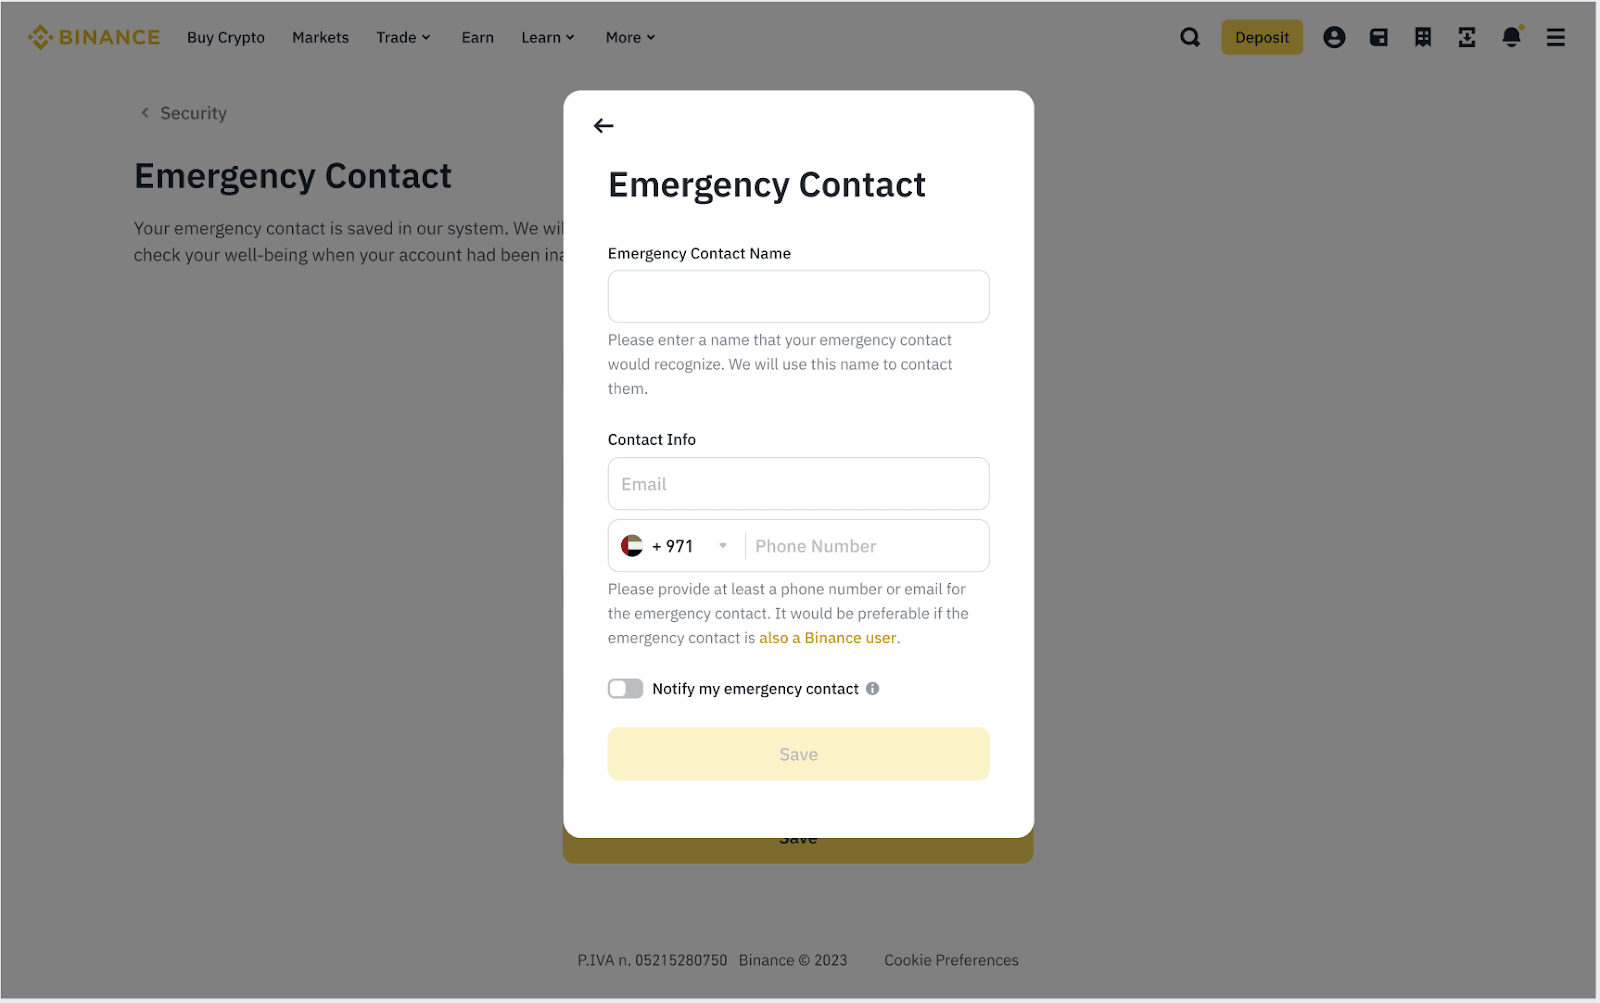
4. Fill in the details of the emergency contact (at least one email or phone number, or both). Then click [Save].
Note, you can slide on the [Notify emergency contact] toggle to send a one-time message to the emergency contact to inform them they have successfully been added as your emergency contact.
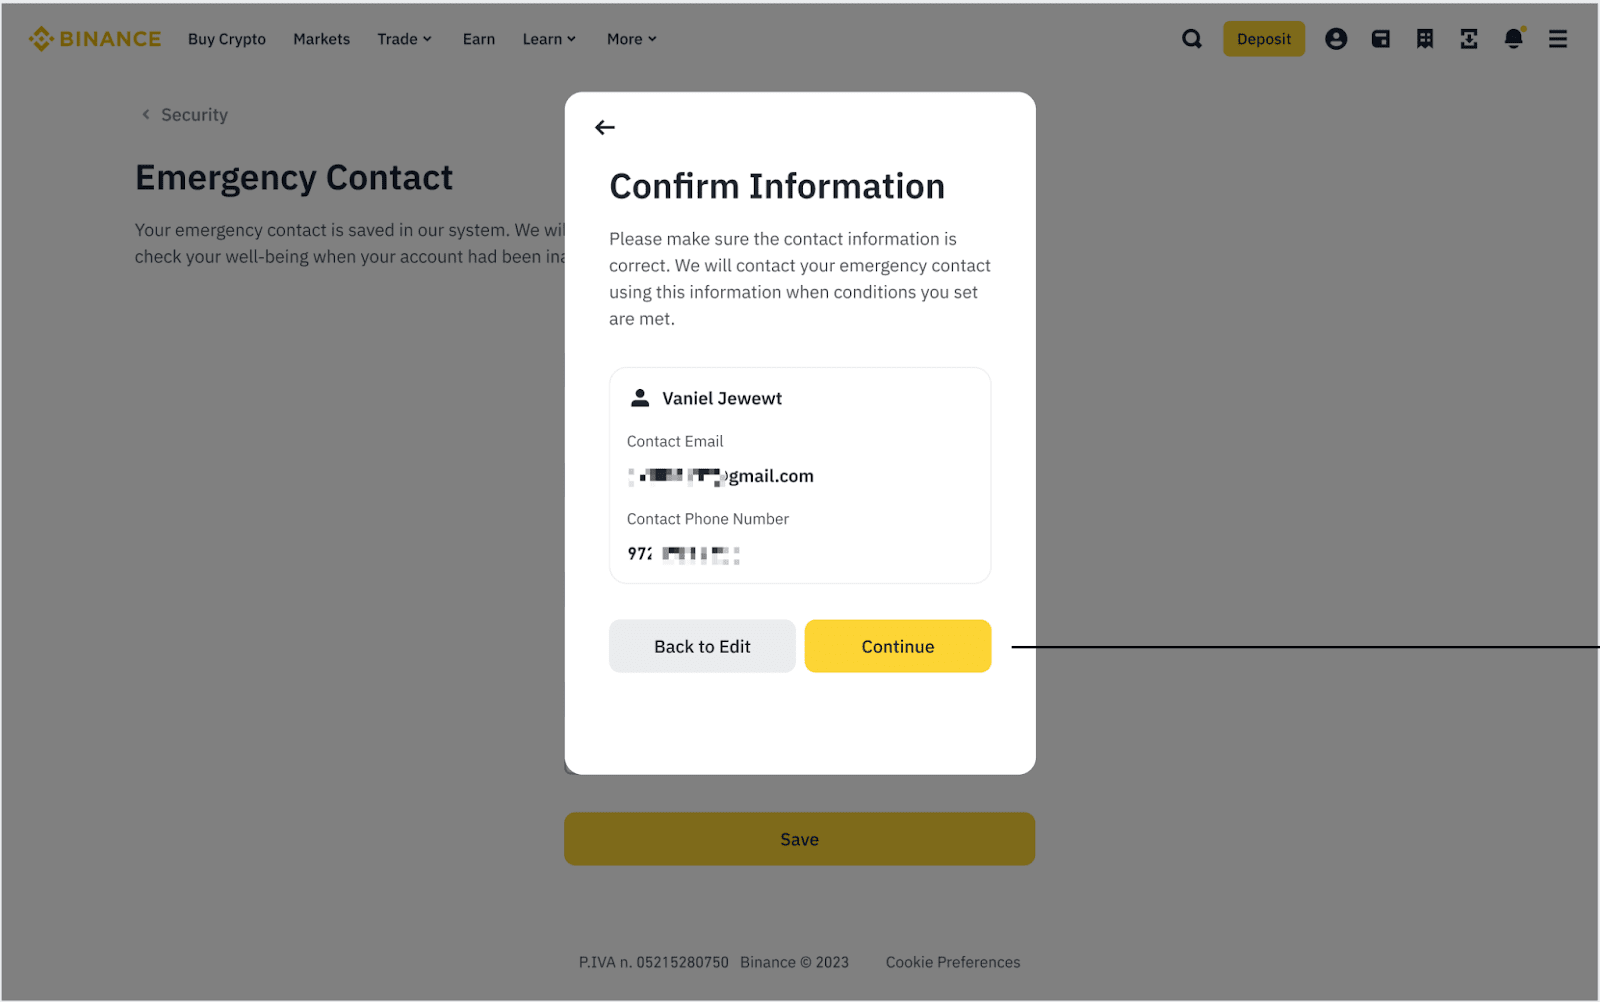
5. Double-check the emergency contact’s details and click [Continue] to save.
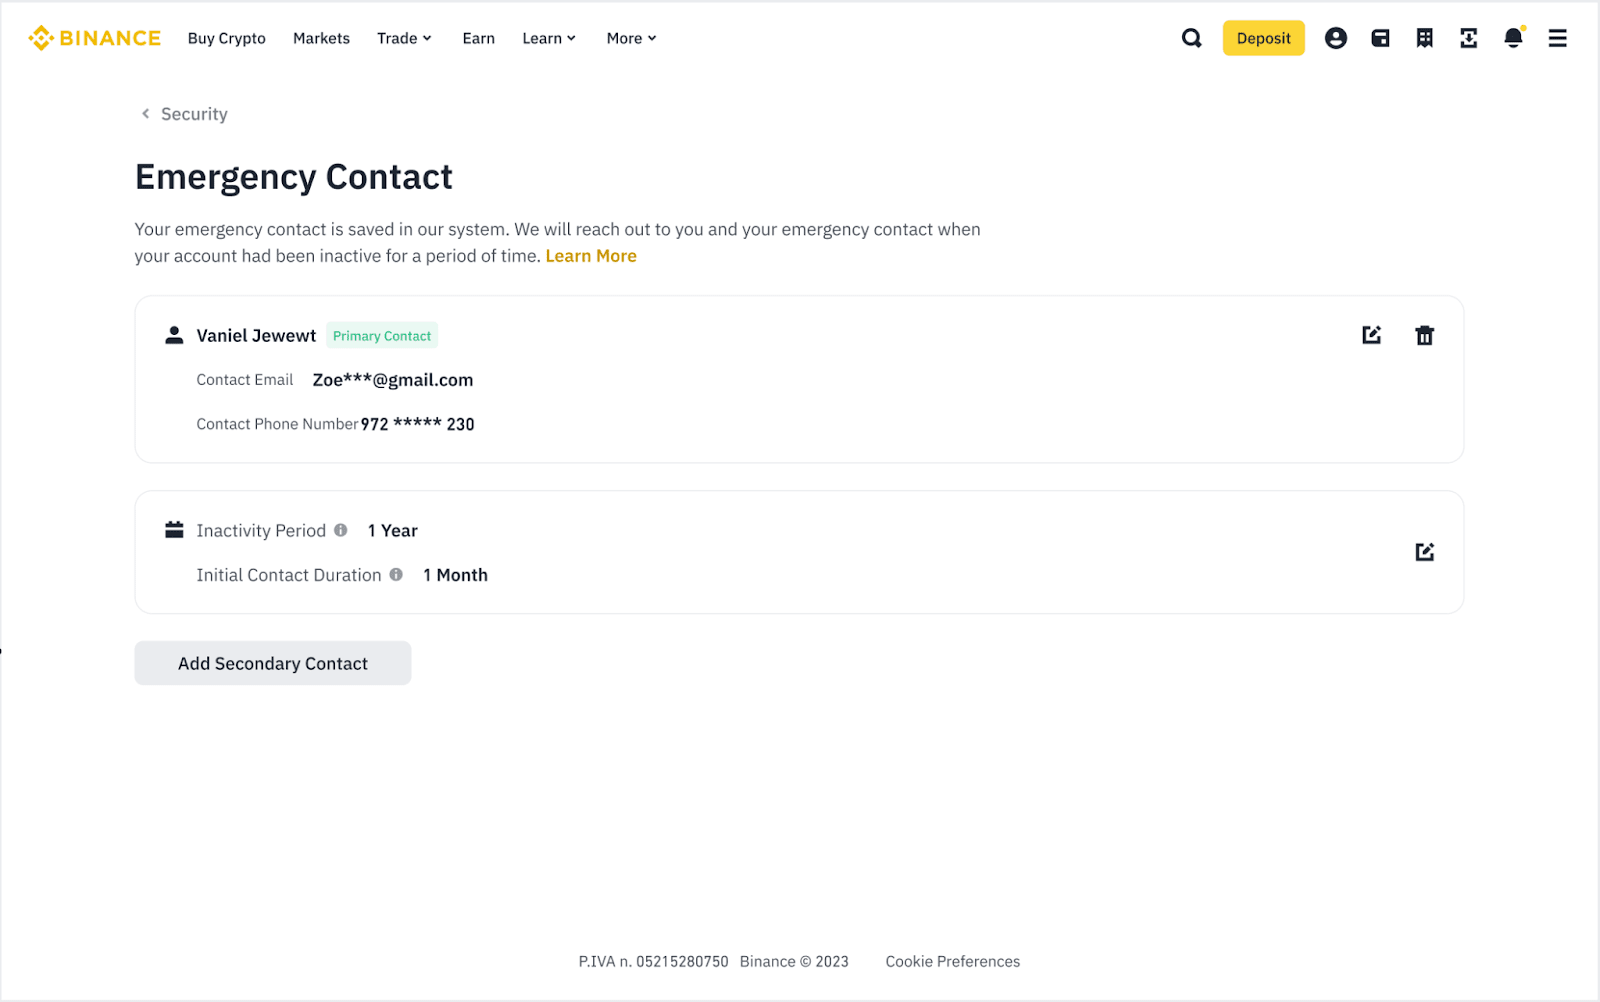
6. You can also choose to add a secondary contact by clicking the [Add Secondary Contact] button, which is optional.
How to manage (edit / delete) emergency contacts
Edit your emergency contacts’ information
Go to [Security] - [Emergency Contact] and click the [Edit] icon beside the name of the emergency contact you’d like to edit information for.
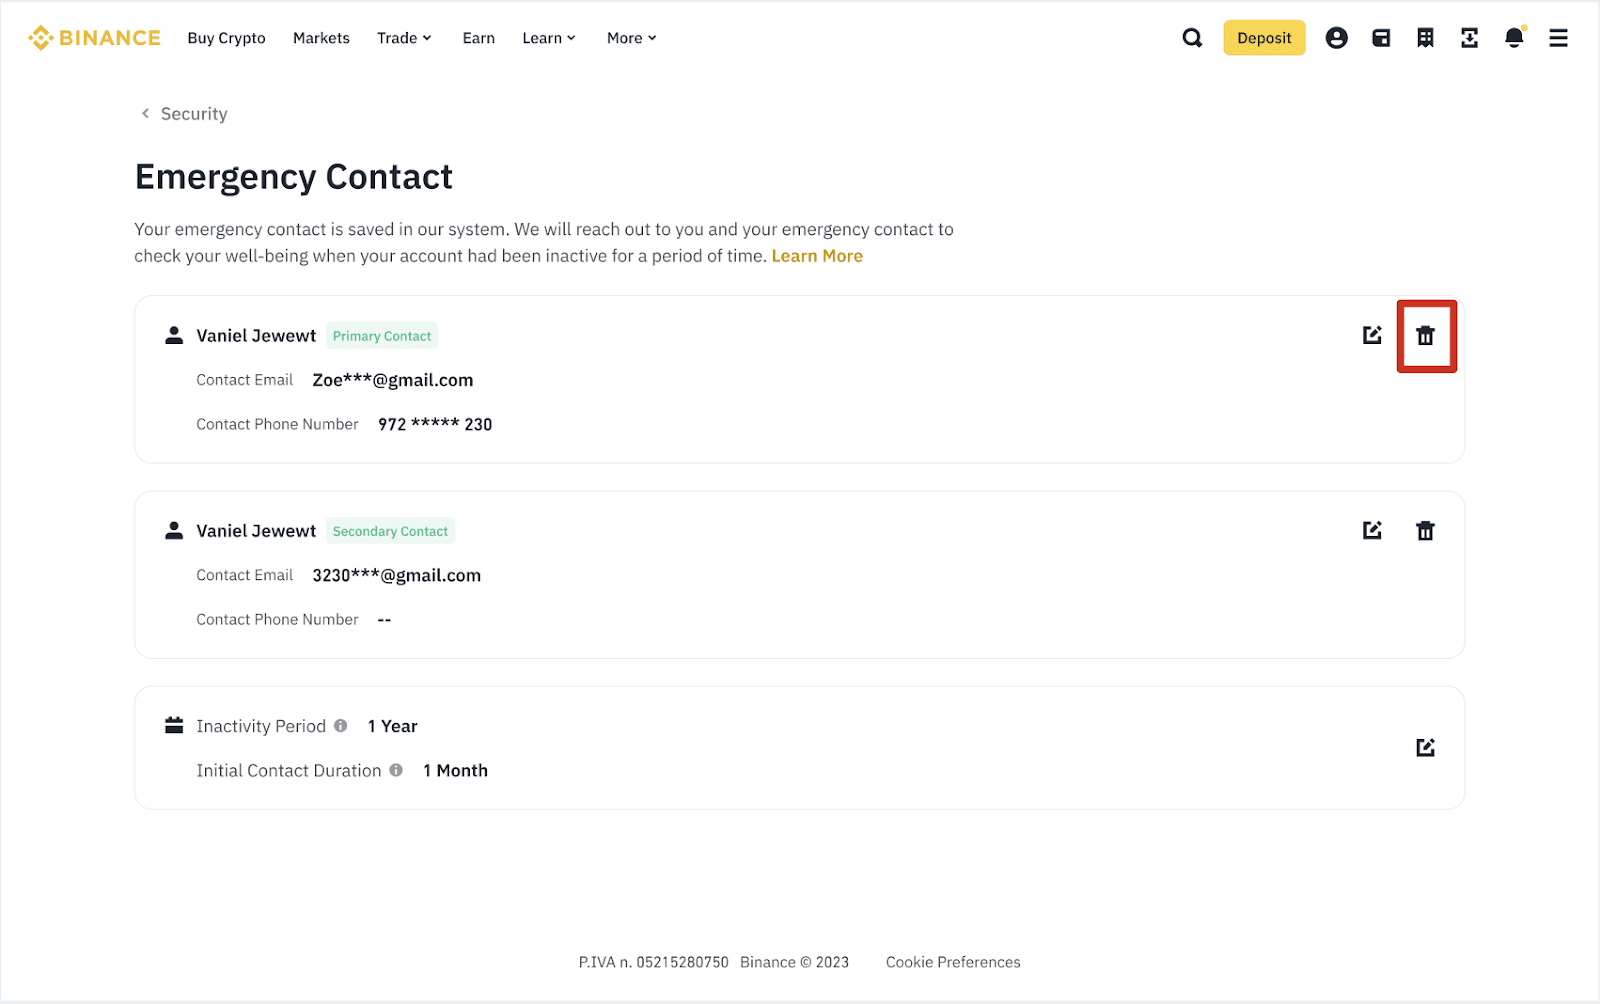
Delete an emergency contact
Go to [Security] - [Emergency Contact] and click the [Delete] icon beside the name of the emergency contact you’d like to delete.
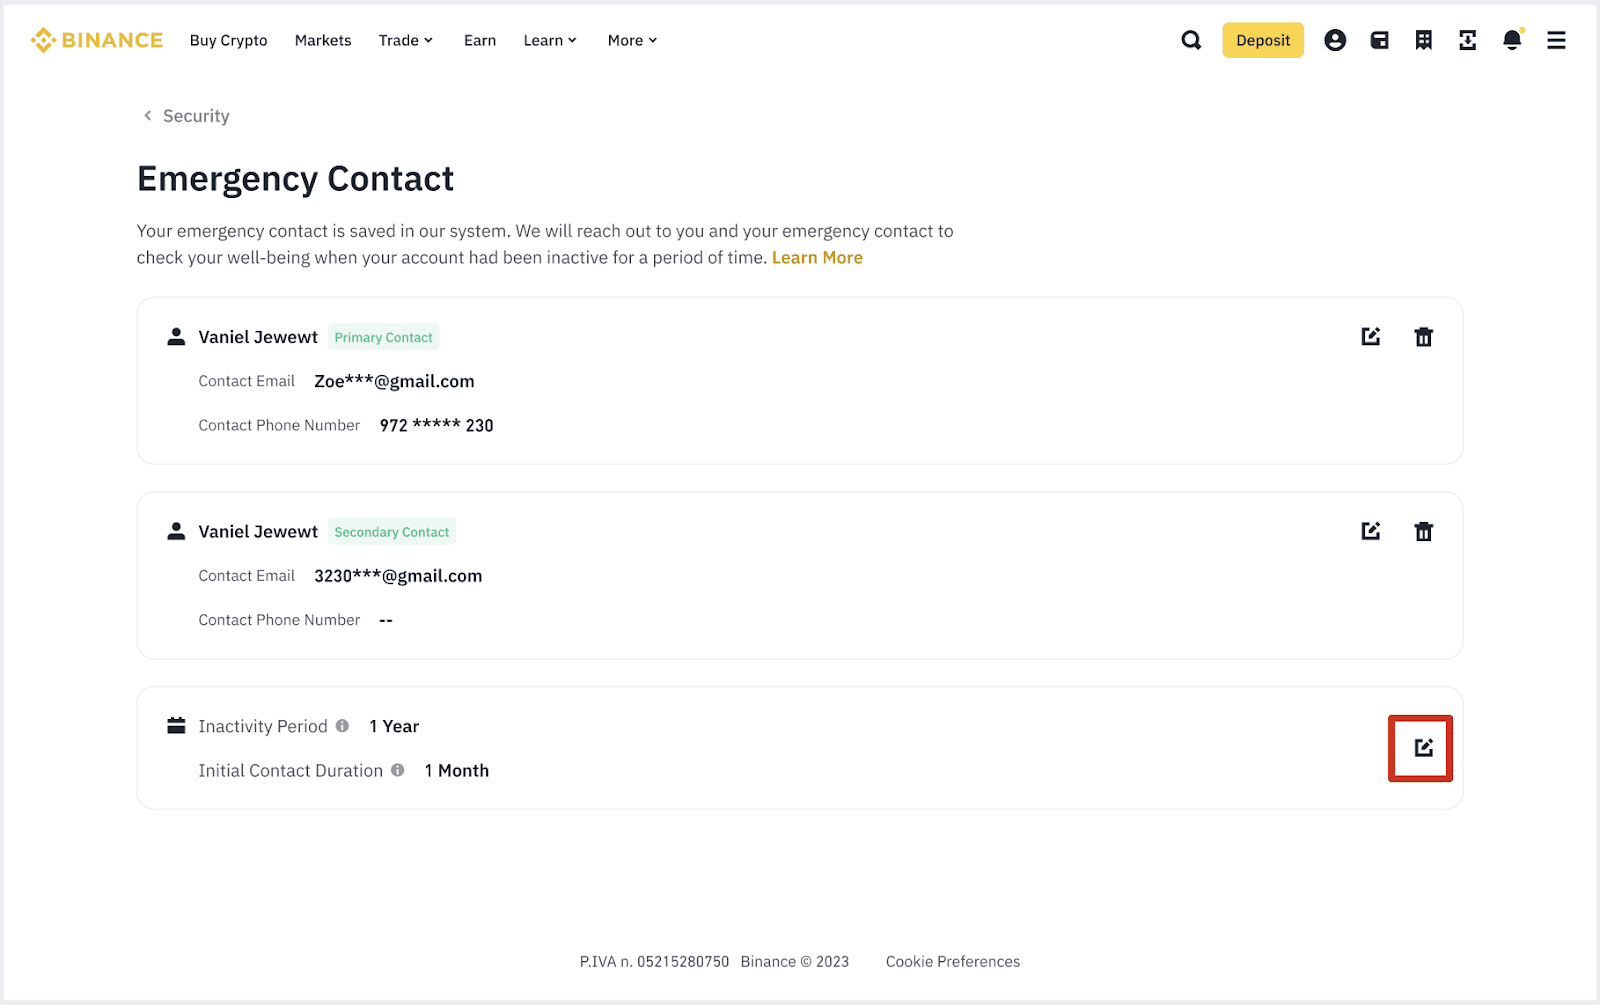
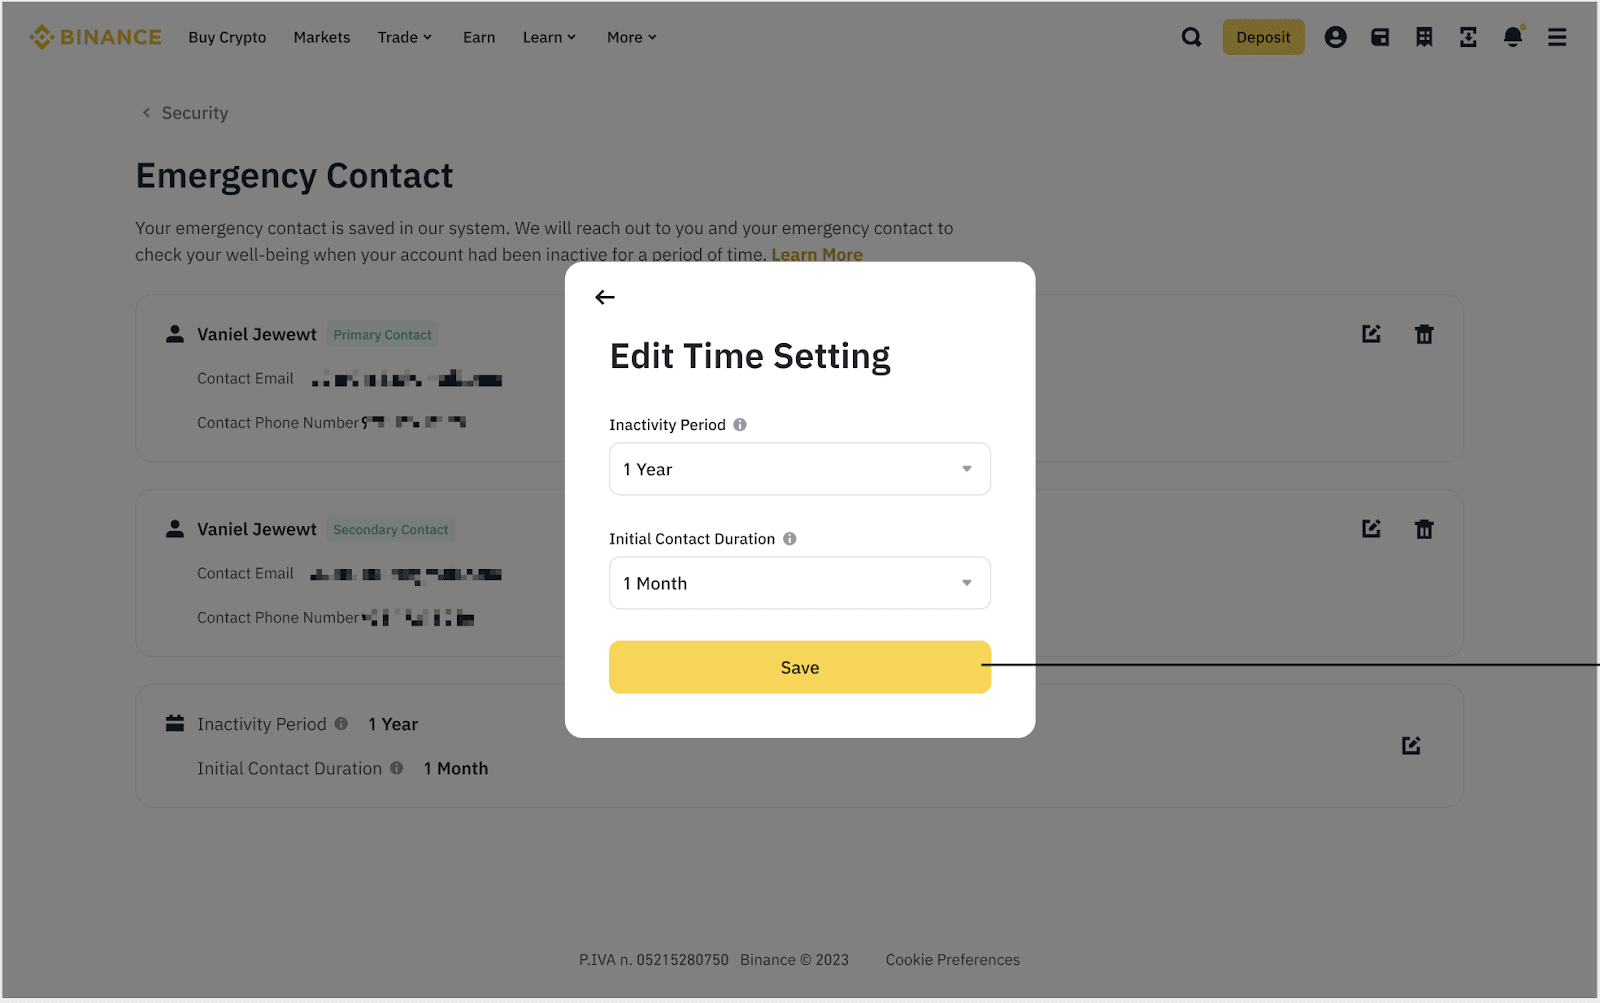
Set the ‘Inactivity Period’ and ‘Initial Contact Duration’
1. Go to the Emergency Contact page and click the [Edit] icon beside ‘Inactivity Period’.
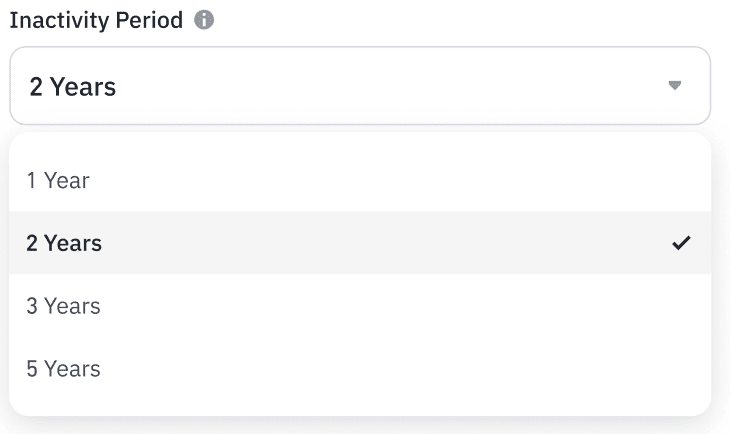
2. Select your preferences here for 'Inactivity Period' and 'Initial Contact Duration'.
Inactivity Period: After your account has been inactive for this chosen period of time, we will start reaching out to you and your emergency contacts. The default is set to 1 Year, with options of 2, 3, and 5 Years.
Initial Contact Duration: We will try to contact you for this chosen period of time, before reaching out to your emergency contacts. The default is set at 1 Month, with options of 2 and 3 Months.
3. Click [Save] to save your setting.
Communication to your emergency contacts
If your account’s inactivity period (based on the last login or session renewal) exceeds your chosen Inactivity Period, we will start contacting you. If you still have not logged into your account after the Initial Contact Duration, we will start contacting your emergency contacts (primary and secondary at the same time) via the contact methods provided.
Communication to your emergency contact will be done simultaneously via email and SMS. Messages are sent every 7 days from the first send.
Register to get rewards
Register Now - Get up to 100 USDT in trading fee rebate (for verified users)