Binance Square
BlackCat Analysis
10.2k Posts

BlackCat Analysis

Square Verified+
I'm BlackCat a crypto blogger sharing real insights from year s in the market.No hype,just experience to help you cut t hrough the noise.🧠 X: @BlackcatTrader7
High-Frequency Trader
1.8 Years
91 Following
32.3K+ Followers
64.4K+ Liked
Posts
PINNED
·
--
Bullish
The past month has been a strong one. A steady run of wins. The kind of month that reminds you exactly why you keep showing up. Most of the trades I shared publicly played out well, and I know many of you made money from them. That means a lot to me. For the ones who didn’t win, or even took a loss, it usually was not the setup. It was psychology. Weak conviction. Poor timing. No patience. No discipline. Most traders spend their time chasing strategies, indicators, and so-called secrets. Very few spend enough time mastering risk management. Fewer still build real discipline. That is the edge. That is always the edge. This game is not easy. It will test your emotions, your patience, and your ability to stay objective. But for those who take it seriously, it is a path worth walking. Thank you to everyone who has been following, trusting, and walking this journey with me. I am still here. And I will keep sharing the path. $BTC $ETH $XRP {future}(XRPUSDT) {future}(ETHUSDT) {future}(BTCUSDT)
The past month has been a strong one.

A steady run of wins. The kind of month that reminds you exactly why you keep showing up.

Most of the trades I shared publicly played out well, and I know many of you made money from them. That means a lot to me.

For the ones who didn’t win, or even took a loss, it usually was not the setup. It was psychology.

Weak conviction. Poor timing. No patience. No discipline.

Most traders spend their time chasing strategies, indicators, and so-called secrets.

Very few spend enough time mastering risk management.

Fewer still build real discipline.

That is the edge. That is always the edge.

This game is not easy. It will test your emotions, your patience, and your ability to stay objective.

But for those who take it seriously, it is a path worth walking.

Thank you to everyone who has been following, trusting, and walking this journey with me.

I am still here.

And I will keep sharing the path.

$BTC $ETH $XRP

PINNED
Verified
Article
You’re not losing trades. You’re just always late.Hey — read this carefully, because this might be the difference between catching the move… or missing it again. You’ve seen my setups hit. Not once. Not twice. Consistently. But here’s the harsh reality most of you are facing: You’re always late. By the time you see the post → entry is gone. By the time you react → price already moved. And sometimes… you enter at the worst possible moment and get wiped before the real move even starts. That’s not a strategy problem. That’s a timing problem. So I fixed it. I’ve opened a private Futures Chat Group on Binance Square — where everything is shared before the move happens, not after. 👉 Click to join the [Future Chat Group](https://app.binance.com/uni-qr/group-chat-landing?channeltoken=ijgfslipqtpqdkp-2o9dcg&type=1&entrysource=sharing_link) or scan the QR code. This is not another noisy free group. No spam. No distractions. No random signals. Only serious traders. Only actionable information. Inside, you get: – Real-time setups with precise Entry / SL / TP before they go public – Early positioning on narratives before they explode – My personal trades + position sizing – Direct access to ask, learn, and refine your execution This is where the advantage is. Not when everyone is talking about it… But when almost no one sees it yet. If you’re tired of chasing… If you’re tired of being late… If you actually want to be early for once — 👉 [Click to join now.](https://app.binance.com/uni-qr/group-chat-landing?channeltoken=ijgfslipqtpqdkp-2o9dcg&type=1&entrysource=sharing_link) Because the next move won’t wait for you.

You’re not losing trades. You’re just always late.

Hey — read this carefully, because this might be the difference between catching the move… or missing it again.
You’ve seen my setups hit.
Not once. Not twice. Consistently.
But here’s the harsh reality most of you are facing:
You’re always late.
By the time you see the post → entry is gone.
By the time you react → price already moved.
And sometimes… you enter at the worst possible moment and get wiped before the real move even starts.
That’s not a strategy problem.
That’s a timing problem.
So I fixed it.
I’ve opened a private Futures Chat Group on Binance Square — where everything is shared before the move happens, not after.
👉 Click to join the Future Chat Group or scan the QR code.
This is not another noisy free group.
No spam. No distractions. No random signals.
Only serious traders. Only actionable information.
Inside, you get:
– Real-time setups with precise Entry / SL / TP before they go public
– Early positioning on narratives before they explode
– My personal trades + position sizing
– Direct access to ask, learn, and refine your execution
This is where the advantage is.
Not when everyone is talking about it…
But when almost no one sees it yet.
If you’re tired of chasing…
If you’re tired of being late…
If you actually want to be early for once —
👉 Click to join now.
Because the next move won’t wait for you.
🎉 Happy Tuesday everyone! ❤️ A new week means new opportunities, new profits, and a new chance to change your future. To thank this amazing community for their unwavering support, every Tuesday I will be holding a Lucky Money Giveaway. 🎁 This isn't just about giving away rewards… It's about building a community where we learn together, grow together, and win together. Your follows, likes, comments, and support inspire me to continue sharing the best market insights every day. Start this week with positive energy, smart trading, and a mindset for success. 🍀 May this Monday be the start of your next big win. Good luck everyone! #LuckyMoney #CryptoGiveaway #Airdrop #ThankYou
🎉 Happy Tuesday everyone! ❤️

A new week means new opportunities, new profits, and a new chance to change your future.

To thank this amazing community for their unwavering support, every Tuesday I will be holding a Lucky Money Giveaway. 🎁

This isn't just about giving away rewards…

It's about building a community where we learn together, grow together, and win together.

Your follows, likes, comments, and support inspire me to continue sharing the best market insights every day.

Start this week with positive energy, smart trading, and a mindset for success.

🍀 May this Monday be the start of your next big win. Good luck everyone!

#LuckyMoney #CryptoGiveaway #Airdrop #ThankYou
·
--
Bearish
⚠️ $LAB | $AKE | $EPIC are running straight into heavy resistance. I wouldn’t be chasing these pumps. If buyers start losing momentum, this could become an attractive short opportunity. Sometimes the best trade isn’t buying the discount… It’s selling the overconfidence. 📉 {future}(EPICUSDT) {future}(AKEUSDT) {future}(LABUSDT)
⚠️ $LAB | $AKE | $EPIC are running straight into heavy resistance.

I wouldn’t be chasing these pumps.

If buyers start losing momentum, this could become an attractive short opportunity.

Sometimes the best trade isn’t buying the discount…

It’s selling the overconfidence. 📉
🐋 Whale Watch: $EVAA After an explosive rally, $EVAA is approaching a critical decision zone where both buyers and sellers are becoming increasingly active. 📍 Current Price: ~$1.94 🟢 Key Buy Zone: $1.75 – $1.80 🔴 Major Sell Zone: $1.90 – $2.12 🛡️ Updated Stop Loss: $1.21 The recent breakout confirms strong bullish momentum, but price is now trading directly beneath a heavy supply area where large sell orders are beginning to stack. While the broader trend remains bullish, chasing strength into resistance carries less favorable risk than waiting for a cleaner opportunity. A pullback toward the $1.75–$1.80 demand zone could provide a higher-quality entry if buyers continue defending the trend. On the other hand, a decisive break and acceptance above $2.12 would signal that bulls have absorbed overhead supply and could trigger another impulsive leg higher. Smart money doesn’t chase price—it waits for liquidity to come to them. Let the market reveal its next move before committing new capital. NFA. DYOR. 🚀 {future}(EVAAUSDT)
🐋 Whale Watch: $EVAA

After an explosive rally, $EVAA is approaching a critical decision zone where both buyers and sellers are becoming increasingly active.

📍 Current Price: ~$1.94

🟢 Key Buy Zone: $1.75 – $1.80
🔴 Major Sell Zone: $1.90 – $2.12

🛡️ Updated Stop Loss: $1.21

The recent breakout confirms strong bullish momentum, but price is now trading directly beneath a heavy supply area where large sell orders are beginning to stack. While the broader trend remains bullish, chasing strength into resistance carries less favorable risk than waiting for a cleaner opportunity.

A pullback toward the $1.75–$1.80 demand zone could provide a higher-quality entry if buyers continue defending the trend. On the other hand, a decisive break and acceptance above $2.12 would signal that bulls have absorbed overhead supply and could trigger another impulsive leg higher.

Smart money doesn’t chase price—it waits for liquidity to come to them. Let the market reveal its next move before committing new capital.

NFA. DYOR. 🚀
🍌 $BANANA is losing momentum near resistance, and I’m looking for sellers to extend the move lower. Trading Plan — Short $BANANA 📍 Entry: 3.98 – 4.08 🛑 SL: 4.35 🎯 TP1: 3.70 🎯 TP2: 3.45 🎯 TP3: 3.20 I’m taking this short because the recent recovery has pushed price back into a key resistance area where buying momentum appears to be fading. Rather than seeing a decisive breakout, the rally is beginning to stall, increasing the probability of another bearish rotation. The setup offers a strong asymmetric opportunity. Risk is tightly defined above the invalidation level, while several liquidity zones remain below the current market. If sellers continue defending this area, I expect price to work through each downside target as bearish momentum builds. I don’t short because the market is weak—I short because the reward becomes greatest when price rallies into resistance. My position is live here 👇 {future}(BANANAUSDT)
🍌 $BANANA is losing momentum near resistance, and I’m looking for sellers to extend the move lower.

Trading Plan — Short $BANANA

📍 Entry: 3.98 – 4.08
🛑 SL: 4.35

🎯 TP1: 3.70
🎯 TP2: 3.45
🎯 TP3: 3.20

I’m taking this short because the recent recovery has pushed price back into a key resistance area where buying momentum appears to be fading. Rather than seeing a decisive breakout, the rally is beginning to stall, increasing the probability of another bearish rotation.

The setup offers a strong asymmetric opportunity. Risk is tightly defined above the invalidation level, while several liquidity zones remain below the current market. If sellers continue defending this area, I expect price to work through each downside target as bearish momentum builds.

I don’t short because the market is weak—I short because the reward becomes greatest when price rallies into resistance. My position is live here 👇
⚔️ $DRAM is pushing into a high-risk area for buyers, and I’m positioning where the probabilities begin to favor the bears. Trading Plan — Short $DRAM 📍 Entry: 59.5 – 60.9 🛑 SL: 66.0 🎯 TP1: 57.2 🎯 TP2: 54.4 🎯 TP3: 51.0 The recent rally has carried price back into a major supply zone where previous bullish attempts were firmly rejected. Although the recovery has attracted fresh optimism, the higher-timeframe structure still suggests this move is a retracement rather than the beginning of a sustained uptrend. What I like most is the location. Risk is clearly defined above the invalidation level, while multiple liquidity pockets remain untouched below the current market. If sellers continue defending this resistance, I expect the next downside rotation to accelerate as late buyers begin unwinding their positions. The highest-probability trades aren’t found by predicting the next move—they’re found by waiting for price to return to your edge. My short setup is live here 👇 {future}(DRAMUSDT)
⚔️ $DRAM is pushing into a high-risk area for buyers, and I’m positioning where the probabilities begin to favor the bears.

Trading Plan — Short $DRAM

📍 Entry: 59.5 – 60.9
🛑 SL: 66.0

🎯 TP1: 57.2
🎯 TP2: 54.4
🎯 TP3: 51.0

The recent rally has carried price back into a major supply zone where previous bullish attempts were firmly rejected. Although the recovery has attracted fresh optimism, the higher-timeframe structure still suggests this move is a retracement rather than the beginning of a sustained uptrend.

What I like most is the location. Risk is clearly defined above the invalidation level, while multiple liquidity pockets remain untouched below the current market. If sellers continue defending this resistance, I expect the next downside rotation to accelerate as late buyers begin unwinding their positions.

The highest-probability trades aren’t found by predicting the next move—they’re found by waiting for price to return to your edge. My short setup is live here 👇
📉 $FIL has recovered into a key supply zone, and I’m looking for sellers to take control from here. Trading Plan — Short $FIL 📍 Entry: 0.773 – 0.793 🛑 SL: 0.850 🎯 TP1: 0.742 🎯 TP2: 0.706 🎯 TP3: 0.668 The recent rebound has carried price back into a well-defined resistance area where previous buying momentum stalled. While the short-term recovery has improved sentiment, the broader structure still favors a corrective move rather than a confirmed bullish reversal. This setup offers a favorable risk-to-reward profile. The stop is positioned above a clear invalidation level, while multiple liquidity pockets remain below the current market. If buyers fail to establish acceptance above this supply zone, I expect sellers to regain control and drive the next bearish rotation. The market rarely rewards chasing rallies. I prefer waiting for price to return to resistance, where the risk is controlled and the opportunity is greatest. My short setup is here 👇 {future}(FILUSDT)
📉 $FIL has recovered into a key supply zone, and I’m looking for sellers to take control from here.

Trading Plan — Short $FIL

📍 Entry: 0.773 – 0.793
🛑 SL: 0.850

🎯 TP1: 0.742
🎯 TP2: 0.706
🎯 TP3: 0.668

The recent rebound has carried price back into a well-defined resistance area where previous buying momentum stalled. While the short-term recovery has improved sentiment, the broader structure still favors a corrective move rather than a confirmed bullish reversal.

This setup offers a favorable risk-to-reward profile. The stop is positioned above a clear invalidation level, while multiple liquidity pockets remain below the current market. If buyers fail to establish acceptance above this supply zone, I expect sellers to regain control and drive the next bearish rotation.

The market rarely rewards chasing rallies. I prefer waiting for price to return to resistance, where the risk is controlled and the opportunity is greatest. My short setup is here 👇
⚔️ $UB has rallied back into a high-probability supply zone where I’m expecting sellers to defend once again. Trading Plan — Short $UB 📍 Entry: 0.0960 – 0.0988 🛑 SL: 0.1060 🎯 TP1: 0.0925 🎯 TP2: 0.0881 🎯 TP3: 0.0832 The latest recovery has carried price into a resistance area that previously rejected bullish momentum. Although the bounce has improved short-term sentiment, the higher-timeframe structure still favors a corrective rally rather than the beginning of a sustained uptrend. What makes this setup attractive is the asymmetric risk profile. The invalidation level is clearly defined above resistance, while multiple liquidity pools remain below the current market. If buyers fail to establish acceptance beyond this supply zone, I expect sellers to regain control and drive the next bearish leg lower. The highest-probability shorts don’t come from chasing red candles—they come from waiting for price to rally into your level. My short setup is here 👇 {future}(UBUSDT)
⚔️ $UB has rallied back into a high-probability supply zone where I’m expecting sellers to defend once again.

Trading Plan — Short $UB

📍 Entry: 0.0960 – 0.0988
🛑 SL: 0.1060

🎯 TP1: 0.0925
🎯 TP2: 0.0881
🎯 TP3: 0.0832

The latest recovery has carried price into a resistance area that previously rejected bullish momentum. Although the bounce has improved short-term sentiment, the higher-timeframe structure still favors a corrective rally rather than the beginning of a sustained uptrend.

What makes this setup attractive is the asymmetric risk profile. The invalidation level is clearly defined above resistance, while multiple liquidity pools remain below the current market. If buyers fail to establish acceptance beyond this supply zone, I expect sellers to regain control and drive the next bearish leg lower.

The highest-probability shorts don’t come from chasing red candles—they come from waiting for price to rally into your level. My short setup is here 👇
🎯 $ONDO has rallied back into a premium supply zone where I’m looking for sellers to reassert control. Trading Plan — Short $ONDO 📍 Entry: 0.324 – 0.334 🛑 SL: 0.358 🎯 TP1: 0.312 🎯 TP2: 0.297 🎯 TP3: 0.280 The latest recovery has carried price directly into a resistance area that previously capped bullish advances. While the bounce has improved short-term sentiment, the higher-timeframe structure still points to a corrective rally rather than the beginning of a sustained uptrend. What stands out about this setup is the risk-to-reward profile. The stop is positioned above a clearly defined invalidation level, while multiple liquidity pools remain below the current market. If buyers fail to establish acceptance beyond this supply zone, I expect sellers to regain control and drive the next bearish expansion. Professional trades aren’t built on hope—they’re built on location. I wait for price to reach my level, then let the probabilities do the work. My short setup is here 👇 {future}(ONDOUSDT)
🎯 $ONDO has rallied back into a premium supply zone where I’m looking for sellers to reassert control.

Trading Plan — Short $ONDO

📍 Entry: 0.324 – 0.334
🛑 SL: 0.358

🎯 TP1: 0.312
🎯 TP2: 0.297
🎯 TP3: 0.280

The latest recovery has carried price directly into a resistance area that previously capped bullish advances. While the bounce has improved short-term sentiment, the higher-timeframe structure still points to a corrective rally rather than the beginning of a sustained uptrend.

What stands out about this setup is the risk-to-reward profile. The stop is positioned above a clearly defined invalidation level, while multiple liquidity pools remain below the current market. If buyers fail to establish acceptance beyond this supply zone, I expect sellers to regain control and drive the next bearish expansion.

Professional trades aren’t built on hope—they’re built on location. I wait for price to reach my level, then let the probabilities do the work. My short setup is here 👇
💎 $ZK is holding a key demand zone, and I’m looking for buyers to fuel the next breakout. Trading Plan — Long $ZK 📍 Entry: 0.01095 – 0.01110 🛑 SL: 0.01070 🎯 TP1: 0.01140 🎯 TP2: 0.01170 🎯 TP3: 0.01200 Price is consolidating just above an important support area after a healthy pullback, which is exactly the type of structure I like to see in an ongoing uptrend. Rather than giving back the recent gains, buyers continue to defend the current range, suggesting demand remains active. The setup provides a clean asymmetric opportunity. Risk is tightly controlled beneath the support zone, while several liquidity targets sit overhead. If buyers continue absorbing supply at current levels, I expect the next bullish expansion to challenge each upside objective. The best longs aren’t chased—they’re built while everyone else is waiting for confirmation. My position is live here 👇 {future}(ZKUSDT)
💎 $ZK is holding a key demand zone, and I’m looking for buyers to fuel the next breakout.

Trading Plan — Long $ZK

📍 Entry: 0.01095 – 0.01110
🛑 SL: 0.01070

🎯 TP1: 0.01140
🎯 TP2: 0.01170
🎯 TP3: 0.01200

Price is consolidating just above an important support area after a healthy pullback, which is exactly the type of structure I like to see in an ongoing uptrend. Rather than giving back the recent gains, buyers continue to defend the current range, suggesting demand remains active.

The setup provides a clean asymmetric opportunity. Risk is tightly controlled beneath the support zone, while several liquidity targets sit overhead. If buyers continue absorbing supply at current levels, I expect the next bullish expansion to challenge each upside objective.

The best longs aren’t chased—they’re built while everyone else is waiting for confirmation. My position is live here 👇
🚀 $RE has delivered a clean breakout, and I’m positioning with the trend while buyers remain in control. Trading Plan — Long $RE 📍 Entry: 0.7080 – 0.7150 🛑 SL: 0.6850 🎯 TP1: 0.7350 🎯 TP2: 0.7600 🎯 TP3: 0.7900 The breakout wasn’t just a quick spike—it came with strong bullish momentum, suggesting buyers have successfully reclaimed control of the market. Instead of rejecting higher prices, the current structure is holding above the breakout zone, increasing the probability of another impulsive leg higher. This setup offers a well-defined risk profile. The stop sits beneath the newly established support, while multiple liquidity targets remain overhead. As long as price continues to hold above the breakout area, I favor trend continuation toward the upside objectives. The biggest trends begin when most traders are still waiting for confirmation. I’m already positioned. My long is live here 👇 {future}(REUSDT)
🚀 $RE has delivered a clean breakout, and I’m positioning with the trend while buyers remain in control.

Trading Plan — Long $RE

📍 Entry: 0.7080 – 0.7150
🛑 SL: 0.6850

🎯 TP1: 0.7350
🎯 TP2: 0.7600
🎯 TP3: 0.7900

The breakout wasn’t just a quick spike—it came with strong bullish momentum, suggesting buyers have successfully reclaimed control of the market. Instead of rejecting higher prices, the current structure is holding above the breakout zone, increasing the probability of another impulsive leg higher.

This setup offers a well-defined risk profile. The stop sits beneath the newly established support, while multiple liquidity targets remain overhead. As long as price continues to hold above the breakout area, I favor trend continuation toward the upside objectives.

The biggest trends begin when most traders are still waiting for confirmation. I’m already positioned. My long is live here 👇
⚔️ $CHZ has rallied back into a key supply zone, and I’m looking for sellers to defend this area once again. Trading Plan — Short $CHZ 📍 Entry: 0.0175 – 0.0181 🛑 SL: 0.0193 🎯 TP1: 0.0168 🎯 TP2: 0.0160 🎯 TP3: 0.0151 The latest recovery has brought price back into a resistance area that previously attracted heavy selling pressure. While the bounce has improved short-term momentum, the higher-timeframe structure still favors a corrective rally rather than a confirmed bullish reversal. This setup offers a clean asymmetric opportunity. The stop is positioned just above the invalidation level, limiting downside risk, while multiple liquidity pockets remain below the current market. If buyers fail to reclaim this supply zone with conviction, I expect sellers to regain control and extend the bearish rotation. The best trades aren’t about chasing momentum—they’re about waiting for momentum to run into resistance. My short setup is here 👇 {future}(CHZUSDT)
⚔️ $CHZ has rallied back into a key supply zone, and I’m looking for sellers to defend this area once again.

Trading Plan — Short $CHZ

📍 Entry: 0.0175 – 0.0181
🛑 SL: 0.0193

🎯 TP1: 0.0168
🎯 TP2: 0.0160
🎯 TP3: 0.0151

The latest recovery has brought price back into a resistance area that previously attracted heavy selling pressure. While the bounce has improved short-term momentum, the higher-timeframe structure still favors a corrective rally rather than a confirmed bullish reversal.

This setup offers a clean asymmetric opportunity. The stop is positioned just above the invalidation level, limiting downside risk, while multiple liquidity pockets remain below the current market. If buyers fail to reclaim this supply zone with conviction, I expect sellers to regain control and extend the bearish rotation.

The best trades aren’t about chasing momentum—they’re about waiting for momentum to run into resistance. My short setup is here 👇
🎯 $ARB has climbed back into a resistance zone where I’m looking for sellers to take control once again. Trading Plan — Short $ARB 📍 Entry: 0.0780 – 0.0802 🛑 SL: 0.0860 🎯 TP1: 0.0750 🎯 TP2: 0.0713 🎯 TP3: 0.0672 The latest recovery has carried price directly into a well-established supply area that previously rejected bullish advances. Although the bounce has improved short-term sentiment, the higher-timeframe structure still suggests this move is corrective rather than the beginning of a sustained trend reversal. What gives this setup an edge is its clear risk-to-reward profile. The stop is positioned above a well-defined invalidation level, while multiple liquidity pools remain below the current market. If buyers fail to secure acceptance beyond this resistance, I expect sellers to regain control and drive the next bearish expansion. Patience creates the best entries. I don’t chase weakness—I wait for strength to run into resistance. My short setup is here 👇 {future}(ARBUSDT)
🎯 $ARB has climbed back into a resistance zone where I’m looking for sellers to take control once again.

Trading Plan — Short $ARB

📍 Entry: 0.0780 – 0.0802
🛑 SL: 0.0860

🎯 TP1: 0.0750
🎯 TP2: 0.0713
🎯 TP3: 0.0672

The latest recovery has carried price directly into a well-established supply area that previously rejected bullish advances. Although the bounce has improved short-term sentiment, the higher-timeframe structure still suggests this move is corrective rather than the beginning of a sustained trend reversal.

What gives this setup an edge is its clear risk-to-reward profile. The stop is positioned above a well-defined invalidation level, while multiple liquidity pools remain below the current market. If buyers fail to secure acceptance beyond this resistance, I expect sellers to regain control and drive the next bearish expansion.

Patience creates the best entries. I don’t chase weakness—I wait for strength to run into resistance. My short setup is here 👇
🎯 $TLM has rallied back into a high-probability supply zone where I’m looking for sellers to regain control. Trading Plan — Short $TLM 📍 Entry: 0.00335 – 0.00345 🛑 SL: 0.00372 🎯 TP1: 0.00322 🎯 TP2: 0.00306 🎯 TP3: 0.00289 The recent recovery has pushed price back into a resistance area that previously capped bullish momentum. While the bounce has improved short-term sentiment, the broader market structure still favors a corrective rally rather than a confirmed trend reversal. This setup offers the kind of asymmetric opportunity I look for. Risk is clearly defined above the invalidation level, while several liquidity pools remain below the current range. If buyers fail to establish acceptance above this supply zone, I expect sellers to step back in and drive the next bearish rotation. The highest-probability shorts aren’t found after the breakdown—they’re found when price rallies into resistance. My short setup is here 👇 {future}(TLMUSDT)
🎯 $TLM has rallied back into a high-probability supply zone where I’m looking for sellers to regain control.

Trading Plan — Short $TLM

📍 Entry: 0.00335 – 0.00345
🛑 SL: 0.00372

🎯 TP1: 0.00322
🎯 TP2: 0.00306
🎯 TP3: 0.00289

The recent recovery has pushed price back into a resistance area that previously capped bullish momentum. While the bounce has improved short-term sentiment, the broader market structure still favors a corrective rally rather than a confirmed trend reversal.

This setup offers the kind of asymmetric opportunity I look for. Risk is clearly defined above the invalidation level, while several liquidity pools remain below the current range. If buyers fail to establish acceptance above this supply zone, I expect sellers to step back in and drive the next bearish rotation.

The highest-probability shorts aren’t found after the breakdown—they’re found when price rallies into resistance. My short setup is here 👇
🚨 Dear Binancians ❤️ STOP… STOP… STOP scrolling! ❗❗ Give me just 5 minutes because I want to share my latest $XRP outlook. I’ve said it before, and I’ll say it again—never underestimate XRP. Right now, price is testing one of the most important support zones on the chart. These are the areas where strong trends often begin while the majority of traders are still expecting lower prices. Yes, a final drop toward $0.50 is still possible if this support fails. If that happens, it could mark the final capitulation before the next major recovery. But that breakdown hasn’t happened yet. As long as buyers continue defending this level, I believe $XRP has the potential to recover toward the $2.00–$3.00 range over time. The next few weekly candles could determine the direction of the next major move. I’ll continue sharing every important update as the market unfolds. Now I want to hear your opinion… Will $XRP make one final dip to $0.50 before the next rally… Or has the bottom already been formed? 👇 {future}(XRPUSDT)
🚨 Dear Binancians ❤️ STOP… STOP… STOP scrolling! ❗❗

Give me just 5 minutes because I want to share my latest $XRP outlook.

I’ve said it before, and I’ll say it again—never underestimate XRP.

Right now, price is testing one of the most important support zones on the chart. These are the areas where strong trends often begin while the majority of traders are still expecting lower prices.

Yes, a final drop toward $0.50 is still possible if this support fails. If that happens, it could mark the final capitulation before the next major recovery.

But that breakdown hasn’t happened yet.

As long as buyers continue defending this level, I believe $XRP has the potential to recover toward the $2.00–$3.00 range over time. The next few weekly candles could determine the direction of the next major move.

I’ll continue sharing every important update as the market unfolds.

Now I want to hear your opinion…

Will $XRP make one final dip to $0.50 before the next rally…

Or has the bottom already been formed? 👇
🔻 $LAB continues to respect the bearish trend, and I’m staying with the downside until the structure changes. Trading Plan — Short $LAB 📍 Entry: 12.00 – 12.20 🛑 SL: 12.90 🎯 TP1: 11.30 🎯 TP2: 10.50 🎯 TP3: 9.60 I’m opening this short because the broader trend remains firmly bearish, with every recovery failing to produce a meaningful shift in market structure. Instead of seeing buyers reclaim key resistance, rallies continue to attract fresh selling pressure. What makes this setup attractive is its asymmetric risk profile. The stop is positioned above a clear invalidation level, while multiple liquidity pockets remain below the current market. As long as price stays beneath resistance, I expect sellers to maintain control and extend the downtrend toward the next support zones. I don’t trade against the trend—I wait for the trend to offer a high-probability entry. My short is live here 👇 {future}(LABUSDT)
🔻 $LAB continues to respect the bearish trend, and I’m staying with the downside until the structure changes.

Trading Plan — Short $LAB

📍 Entry: 12.00 – 12.20
🛑 SL: 12.90

🎯 TP1: 11.30
🎯 TP2: 10.50
🎯 TP3: 9.60

I’m opening this short because the broader trend remains firmly bearish, with every recovery failing to produce a meaningful shift in market structure. Instead of seeing buyers reclaim key resistance, rallies continue to attract fresh selling pressure.

What makes this setup attractive is its asymmetric risk profile. The stop is positioned above a clear invalidation level, while multiple liquidity pockets remain below the current market. As long as price stays beneath resistance, I expect sellers to maintain control and extend the downtrend toward the next support zones.

I don’t trade against the trend—I wait for the trend to offer a high-probability entry. My short is live here 👇
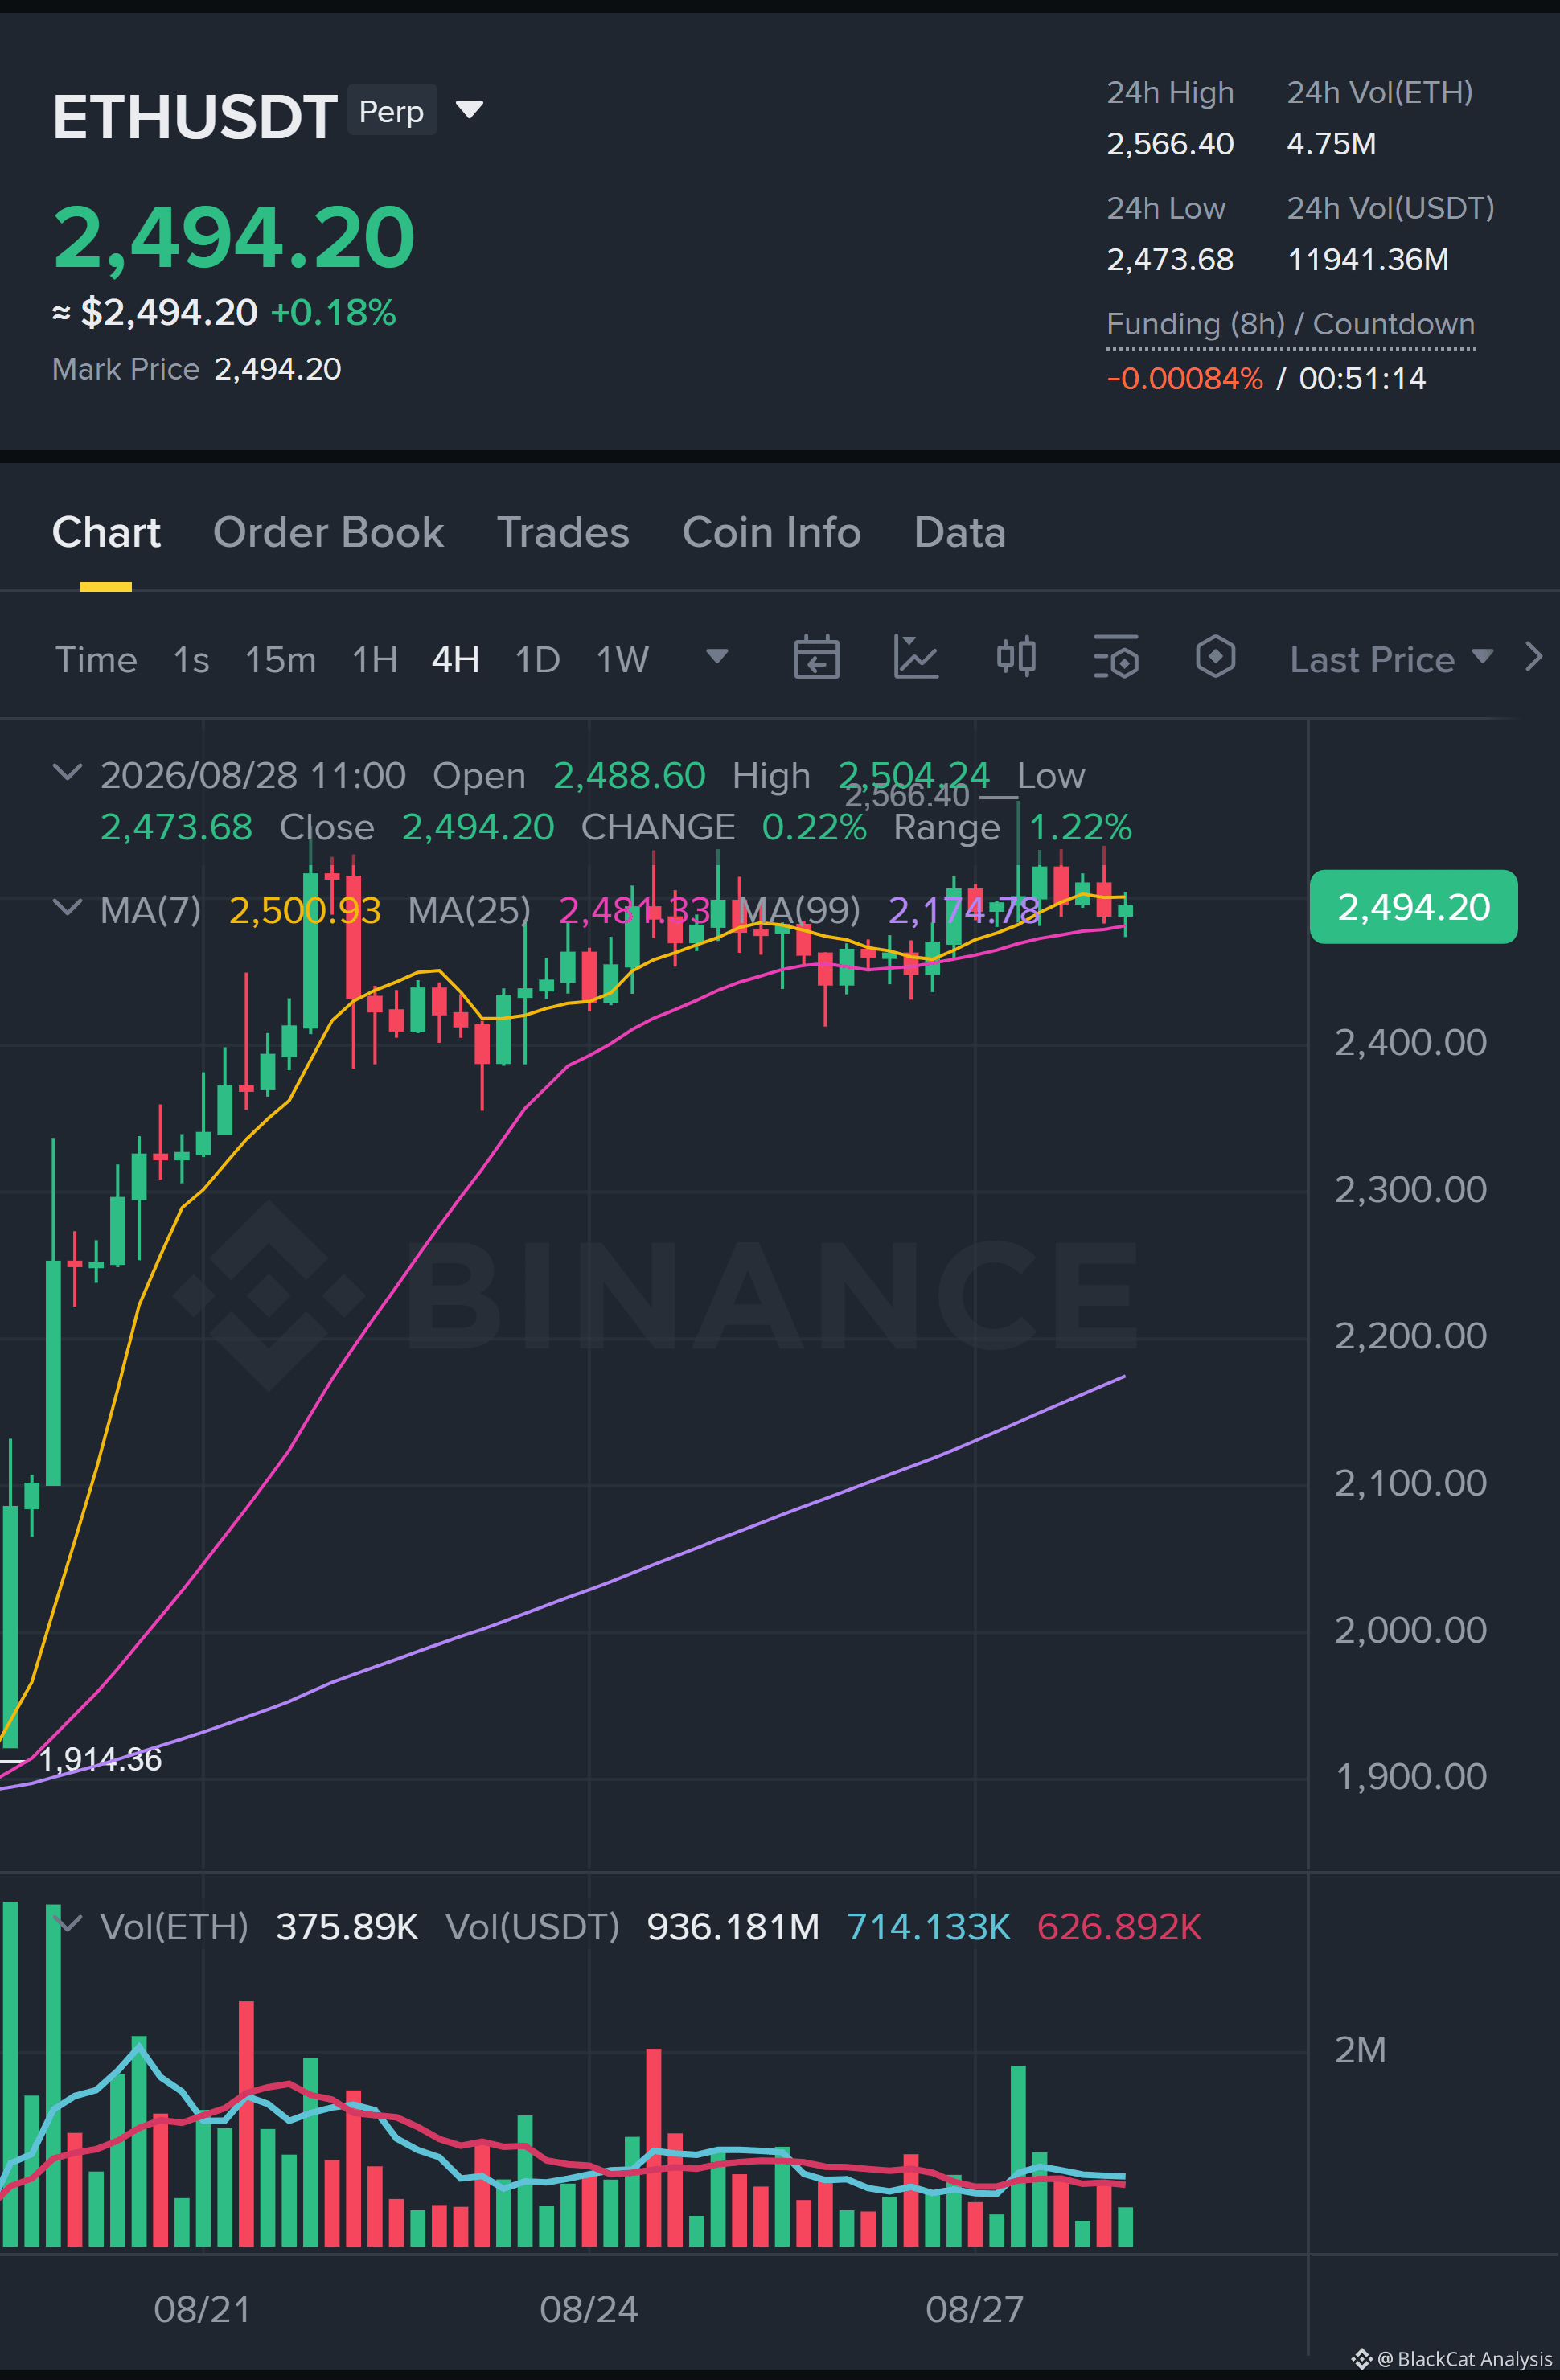
🚨 Dear Binancians ❤️ STOP… STOP… STOP scrolling! ❗❗ Give me just 5 minutes because I want to share my latest $ETH outlook. One mistake I see over and over is traders rushing to short simply because the market feels weak. Don’t underestimate $ETH. Yes, there’s still a possibility that Ethereum revisits the $1,000–$1,200 zone if the current support finally breaks. If that happens, I believe it could mark the final capitulation before the next major recovery. But that hasn’t happened yet. As long as buyers continue defending the current support, I still see a path for $ETH to recover toward the $2,200–$2,500 region before any larger trend unfolds. I’m staying patient and will continue sharing every important update as the market develops. Now I want to hear your opinion… Will $ETH make one last trip to $1,000–$1,200 before the next major bull run… Or has the bottom already been printed? 👇 {future}(ETHUSDT)
🚨 Dear Binancians ❤️ STOP… STOP… STOP scrolling! ❗❗

Give me just 5 minutes because I want to share my latest $ETH outlook.

One mistake I see over and over is traders rushing to short simply because the market feels weak.

Don’t underestimate $ETH .

Yes, there’s still a possibility that Ethereum revisits the $1,000–$1,200 zone if the current support finally breaks. If that happens, I believe it could mark the final capitulation before the next major recovery.

But that hasn’t happened yet.

As long as buyers continue defending the current support, I still see a path for $ETH to recover toward the $2,200–$2,500 region before any larger trend unfolds.

I’m staying patient and will continue sharing every important update as the market develops.

Now I want to hear your opinion…

Will $ETH make one last trip to $1,000–$1,200 before the next major bull run…

Or has the bottom already been printed? 👇
📉 $BLUR is showing signs of exhaustion, and fading momentum could open the door for a deeper pullback. Trading Plan — Short $BLUR 📍 Entry: 0.0200 – 0.0203 🛑 SL: 0.0212 🎯 TP1: 0.0192 🎯 TP2: 0.0183 🎯 TP3: 0.0172 The recent rally has begun to lose strength, with price struggling to sustain higher levels. Instead of building on the recovery, momentum is fading near resistance, suggesting buyers are becoming less aggressive while sellers gradually regain control. What I like about this setup is the clean structure. Risk is tightly capped above the invalidation level, while multiple liquidity zones remain below the current price. If bearish pressure continues to build, I expect price to rotate lower toward the downside targets. Momentum fades before price falls. I’m positioning while the market is still giving me a favorable risk-to-reward. My short is live here 👇 {future}(BLURUSDT)
📉 $BLUR is showing signs of exhaustion, and fading momentum could open the door for a deeper pullback.

Trading Plan — Short $BLUR

📍 Entry: 0.0200 – 0.0203
🛑 SL: 0.0212

🎯 TP1: 0.0192
🎯 TP2: 0.0183
🎯 TP3: 0.0172

The recent rally has begun to lose strength, with price struggling to sustain higher levels. Instead of building on the recovery, momentum is fading near resistance, suggesting buyers are becoming less aggressive while sellers gradually regain control.

What I like about this setup is the clean structure. Risk is tightly capped above the invalidation level, while multiple liquidity zones remain below the current price. If bearish pressure continues to build, I expect price to rotate lower toward the downside targets.

Momentum fades before price falls. I’m positioning while the market is still giving me a favorable risk-to-reward. My short is live here 👇
Log in to explore more content
Join global crypto users on Binance Square
⚡️ Get latest and useful information about crypto.
💬 Trusted by the world’s largest crypto exchange.
👍 Discover real insights from verified creators.
Email / Phone number
Sitemap
Cookie Preferences
Platform T&Cs