
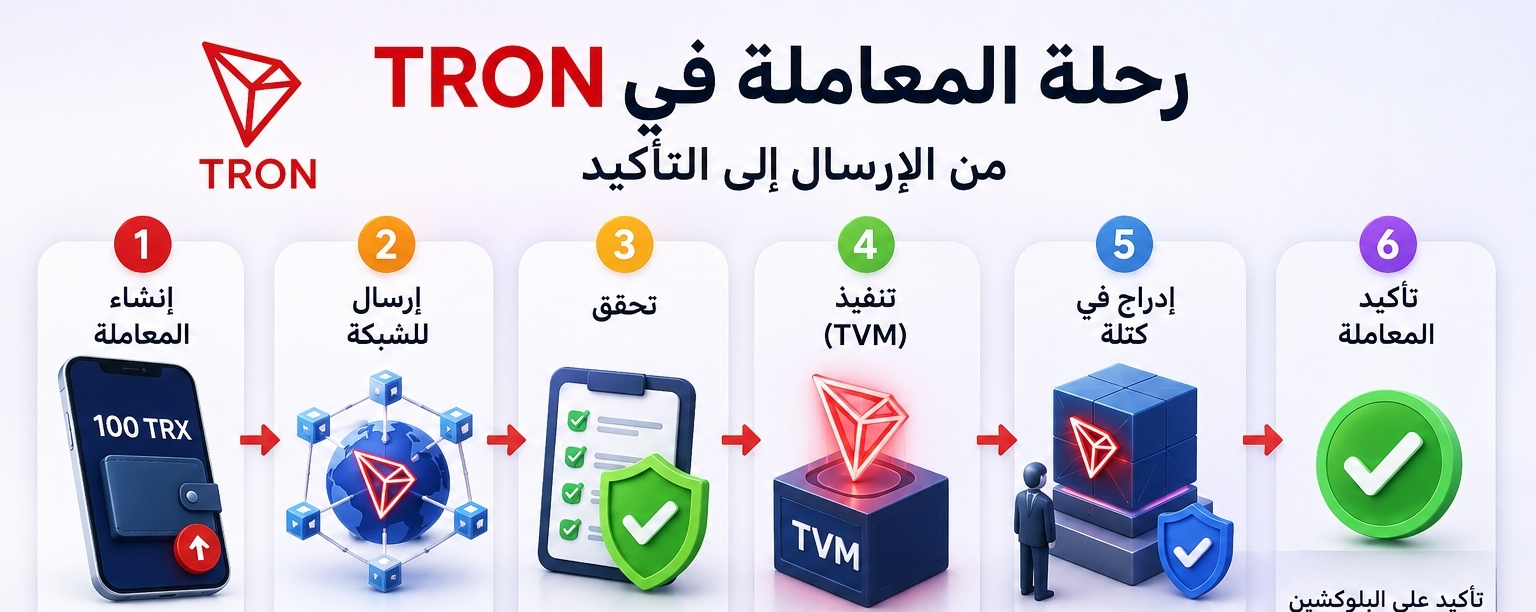
The journey of a transaction on the TRON network: what happens after you press the "Send" button
Sending digital assets on the TRON network may seem simple; all the user needs to do is enter the recipient’s address and press the "Send" button.
But in reality, the transaction goes through several stages within the network before it is permanently recorded on the blockchain.
So what happens from the moment you press the send button until the transaction appears on TRONSCAN?
---
Step one: Create the transaction
When you press the Send button, the wallet creates a transaction containing the core data, such as:
- Sender address.
- Recipient address.
- Transaction value.
- Type of operation.
- Additional data when needed.
At this stage, the transaction is signed using the private key stored in the wallet.
It is important to note that the private key never leaves the wallet; instead, it is used locally to create a digital signature that proves ownership of the account and the validity of the transaction.
---
Step two: Broadcast the transaction to the network
After creating the digital signature, the transaction is sent to one of the TRON network’s contracts.
These contracts then begin broadcasting the transaction to the rest of the connected network nodes until it becomes widely known.
Broadcasting the transaction does not mean it is already part of the blockchain; it means it is waiting to be verified and included in a new block.
---
Step three: Verify the transaction’s validity
Before accepting the transaction, nodes perform several validation checks, the most important of which are:
- The digital signature is valid.
- The transaction data is properly formatted.
- The sender has a sufficient balance.
- Checking that the required resources are available, such as Bandwidth and Energy when needed.
And if any of these tests fail, the transaction is rejected and not included in the blockchain.
---
Step four: What happens if the transaction invokes a smart contract?
If the transaction involves executing a smart contract, such as transferring USDT (TRC20) or using a decentralized finance (DeFi) application, then the TRON Virtual Machine (TVM) executes the contract’s code instructions.
And during this stage, the contract instructions are executed, and the required Energy consumption to complete the process is calculated.
Transactions that do not invoke smart contracts, such as transferring TRX, do not need to be executed inside the TVM.
---
Step five: Include the transaction in a block
After passing the verification checks, the transaction becomes eligible for inclusion in a new block.
The Super Representative, who is responsible for producing the block, selects the valid transactions to include in the new block, and then broadcasts the block to the rest of the network nodes to verify and approve it.
The average block production time on the TRON network is around 3 seconds, which helps speed up transaction processing.
---
Step six: Confirm the transaction
After the transaction is included in a new block and the network accepts that block, the transaction is considered confirmed.
From this moment on, anyone can verify it via TRONSCAN using the Transaction ID (TXID) and view all its details.
---
What does TRONSCAN show?
When you search for a transaction on TRONSCAN, information such as the following will appear:
- Transaction ID (TXID).
- The transaction status.
- Block number.
- Execution time.
- Sender address.
- Recipient address.
- Transaction value.
- Bandwidth consumption.
- Energy consumption (if any).
- Fees or resources used.
These data help you track the transaction and understand how it is executed within the network.
---
Why might the transaction fail?
Some transactions may not be executed for several reasons, including:
- Insufficient balance.
- Insufficient resources such as Bandwidth or Energy when needed.
- An error occurs while executing the smart contract.
- Incorrect data exists, or the digital signature is invalid.
In many cases, TRONSCAN displays the reason the transaction failed, which helps the user diagnose the problem.
---
What do we gain from understanding the transaction journey?
Understanding the transaction lifecycle helps you:
- Explaining the reasons for transaction success or failure.
- Understanding the role of Bandwidth and Energy during execution.
- Knowing when TVM comes into play.
- Understanding the role of Super Representatives in block production.
- Using TRONSCAN to analyze transactions with greater confidence.
---
Summary
Every transaction on the TRON network goes through several stages: it starts by being created inside the wallet, then signed with the private key; next it is broadcast to the network and validated; then it is included in a new block by one of the Super Representatives; and finally it is recorded on the blockchain so it can be verified via TRONSCAN.
Even though this process usually takes only a few seconds, it depends on a set of components we discussed in the previous articles—such as TVM, Bandwidth, Energy, and the DPoS consensus mechanism—to work together and ensure transactions are executed efficiently and reliably.
---
Sources
- TRON Developer Documentation – Transactions.
- TRON Developer Documentation – TRON Virtual Machine (TVM).
- TRON Developer Documentation – Resource Model.
- TRON Developer Documentation – Consensus Mechanism.
- TRONSCAN Documentation.
Note: This article is based on the official TRON documentation available at the time of publication, and some operational details may be updated in the future as the network evolves and its releases change.