Sending cryptocurrencies between platforms may seem complicated at first, but it's a simple process once you understand each step.
In this guide, we will show you how to securely and accurately transfer cryptos from Coinbase to Binance, with special focus for those operating in Brazil.
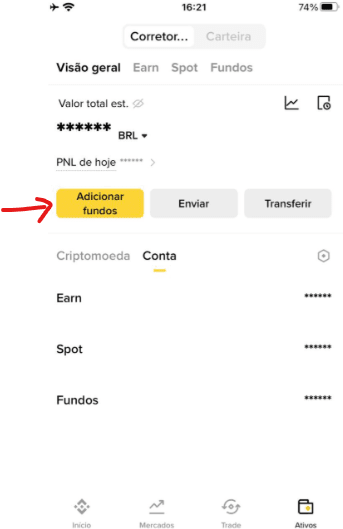
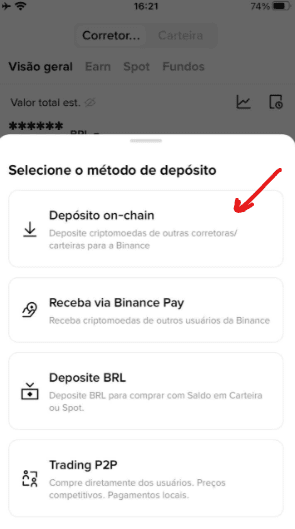
Step 1: Copy the Binance deposit address
Access your Binance account, on the website or in the app. Click on Assets and then on On-Chain Deposit.
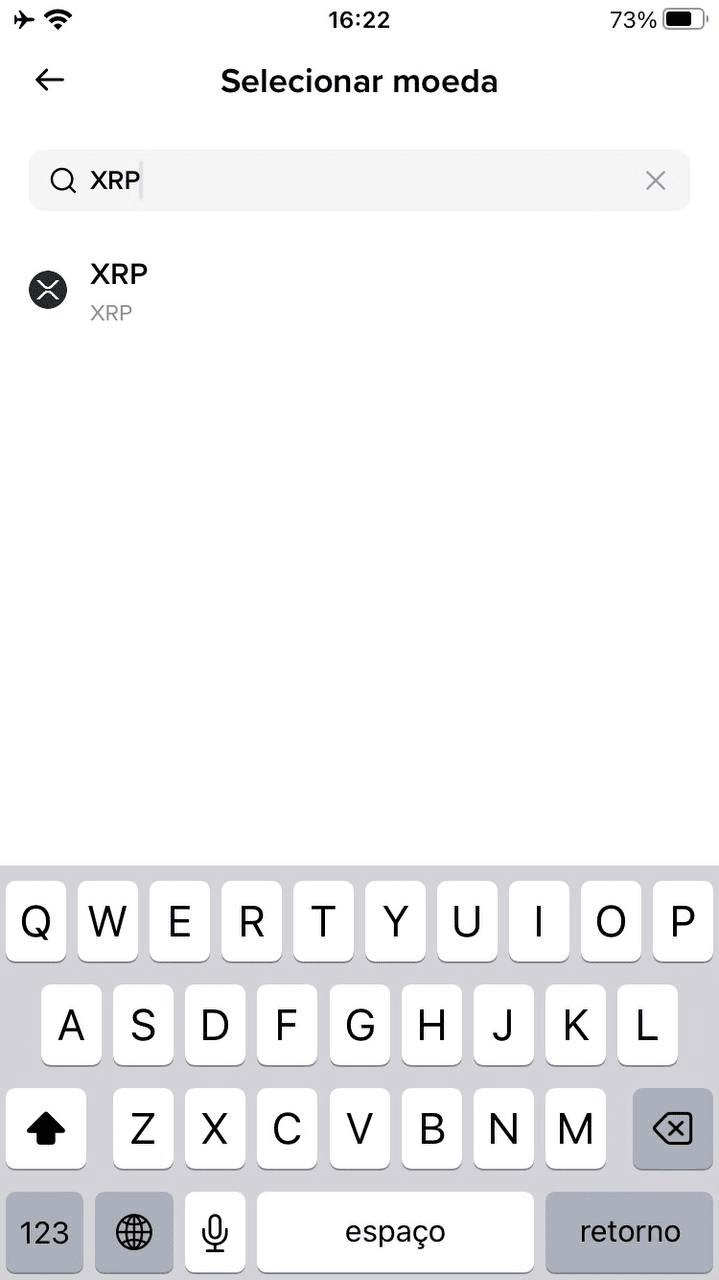
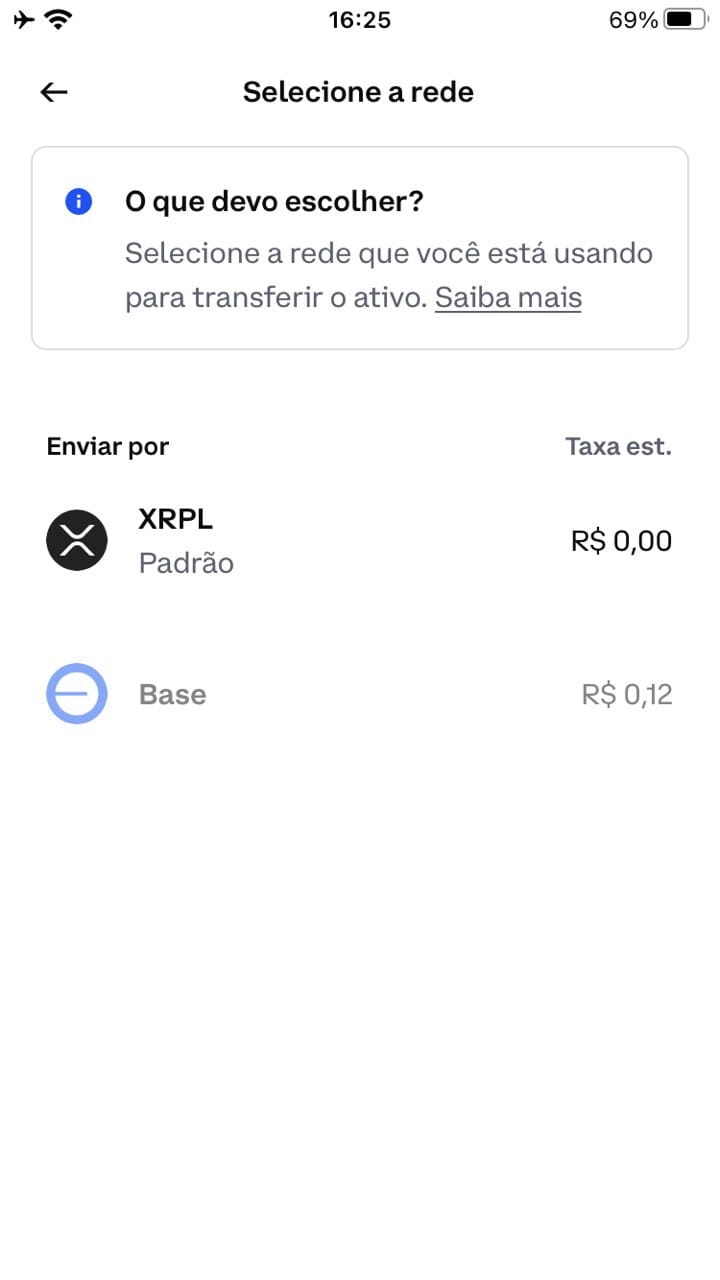
Choose the cryptocurrency you will transfer (e.g., BTC, ETH, XRP). Select the correct network for the send (e.g., ERC20 for Ethereum, BEP20 for BNB Chain, XRP Ledger (XRPL) for XRP). In this example, we will send XRP from Coinbase to Binance.
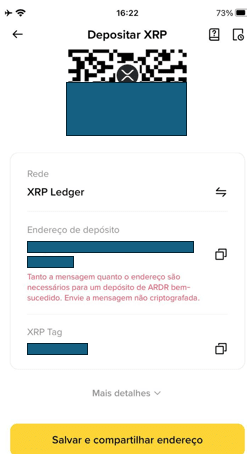
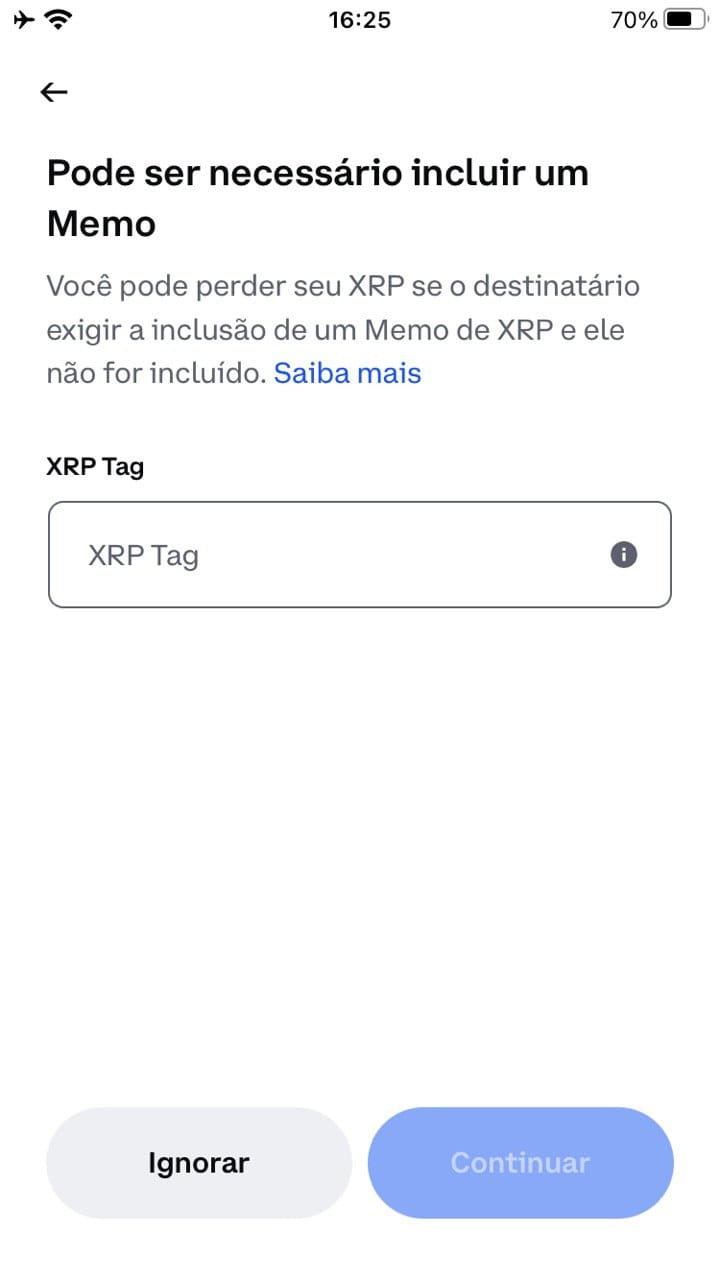
Carefully copy the generated address. It will be used in the next step. In the case of XRP, there is also the tag, which needs to be copied and pasted on the other platform.
Attention: choosing the network is crucial. If you choose a different network on Coinbase, the funds may be lost. In this example, we are using the XRP Ledger.
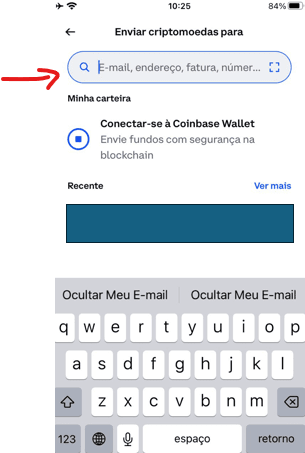
Step 2: Access your Coinbase account and initiate the send
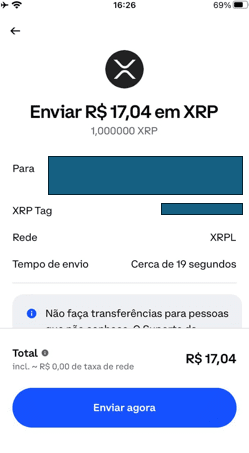
Open the Coinbase app and select the 'Send' option on the home screen. Then, choose the cryptocurrency XRP (make sure there is available balance). In the destination field (To), paste the address copied from Binance and also enter the XRP Tag, if requested.
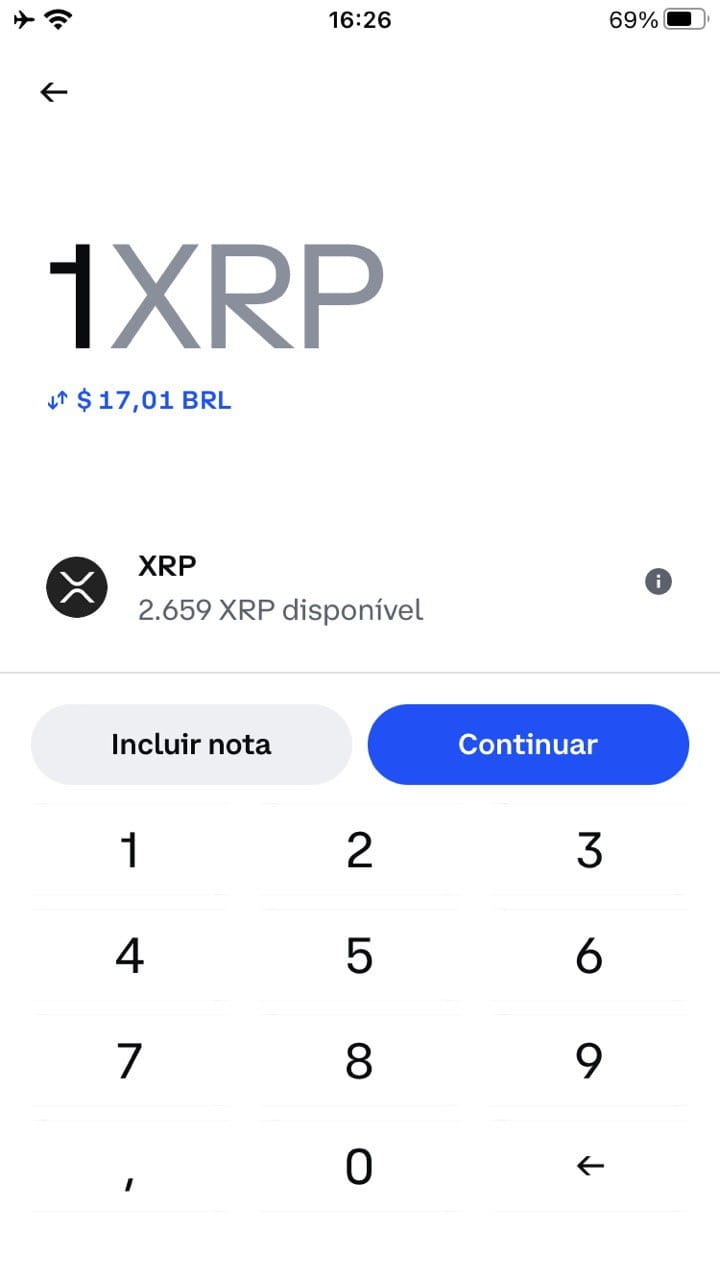
Enter the amount you wish to transfer — in this example, 1 XRP — and tap 'Continue'.
Confirm the XRPL network as the sending method, as it is the compatible network for this type of transfer.
Coinbase may automatically suggest, but always review this selection to avoid mistakes.
Step 3: Confirm the transaction and check the details
Review the copied address: a mistake here can mean total loss of funds. Check the network fees charged. Enable two-factor authentication (2FA), if prompted. Confirm the transaction. Coinbase will show the status of the operation.
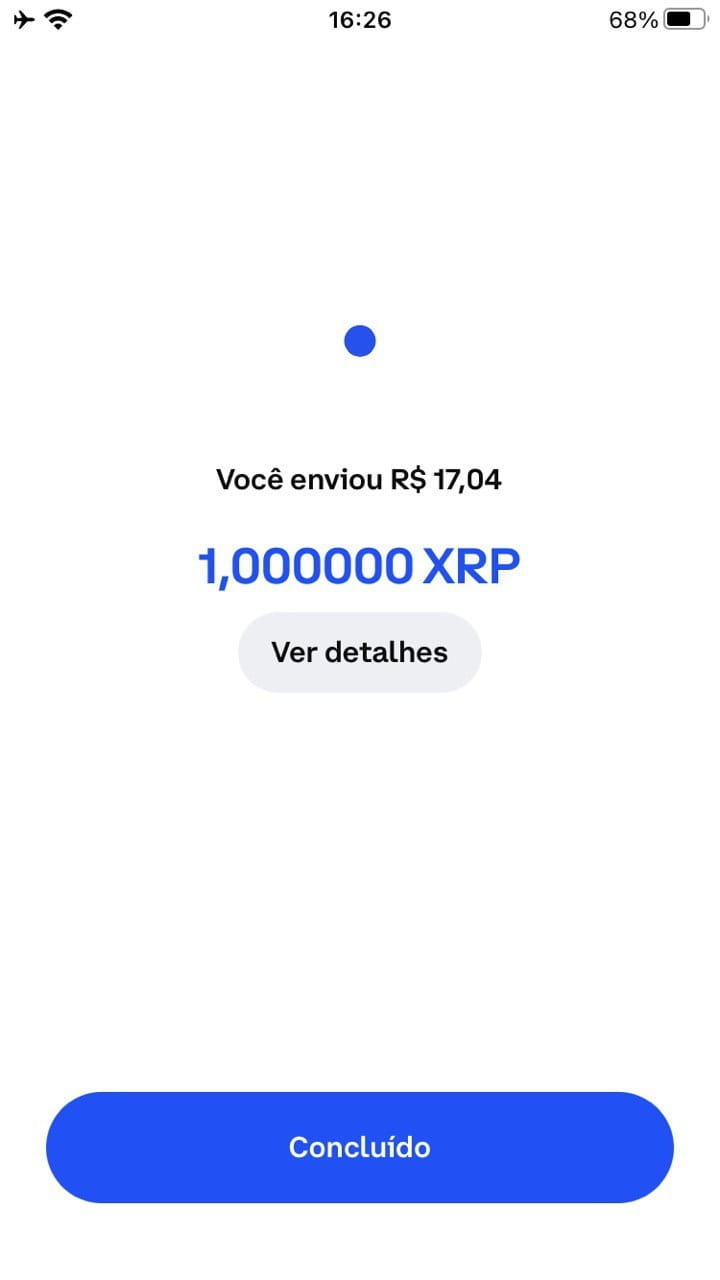
In some cases, you may be asked to confirm the transaction via email.
Step 4: Track the confirmation on the blockchain
After sending, the transaction goes through the network's confirmation process. This can take:
XRP Ledger: usually less than 1 minute.
Ethereum (ERC20): 5 to 15 minutes.
BNB Chain (BEP20): less than 5 minutes.
TRON (TRC20): usually less than 2 minutes.
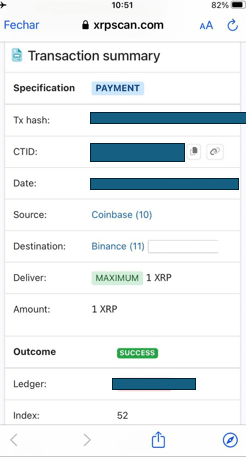
You can track the progress using the TXID (transaction ID) on a blockchain explorer, such as:
Xrpscan.com for XRPL
Etherscan.io for ERC20
BscScan.com for BEP20
Tronscan.org for TRC20
In the case of the test conducted, we were able to see that the transfer of funds was successful.
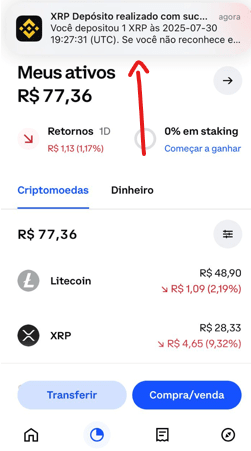
As soon as the transfer is completed, Binance sends an instant notification confirming the receipt of the deposit — as shown by the push notification at the top of the screen. In the app, you can check the credit of 1 XRP in the assets tab.
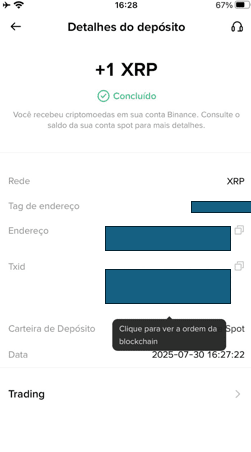
Additionally, by accessing the deposit details, you can confirm the status as 'Completed', view the network used (XRP), the destination address, the Tag, and the TXID of the transaction. All this serves as proof that the funds arrived correctly in your Binance account.
Confirm the network used on both platforms. This is the most common and dangerous mistake. Start with small amounts, especially when using networks or cryptos for the first time. Avoid manually copying addresses.
Always use the copy button. Note the TXID. It is your proof of the transaction. Check for the existence of a memo/tag, when applicable (in the case of XRP or BNB).
Comparison between networks
ERC20: average speed, high fee, ideal for large amounts and applications compatible with the Ethereum ecosystem.
BEP20: fast speed, low fee, ideal for transactions within the Binance Smart Chain.
TRC20: very fast speed, very low fee, ideal for sending USDT at reduced cost.
XRPL: extremely high speed, virtually zero fee, ideal for fast XRP transfers with almost instant confirmation and high efficiency.
Conclusion: safe operation without surprises
Moving cryptocurrencies between platforms like Coinbase and Binance may seem challenging at first, but with attention to the right details — such as choosing the network, the correct address, and checking the TXID — the process becomes simple, secure, and fast.
The key is in the careful checking of each step. A small mistake can lead to losses, but by following this step-by-step guide, you drastically reduce the risks.
It should be noted: the secret is in:
Choose the correct network;
Check the address and fees;
Track the confirmation on the blockchain.
Now that you know how to do it, you are ready to make your transfers securely and make the most of both platforms' features. Whether for investing, trading, or diversifying your portfolio, your next send will be much smoother.
#xrp #exchange #Ripple #transfer
---
Photo available on Freepik