Transferring cryptocurrencies between platforms may seem complicated at first, but by knowing the key steps, the process is quick, secure, and straightforward. In this guide, we show you how to send cryptos from Coinbase to Binance, focusing on users in Latin America, especially those operating from Brazil.
Note: the screenshots used are in Portuguese, as they were taken by a Brazilian user. However, the dynamics in other countries in the region change very little, and the steps described here remain applicable.
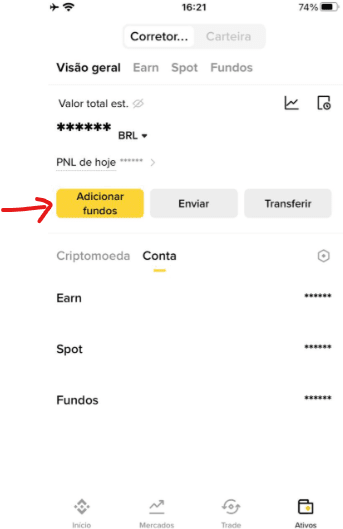
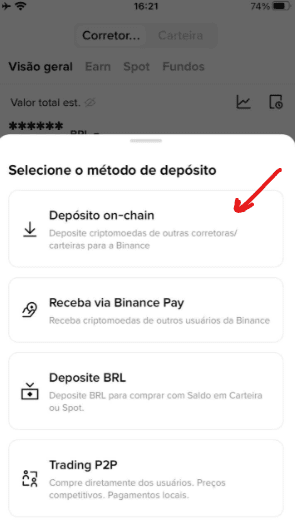
Step 1: copy the deposit address on Binance
Access your Binance account (web or app) and go to the Assets > On-Chain Deposit section.
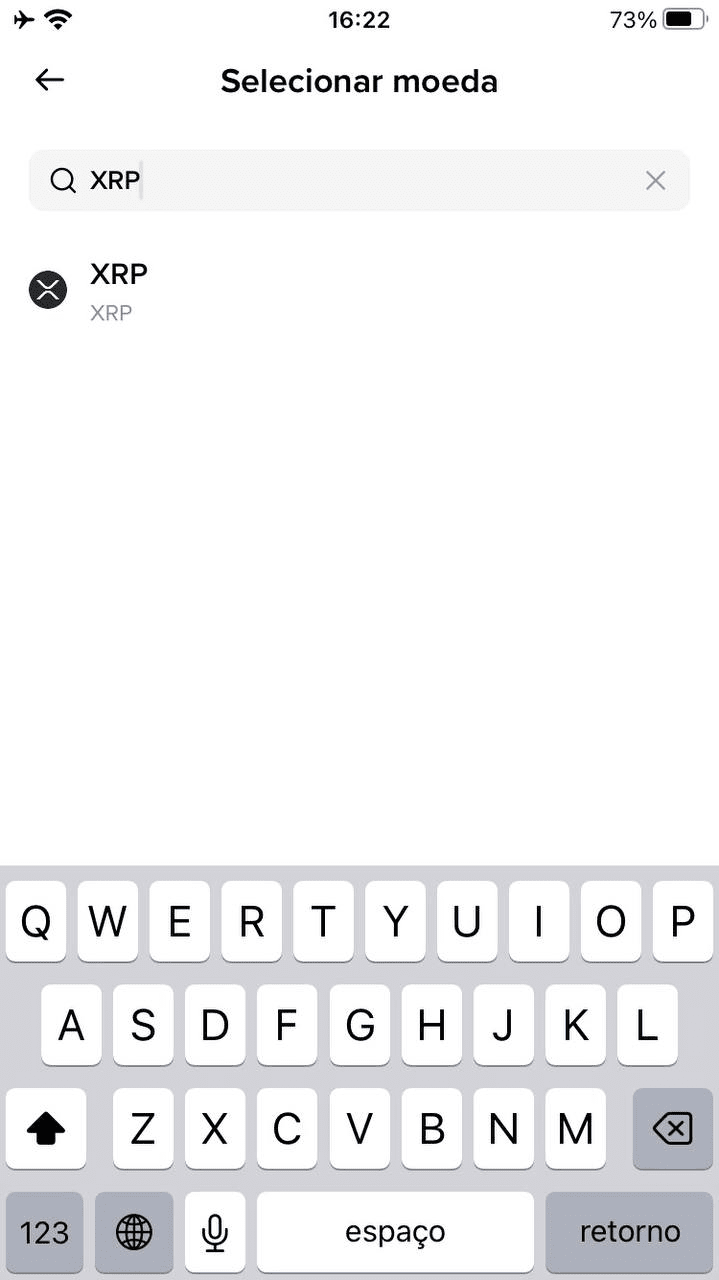
Select the cryptocurrency you wish to receive, for example: XRP, BTC, or ETH. Then, choose the correct network for that coin:
Ethereum → ERC20
BNB → BEP20
XRP → XRP Ledger (XRPL)
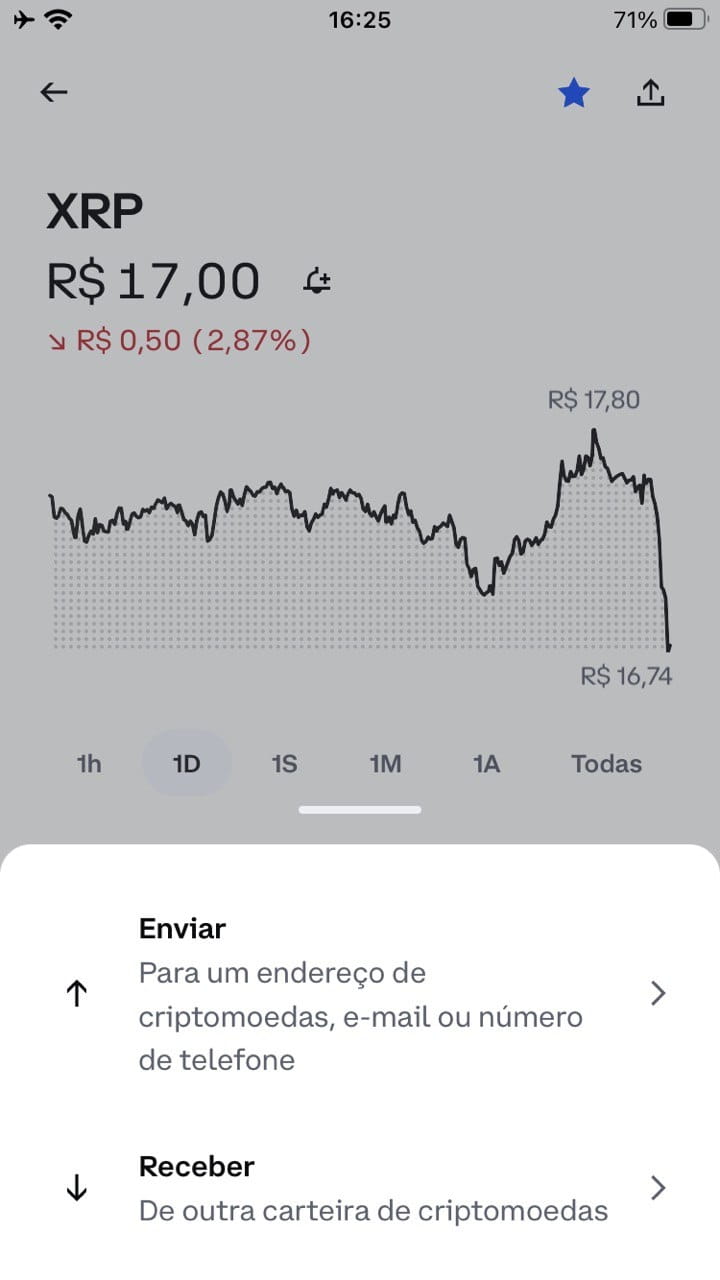
In this example, we will use XRP.
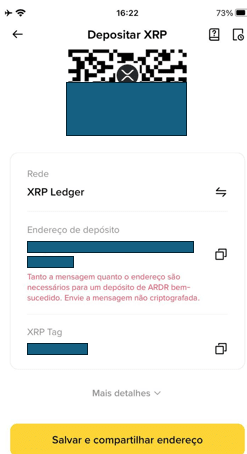
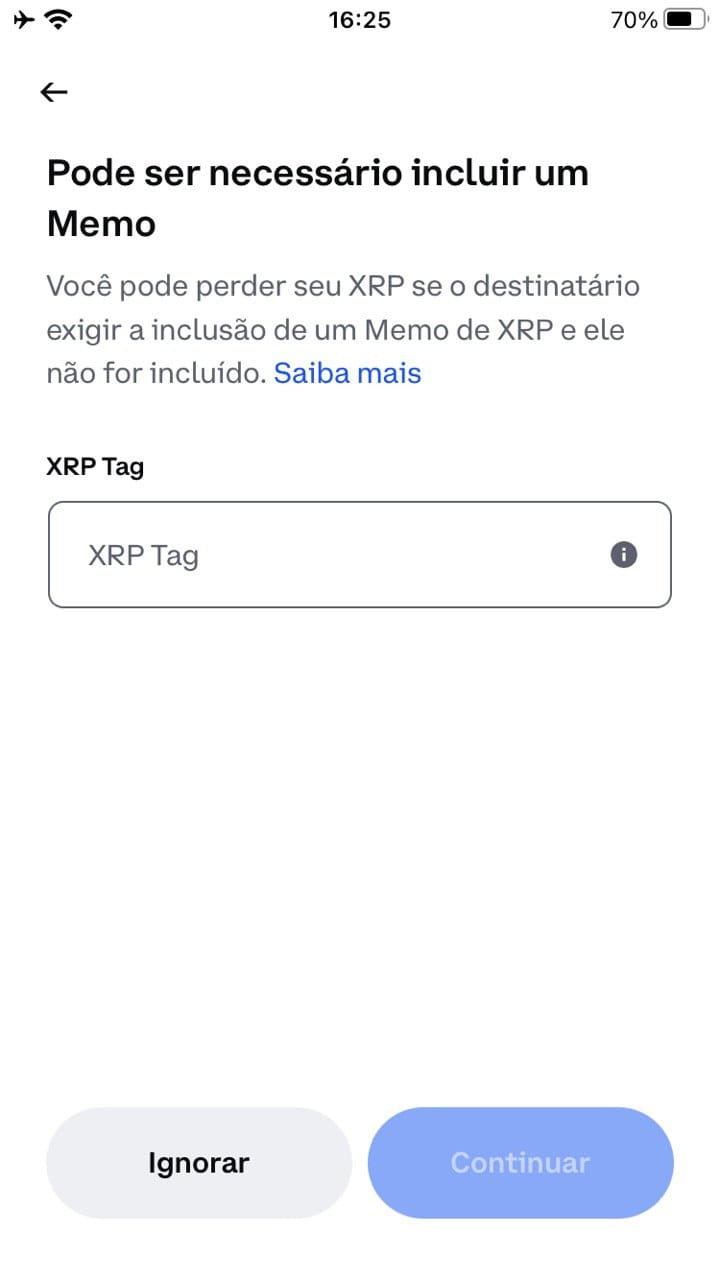
Carefully copy the address that Binance generates. For XRP, you will also need to copy the Tag that will be requested on Coinbase.
Attention: choosing the wrong network can result in total loss of funds. If you are going to send XRP, make sure to use XRPL on both Binance and Coinbase.
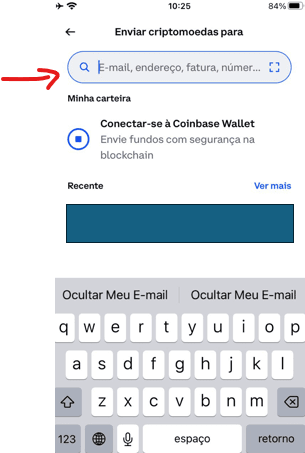
Step 2: access Coinbase and start the sending process
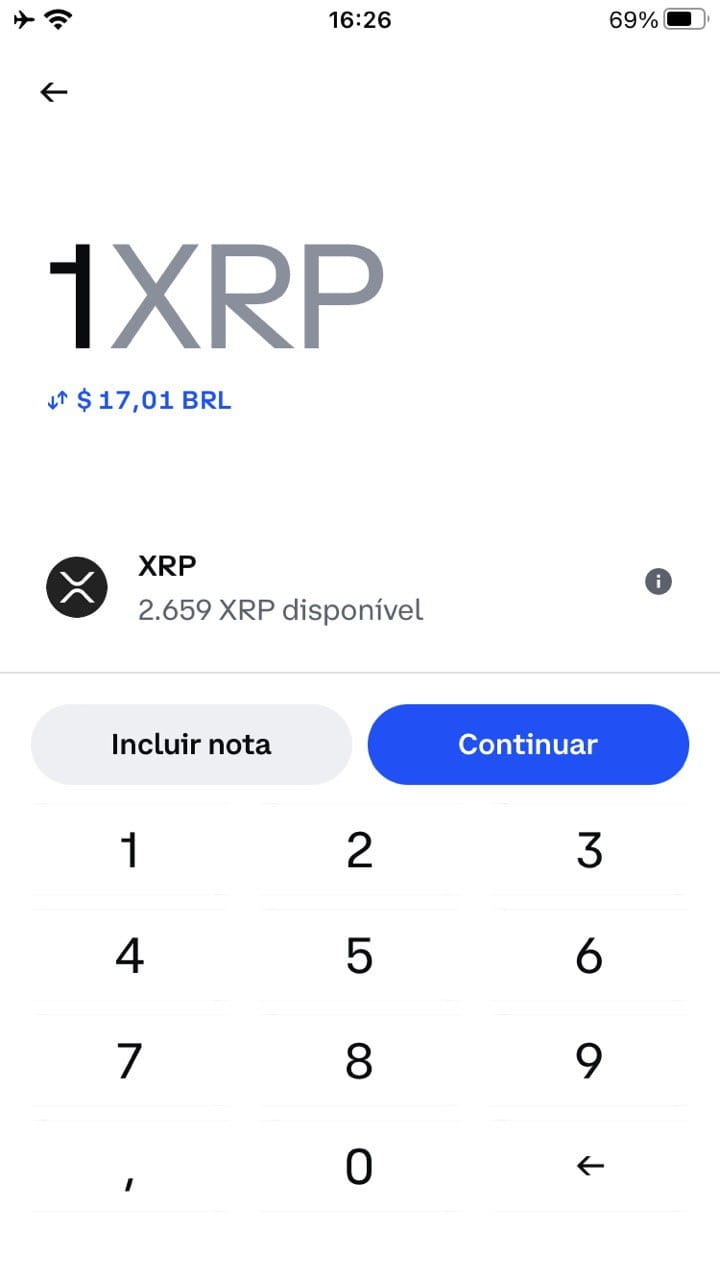
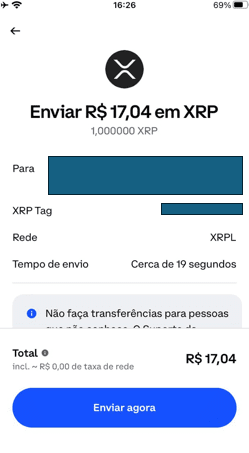
Open the Coinbase app and tap the 'Send' option on the main screen. Select the cryptocurrency (XRP, in our example) and ensure you have sufficient balance. In the 'To' field, paste the address copied from Binance. If it is XRP, also add the corresponding Tag.
Enter the amount to transfer —for example, 1 XRP— and click on 'Continue'.
Confirm that the selected network is XRPL.
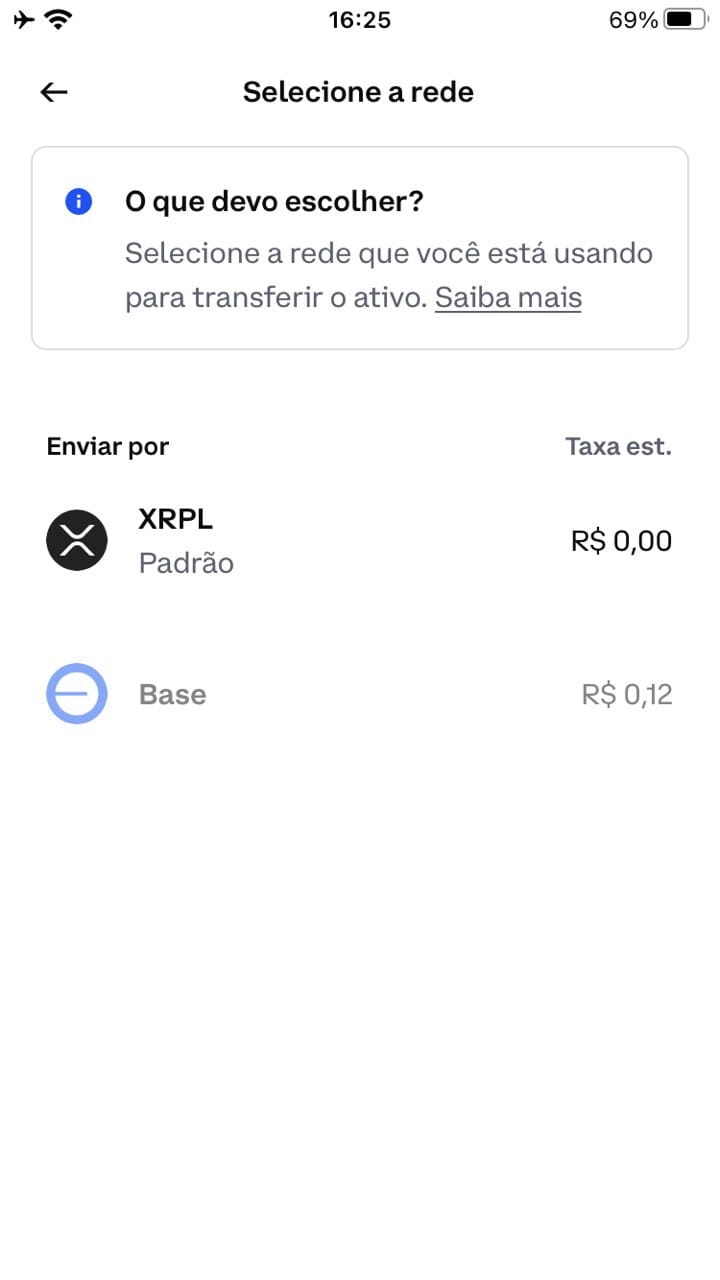
Coinbase usually recommends it automatically, but always check before confirming.
Step 3: confirm the transaction and review the details
Before sending, verify:
That the address and tag are identical to those copied from Binance.
The network fees applied.
The activation of 2FA (two-factor authentication), if requested.
Confirm the sending. Coinbase may require an email verification as an additional security measure.
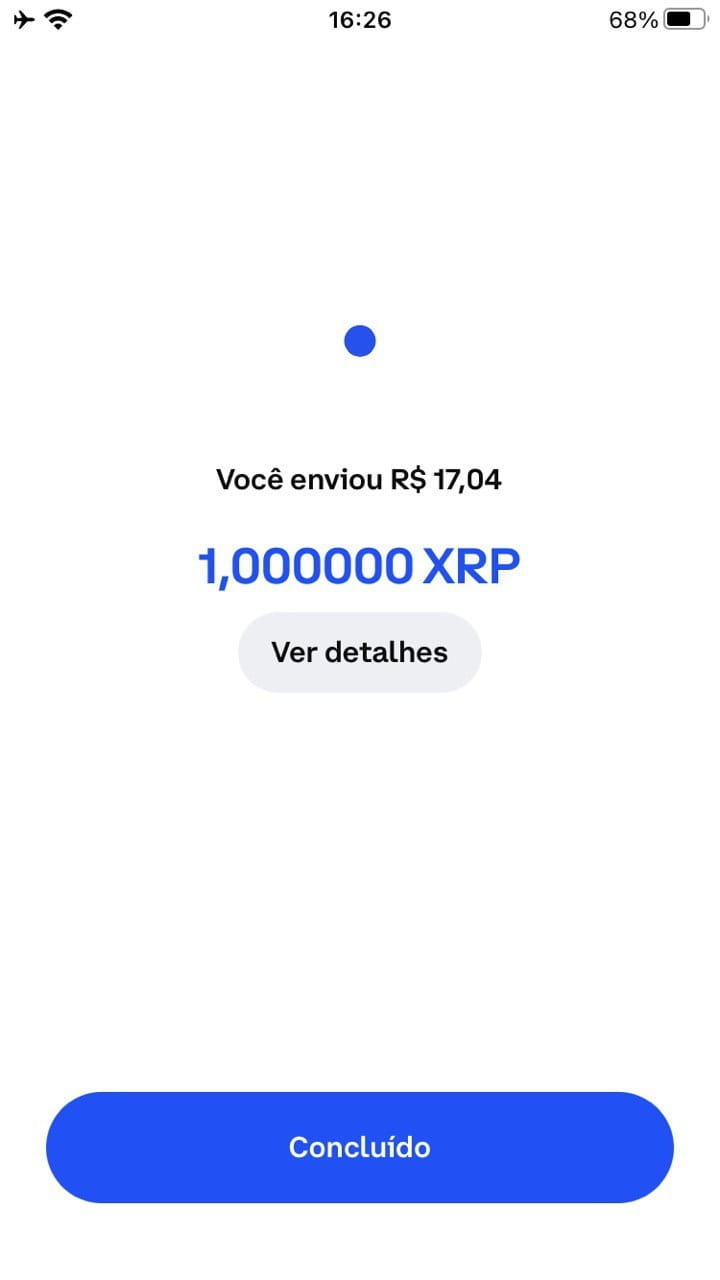
Step 4: track the transaction on the blockchain
Once the crypto is sent, the transaction goes through the network validation process. The time varies depending on the blockchain used:
XRP Ledger: less than 1 minute
Ethereum (ERC20): between 5 and 15 minutes
BNB Chain (BEP20): less than 5 minutes
TRON (TRC20): around 2 minutes
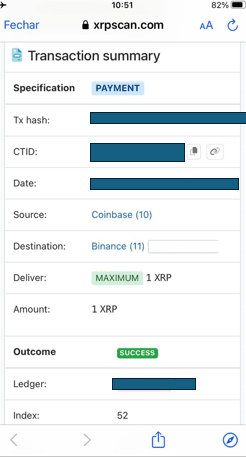
You can check the status of the transaction with the TXID (transaction ID) on a blockchain explorer:
xrpscan.com (XRP)
etherscan.io (ERC20)
bscscan.com (BEP20)
tronscan.org (TRC20)
In the case of the example performed, the transaction was confirmed successfully.
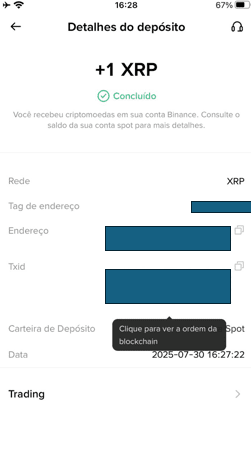
Step 5: check the balance on Binance
Once the transfer is complete, Binance notifies you immediately. Open the app and go to the Assets section. You will see the deposit reflected —for example, 1 XRP credited.

You can also check the deposit details, including:
Network used (e.g., XRPL)
Destination address
Tag
TXID
All this serves as proof that the funds arrived correctly in your account.
Confirm the network used on both platforms. This is the most common and dangerous error.
Start with small amounts, especially if it's your first time using that network or cryptocurrency.
Avoid copying addresses manually. Always use the copy button.
Note down the TXID. It is your proof of the transaction.
Check if it is necessary to include a memo/tag, depending on the case (like with XRP or BNB).
Comparison between networks
ERC20: average speed, high fee, ideal for large amounts and applications compatible with the Ethereum ecosystem.
BEP20: fast speed, low fee, ideal for transactions within Binance Smart Chain.
TRC20: very fast speed, very low fee, ideal for sending USDT at low cost.
XRPL: extremely high speed, almost zero fee, ideal for fast XRP transfers with almost instant confirmation and high efficiency.
Conclusion: secure and hassle-free operation
Sending cryptocurrencies from Coinbase to Binance may seem challenging at first, but with the right steps, it becomes a simple and reliable task.
Always remember:
Choosing the right network
Check address, tag, and fees
Track the transaction via TXID
With these precautions, you can transfer your cryptos with peace of mind and make the most of the benefits of both platforms —whether to invest, diversify, or trade.
Ready to make your next transfer without errors?