


Here’s a detailed multi-timeframe analysis of BTC/USD as of 20th April 2025, based on the charts (Daily, 4HR, 1HR):
---
###

Overall Context:
- BTC is currently in a consolidation phase across all key timeframes.
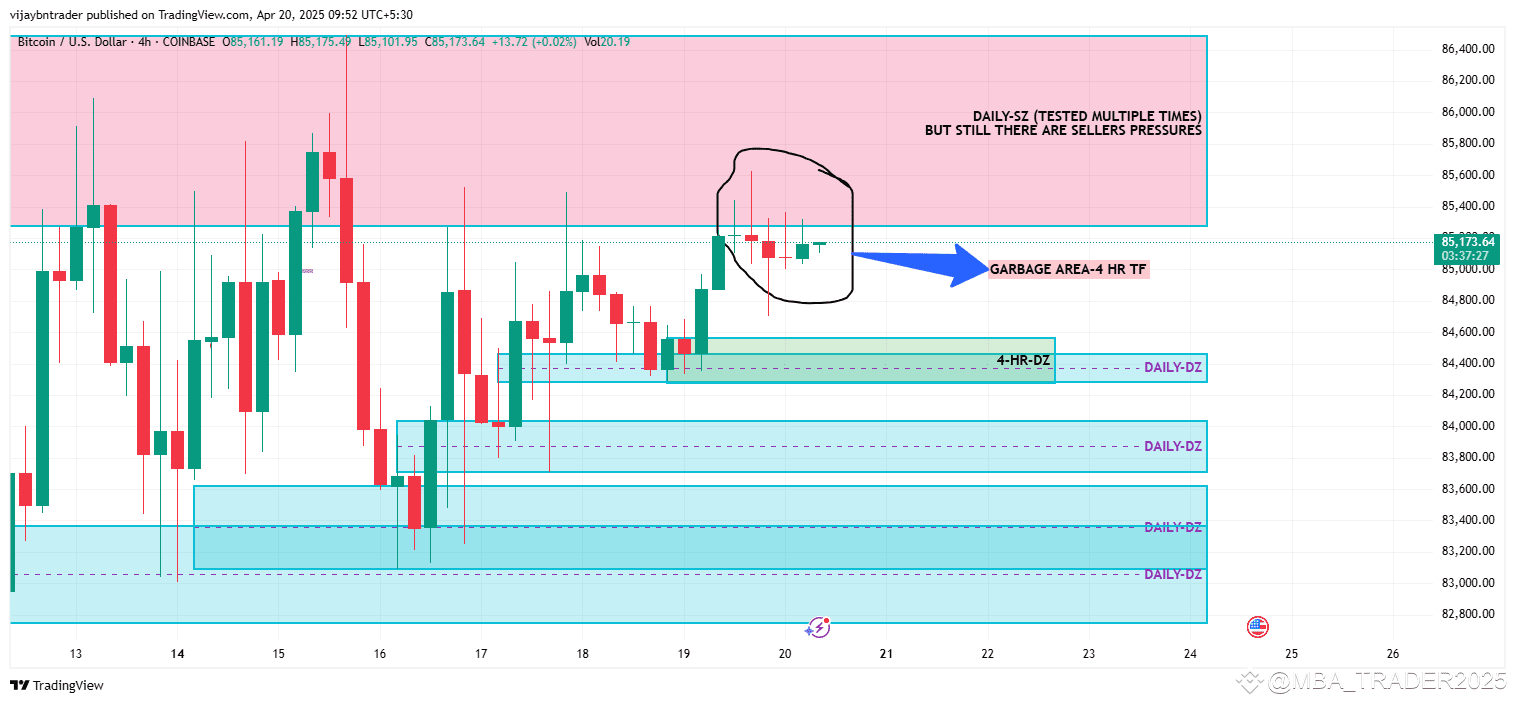
- Daily Supply Zone (Daily-SZ) has been tested multiple times, indicating strong seller presence but no clear breakout yet.
- Price is hovering around $85,300, showing sideways movement within a defined range.
---
##

Daily Timeframe (1D):
- Supply Zone: 85,300 – 86,500 (tested multiple times but not broken).
- Demand Zones:
- 84,200 – 83,700
- 83,100
- 76,800 (stronger, untested zone)
- Structure:
- Currently forming indecision candles near resistance.
- No clear directional breakout = high caution.
Observation:
If the price closes above the Daily-SZ, it could indicate bullish continuation. A break below 84,200 may trigger stronger downside movement.
---
##

4-Hour Timeframe (4HR):
- Key Zones:
- Supply Zone overlaps with Daily-SZ
- Demand Zone: 84,200 – 83,700
- Current Price: Trading around the ‘Garbage Area’, which means low-quality price action (no clear buyers/sellers dominance).
- Structure:
- No strong higher highs or lower lows.
- Could break either side depending on volume.
Note:
Use caution in this "garbage" area as fakeouts are common. Wait for price to reach defined SZ/DZ for clean trades.
---
##

1-Hour Timeframe (1HR):
- Supply Zone: Matches Daily-SZ; tested multiple times.
- Demand Zones:
- 84,200 – 83,700 (confluence with 4HR and Daily)
- Price Action:
- Slightly bullish within a tight range.
- Any breakout from current zone could give quick short-term move.
---
###

Strategy & Trade Plan:
#### If Price Breaks Below 84,200:
- Expect bearish move to 83,700 and 83,100
- Watch volume for confirmation.
#### If Price Holds Above 84,200:
- Potential targets: 85,450, 86,000, Daily-SZ breakout zone
---
###

Rules for Traders:
1. Strictly follow SL to protect capital.
2. Risk:Reward should be ≥ 1:2.
3. Wait for confirmation (candle close, volume, retest).
4. Avoid entries in garbage/indecision zones.
