1. Register for a Binance Japan account or log in to your existing Binance Japan account.
i) Click [Sign Up] on the official Binance Japan website.

ii) Click [Sign up as an entity].

iii) Enter the entity name and click [Next]

iv) Enter your entity email and click [Next].

v) You’ll receive a 6-digit code in your email. Enter the code to verify your email in the next page.

vi) Create a secure password. Click [Create Entity Account].
Note:
vii) You have successfully created an entity account.
Click [Yes], If you’ve been referred by a friend to register on Binance, make sure to fill in their Referral ID.
Then, click [Next] to start the Entity Verification process.

1. Click [Log In] on the official Binance Japan website.

ii) Go to [Profile] and click [Verify Now].

Please note that if your email has already been linked to a personal account, it cannot be upgraded to an entity account. Please make sure that you submit the Entity Verification with an unverified account.
2. You’ll now enter the entity verification process.
2.1 Click [Verify] to start.

2.2 Enter your [Entity Name] and [Registration Number] as displayed on the official company documents and answer the questions, including the registered country/region, the legal form, registration number, nature of business, shareholding structure, etc.


Important Note:
Please ensure that all the provided information is correct. If you fail to provide the correct information, it could lead to us rejecting your business verification application and you’ll have to redo the full verification process.
If you confirm information is correct, click [Continue].
Before starting the verification process, you’ll also need to prepare the company documents shown on the pop-up checklist. The checklist will be displayed based on your legal form, nature of business, and the shareholding structure. You can select [Print Full List] to print the checklist for reference.
Note: The required corporate documents for Binance KYB will be different based on your legal form, nature of business you choose. The following screenshots are examples only. Please refer to the actual list, specific to you, on the verification page.

3. Generally, the Entity Verification includes 3 main steps:
You may click [Save as Draft] any time during the verification process.

1. Fill in the account information, including the Entity Name, Entity Name (in Kana), Date of Incorporation, and click [Confirm].

2. Fill in the Entity Address section, including the Registered Address, Operating Business Address and click [Confirm].

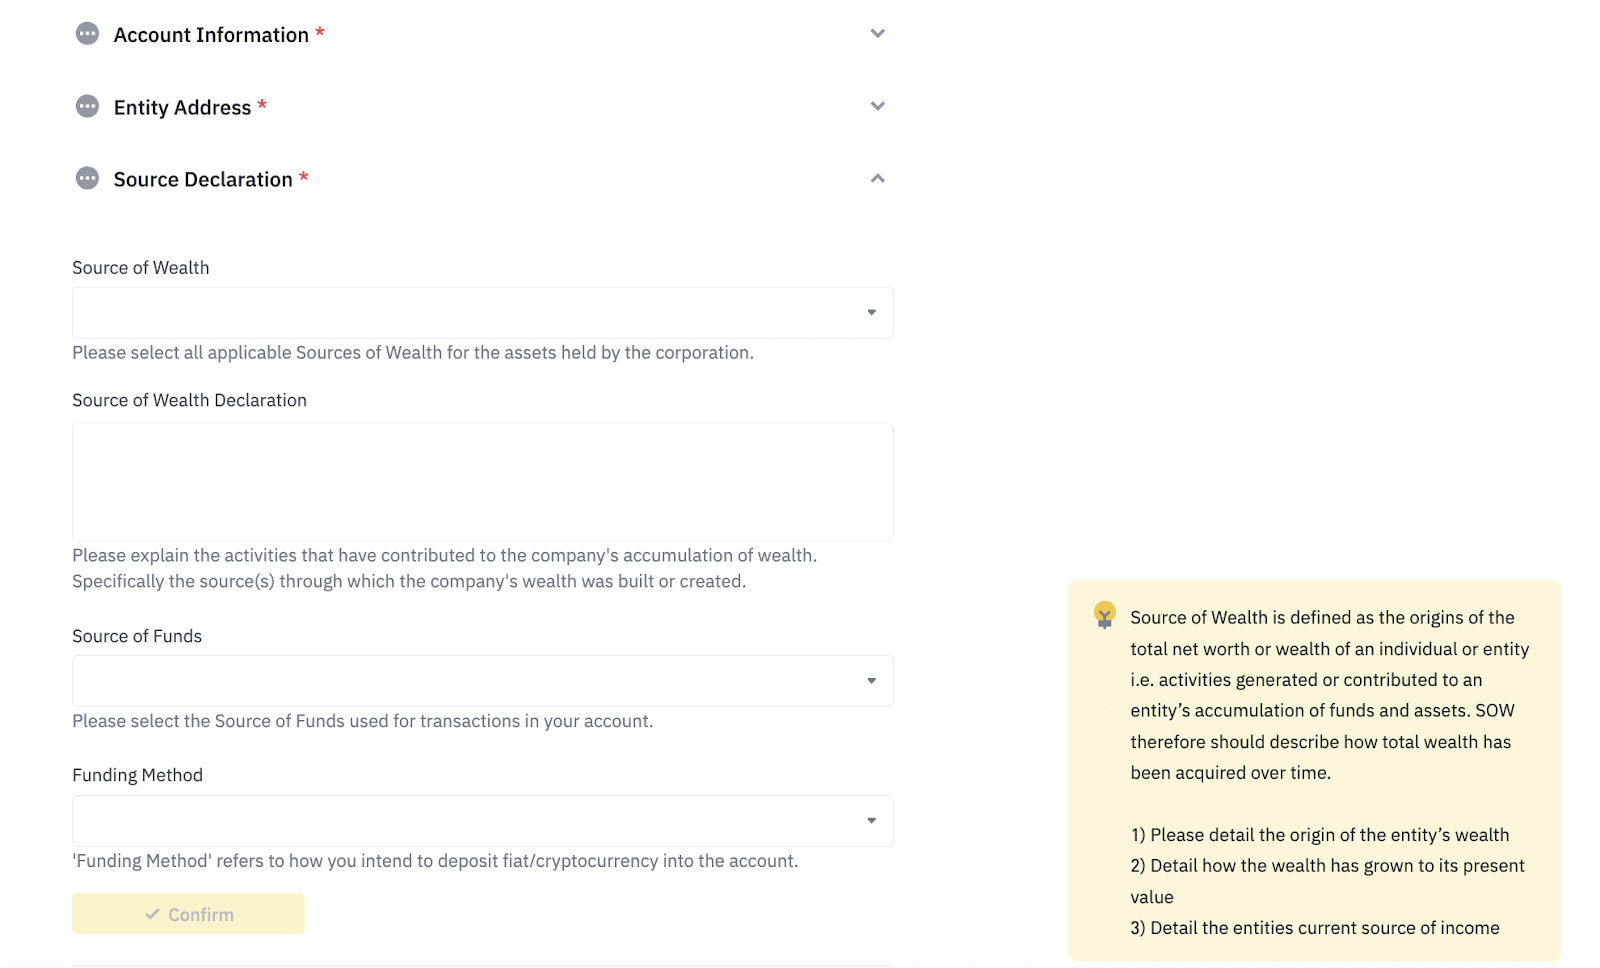
3. Fill in the Source Declaration section, including the Source of Wealth, Source of Wealth Declaration, Source of Funds, Funding Method and click [Confirm]. .
4. Fill in the Additional Information section, including Nature of Business Declaration, AUM, Monthly Transaction Volume, Amount of capital, Annual Operating Income, Preferred Language, Contact Number, Company Website (if any), the Purpose of Application and click [Confirm].

5. After completing the Basic Information section, click [Continue] to proceed.

Next, complete the Related Parties section.


1. Enter the basic information of the Director or equivalent person, Upload Identification Documents and click [Confirm].

2. Enter the basic information, upload the Identification Documents, the Proof of address of the Ultimate Beneficial Owner(s) (if any), and click [Confirm].
Then, choose the Ownership Percentage.

3. Enter the basic information, upload the Identification Documents,the Proof of address of Significant Controller(s) and click [Confirm].

4. Enter the basic information and Residential Address,upload the Identification Documents of Authorized Account Trader(s) and click [Confirm].

5. Choose an Authorized Account Trader as the main trader in [Set as Main Dealer/ Trader], enter the main Dealer/ Trader’s email, click [Upload] to perform the facial verification in the next step.

6. Click [Verify Now] to complete the main trader’s facial verification on the current device or Mobile app.
Please do not wear hats or glasses, and do not use filters. All photos must be taken under sufficient lighting.

Verify via current device
Choose the [Current Device] option and make sure that your device has a camera.


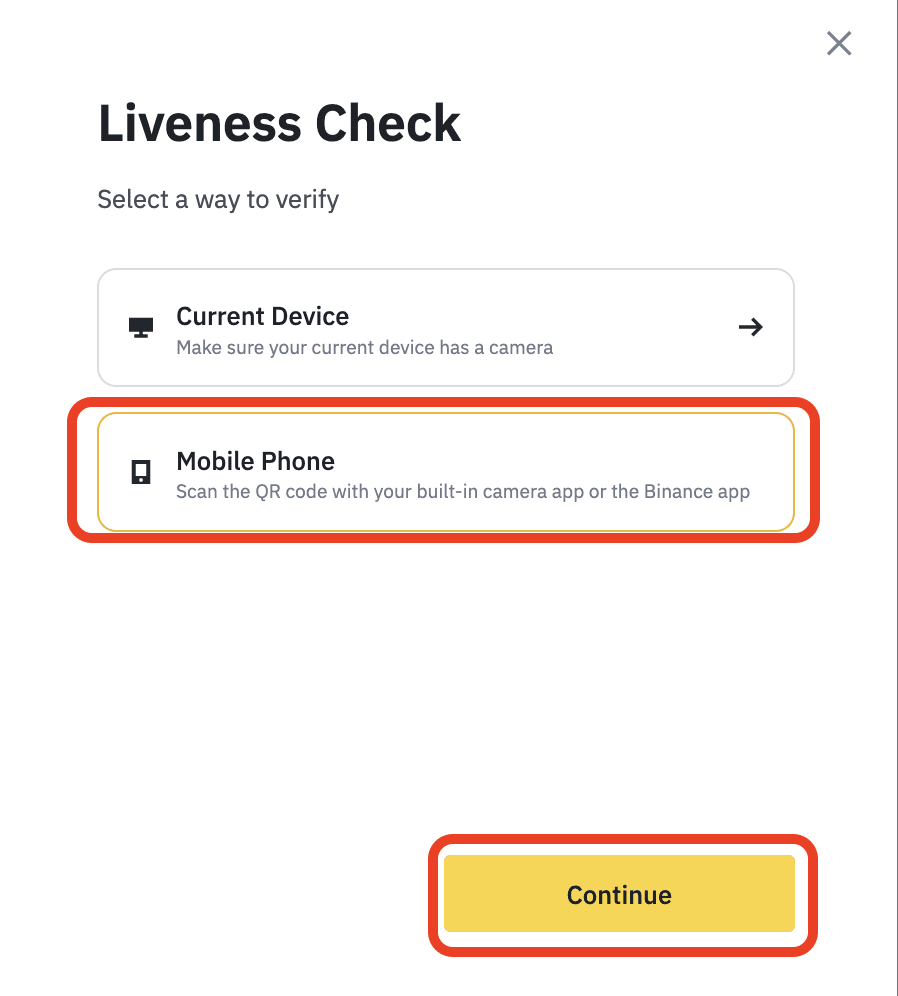
Verify via mobile app
Choose [Mobile Phone] option and use your smartphone to scan the QR code to complete the facial verification.

7. Generate the Letter of Authorization. Fill in required information, sign and upload it, then click [Confirm].

8. You can also invite related parties to collaborate or sign online documents for your entity verification. For more details, please visit:
9. Click [Continue] to proceed to the next section.
*If the check mark on the left is gray instead of green, it means the item has not been submitted.


1. Upload the required documents according to the list shown on the page and click [Confirm] after uploading.
Note: The required documents will be different based on your legal form, the nature of business and shareholding structure you choose. Please refer to the actual list, specific to you, on the verification page.
(The following images are examples only)

2. Click [Complete] to proceed.
*If the check mark on the left is gray instead of green, it means the item has not been submitted.


3. After completing all the sections, click [Next].

4. On the Preview page, kindly check all your information and click [Confirm] if it’s correct.

You can click [Back to Edit] if there are any mismatches.
5. Read and agree to the declaration. Check the box next to [I/we understand and agree to the declaration] and click [Submit].

6. Your application has been successfully submitted. You will be notified once the review is complete.

