This article is a bit late because last Friday when the event went live, I was already on the highway, and over the weekend I found a cabin in the mountains; I didn’t bring my computer and didn’t expect so many events to come up all at once.
You still have to do what you need to do. Considering the timeliness has passed, I’ll just focus on the key points. I don’t expect much readership; it’s just a record for myself.
Stargate Finance Task
Stargate is a leading cross-chain platform. This step is a prerequisite for the next two steps, transferring $USDC and $ETH from the Binance wallet to #HEMI chain through Stargate. 80 USDC is crucial for participating in the next two DeFi tasks, and USDC should be placed on the Binance chain; make sure to have enough BNB for gas. After transferring USDC to Hemi, you will receive USDC.e
Transferring 2u ETH to Hemi is for the Gas required for the subsequent DeFi tasks. It’s better to prepare more ETH; I think at least 3u is needed, and storing 5u is safer. Buy on the exchange and transfer it to the chain. Since the gas on the ETH chain may be relatively high, you can transfer to some Layer 2 chains, like Base or Arbitrum, where theoretically gas will be much lower.
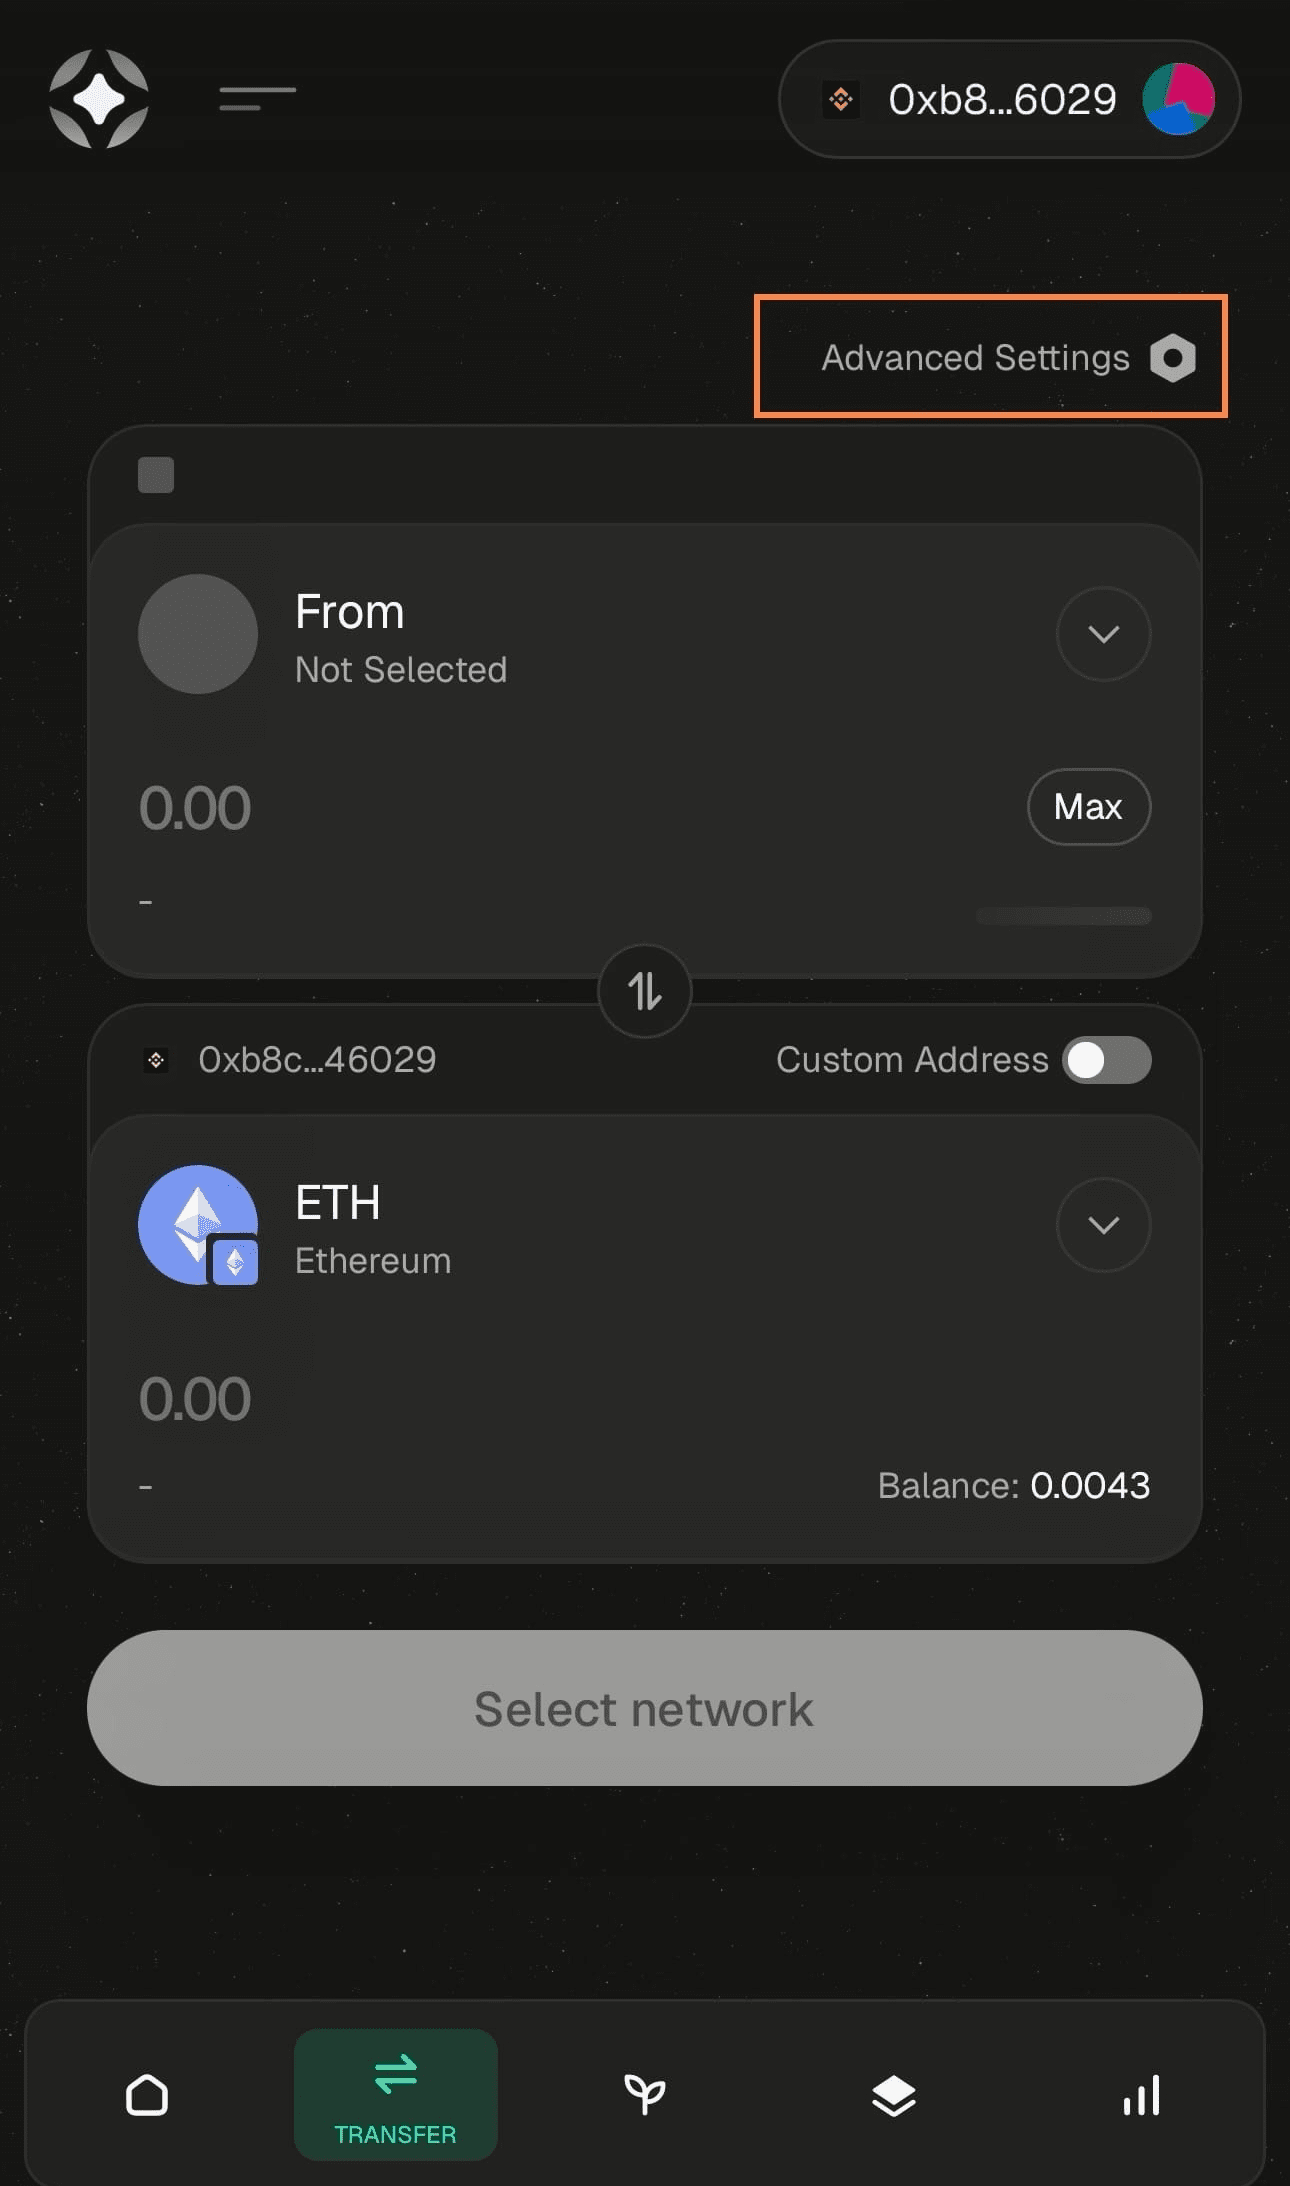
One key point when using Stargate for cross-chain is several configuration items. On the Transfer page of Stargate, click 'Advanced Settings', as shown in position below:
Modify the settings in the pop-up window as follows:
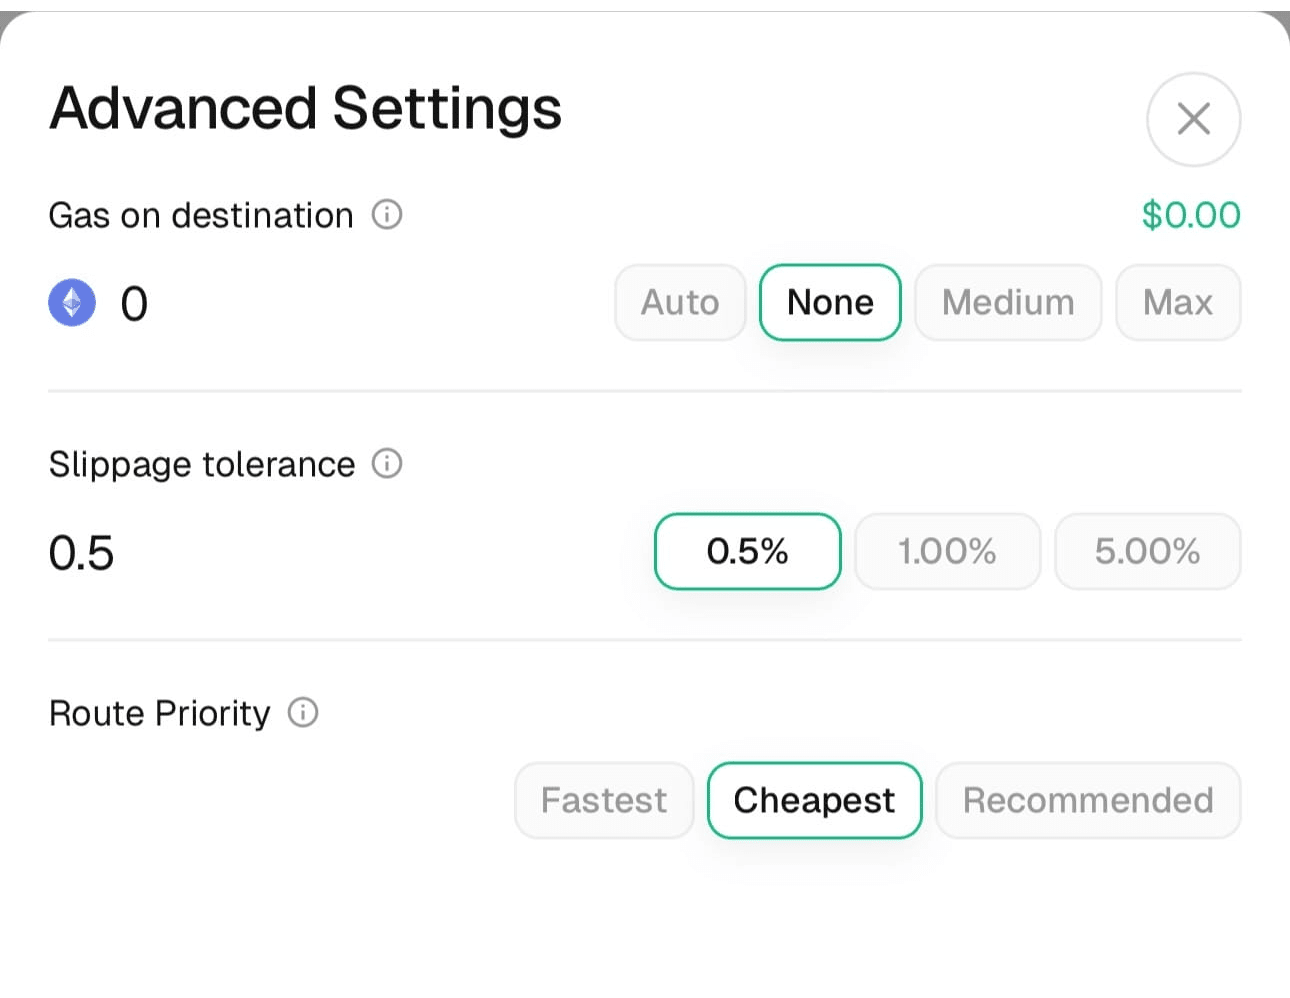
The 'Gas on destination' option should be turned off (select None); this configuration means that the gas for the transaction is charged from the target chain. I feel that most people have probably not used the Hemi chain before, so there should be nothing on the Hemi chain. If this is turned on, the transfer will report an error. The next two items are slippage and how to choose the route, both selected to the lowest, and it’s fine if it’s slow.
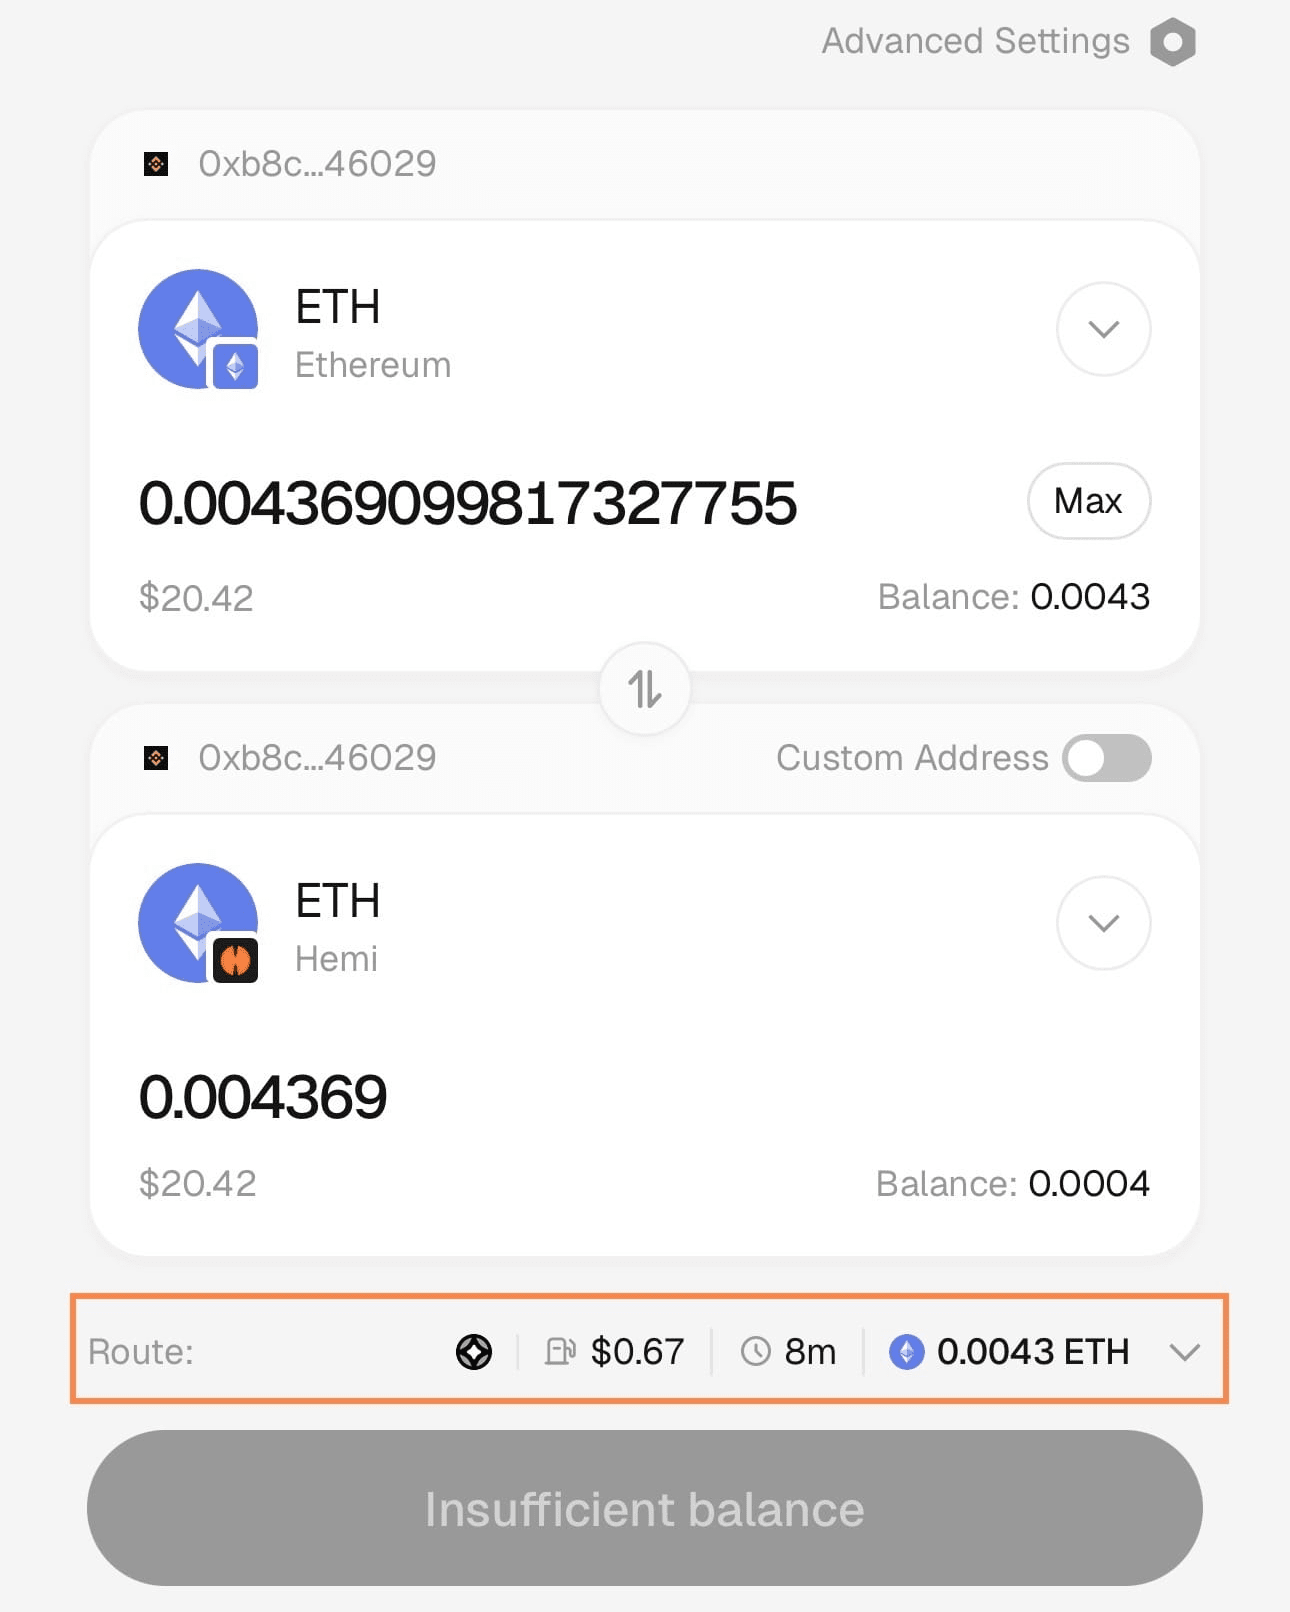
Double-check the details of the transfer on the transfer page, especially the gas, by clicking the position shown in the image below:
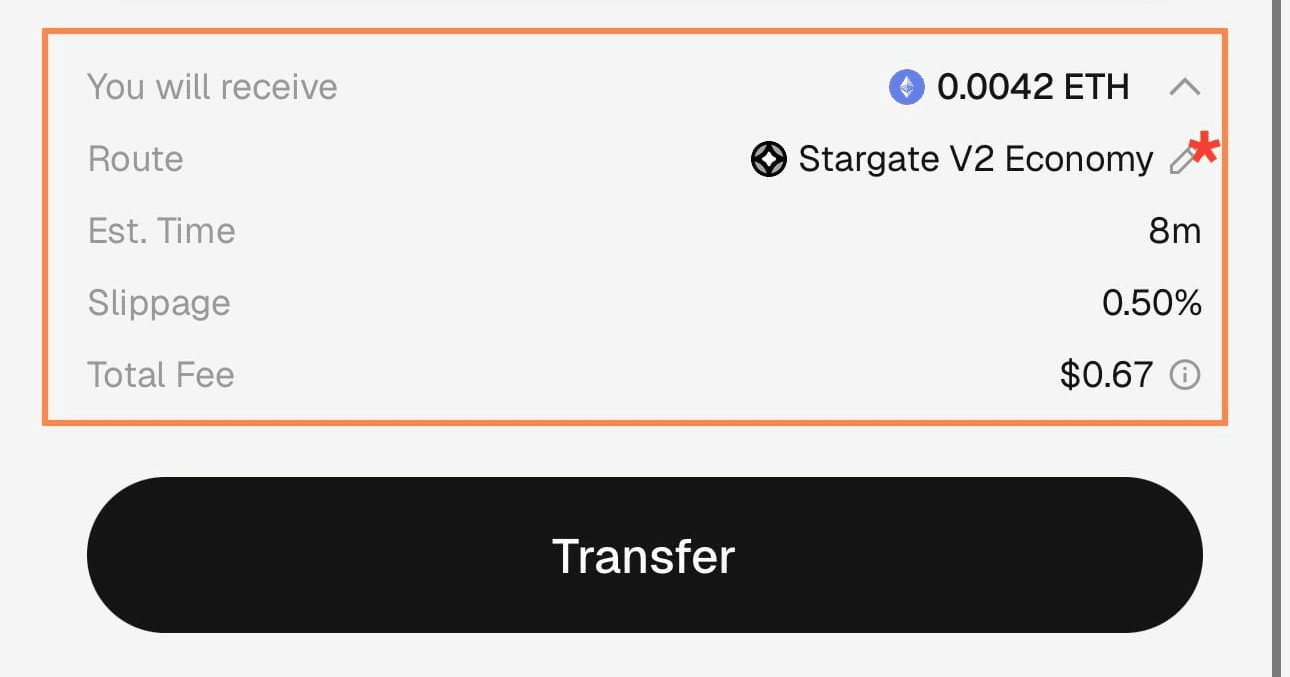
Click on the icon at * to see more detailed transfer routing information, and you can also click to confirm:
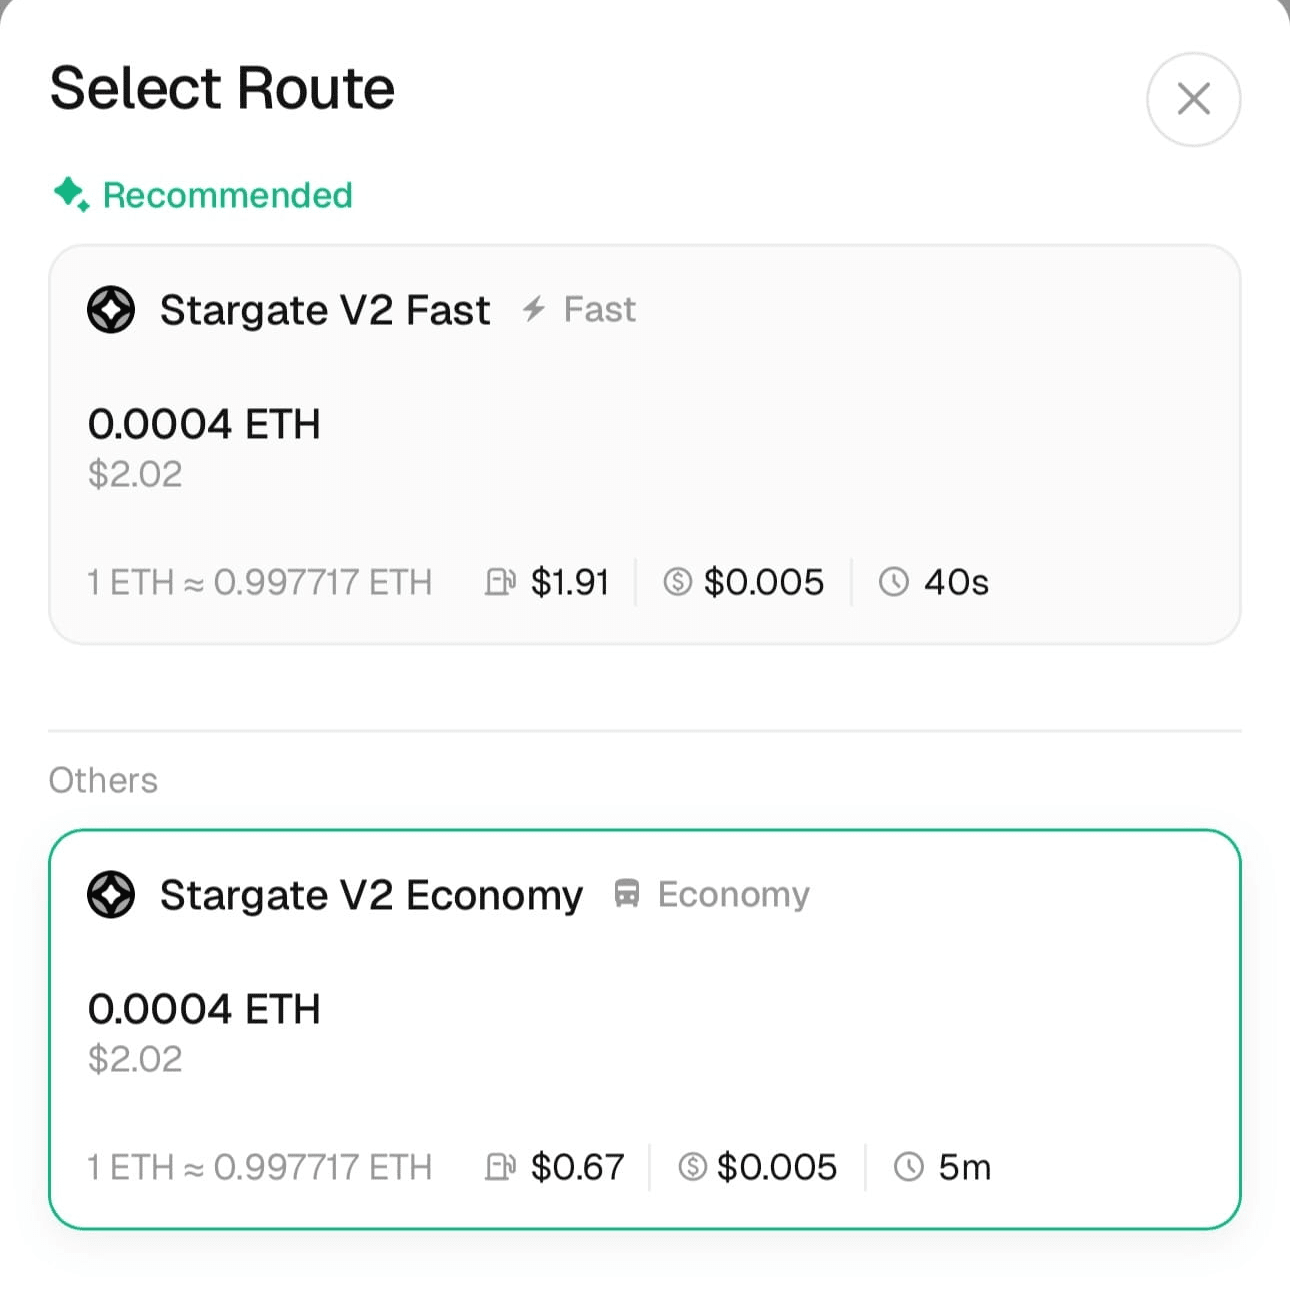
I spent 0.00085813 BNB to transfer 80 USDC, which is about 0.7u; for ETH, I went directly through the ETH chain, and I don’t quite remember the gas, but it was probably around 0.7u. Everyone should be cautious during the operation; the gas shouldn’t be as exaggerated as reported online. If it’s too high, wait and operate again, or check if you selected a route with high fees.
Sushi
The next two DeFi tasks require providing liquidity for hemiBTC, so the prerequisite is to exchange the USDC that was just transferred to Hemi for hemiBTC. As the name suggests, this is the wrapping of BTC on the Hemi chain. We will use Sushi, which supports Hemi, for this.
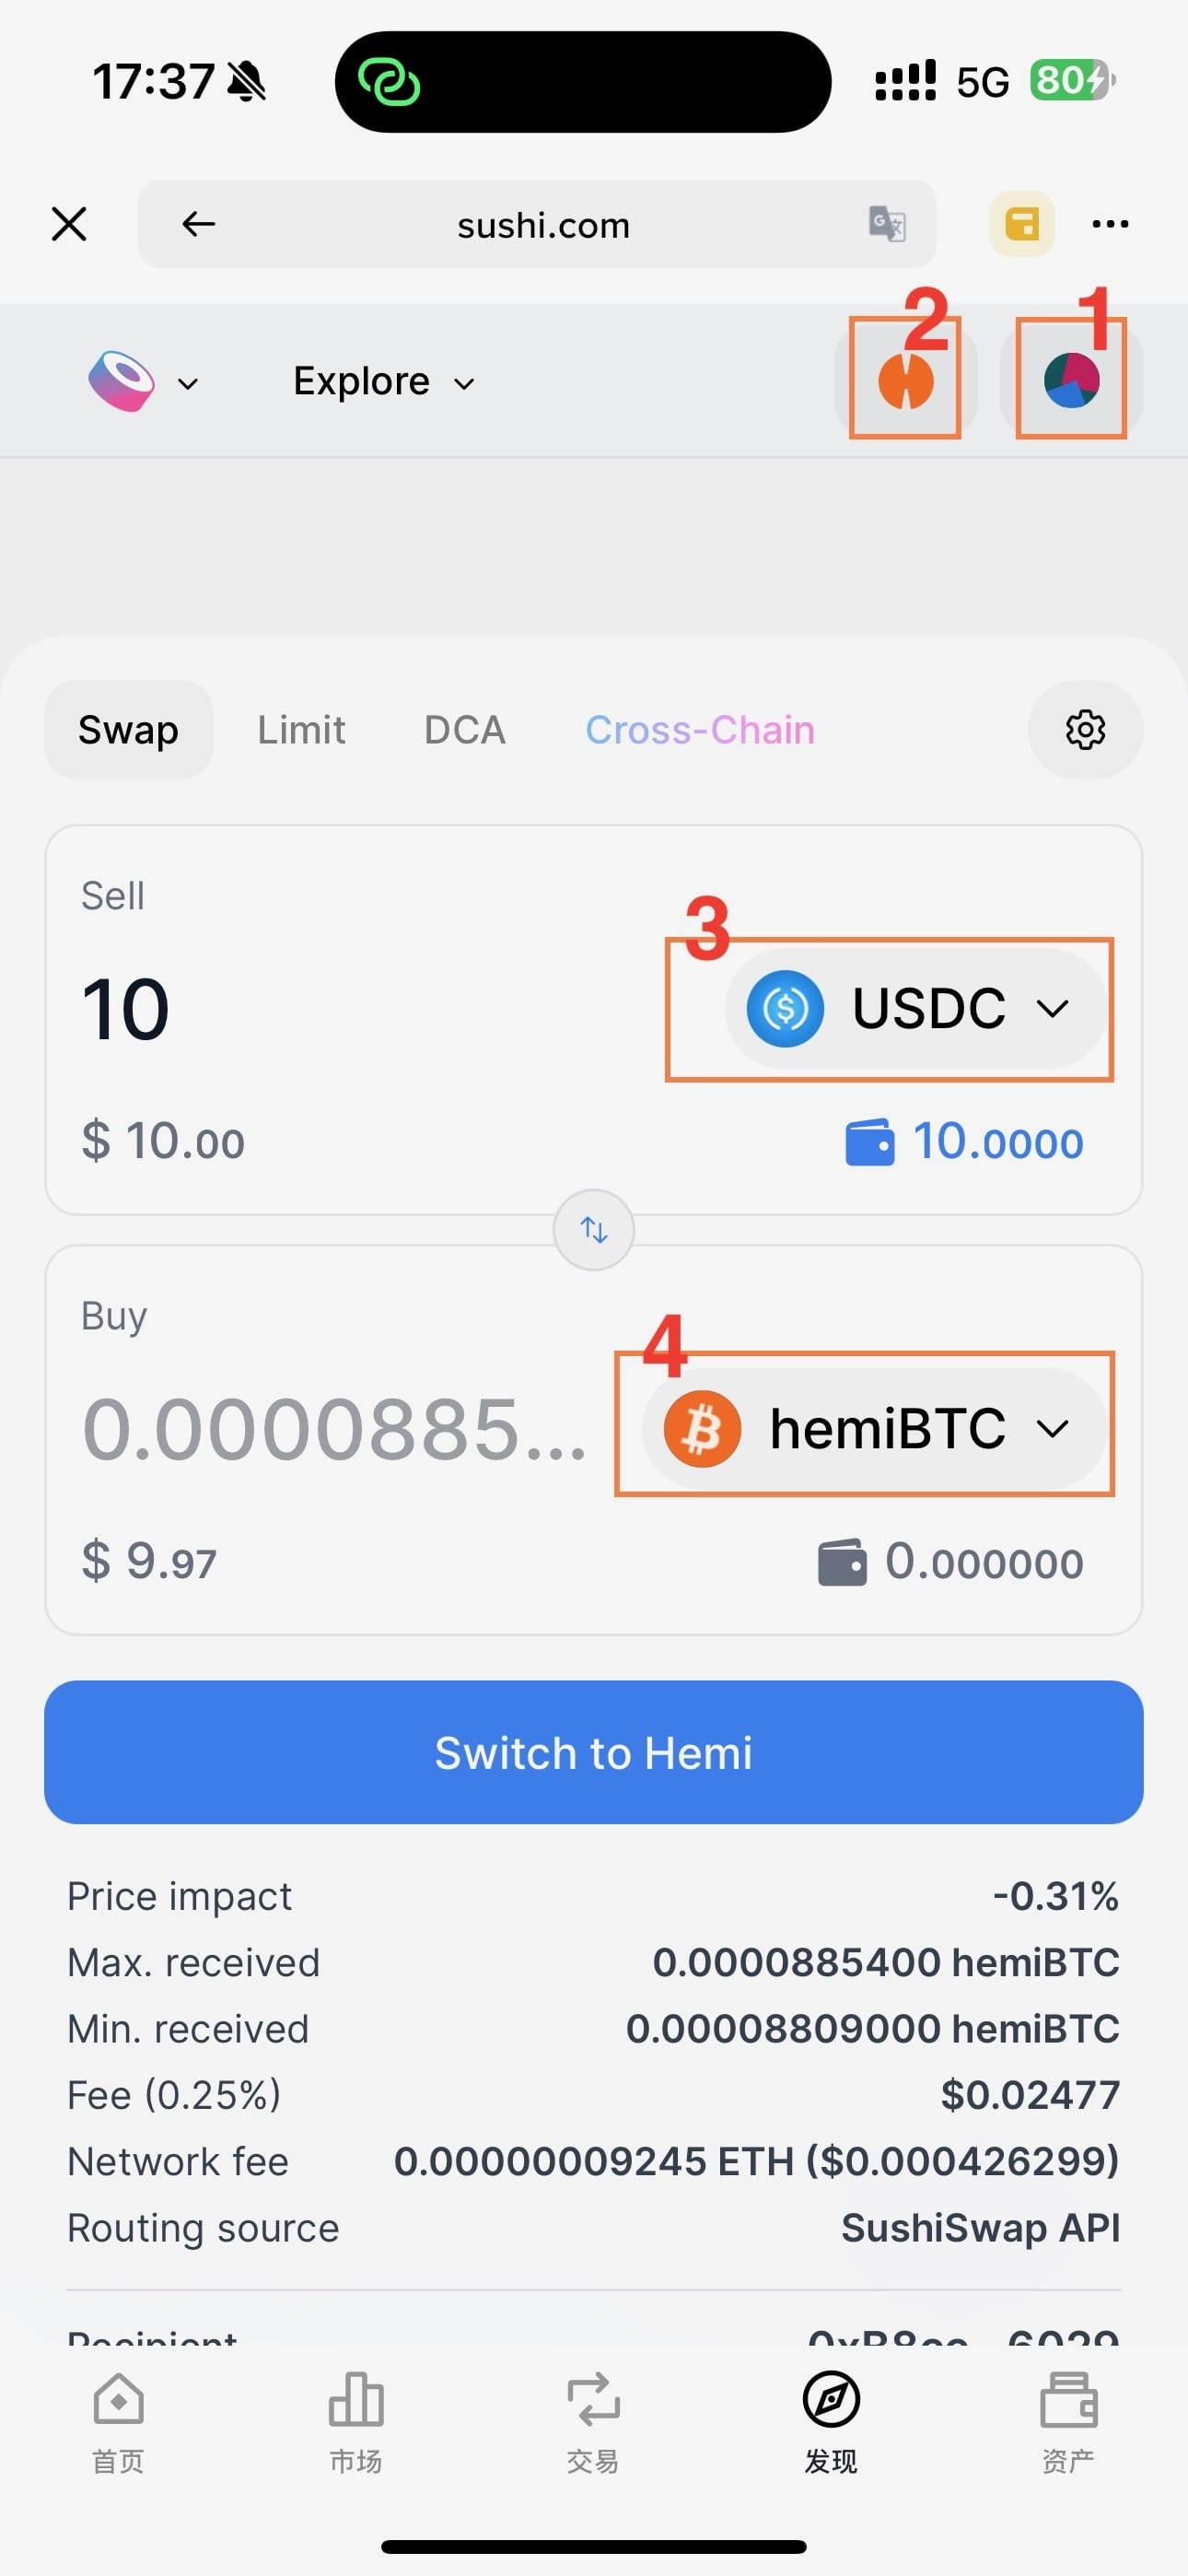
On the 'Discover' page of the Binance wallet, search for Sushi in the DApp tab to find this DEX platform. Refer to the image below, click on location 1 to connect the wallet. In the pop-up window, select WalletConnect, then choose the Binance wallet. WalletConnect requires a VPN.
After the wallet connection is successful, click on location 2 to switch the network to Hemi, then at location 3, you will be able to select the USDC that was previously transferred to Hemi. Click on location 4, select hemiBTC, input the corresponding USDC amount, and then click the button below to exchange (authorization is required before the exchange). The hemiBTC needed for the subsequent two tasks will be obtained through this method.
Spectra
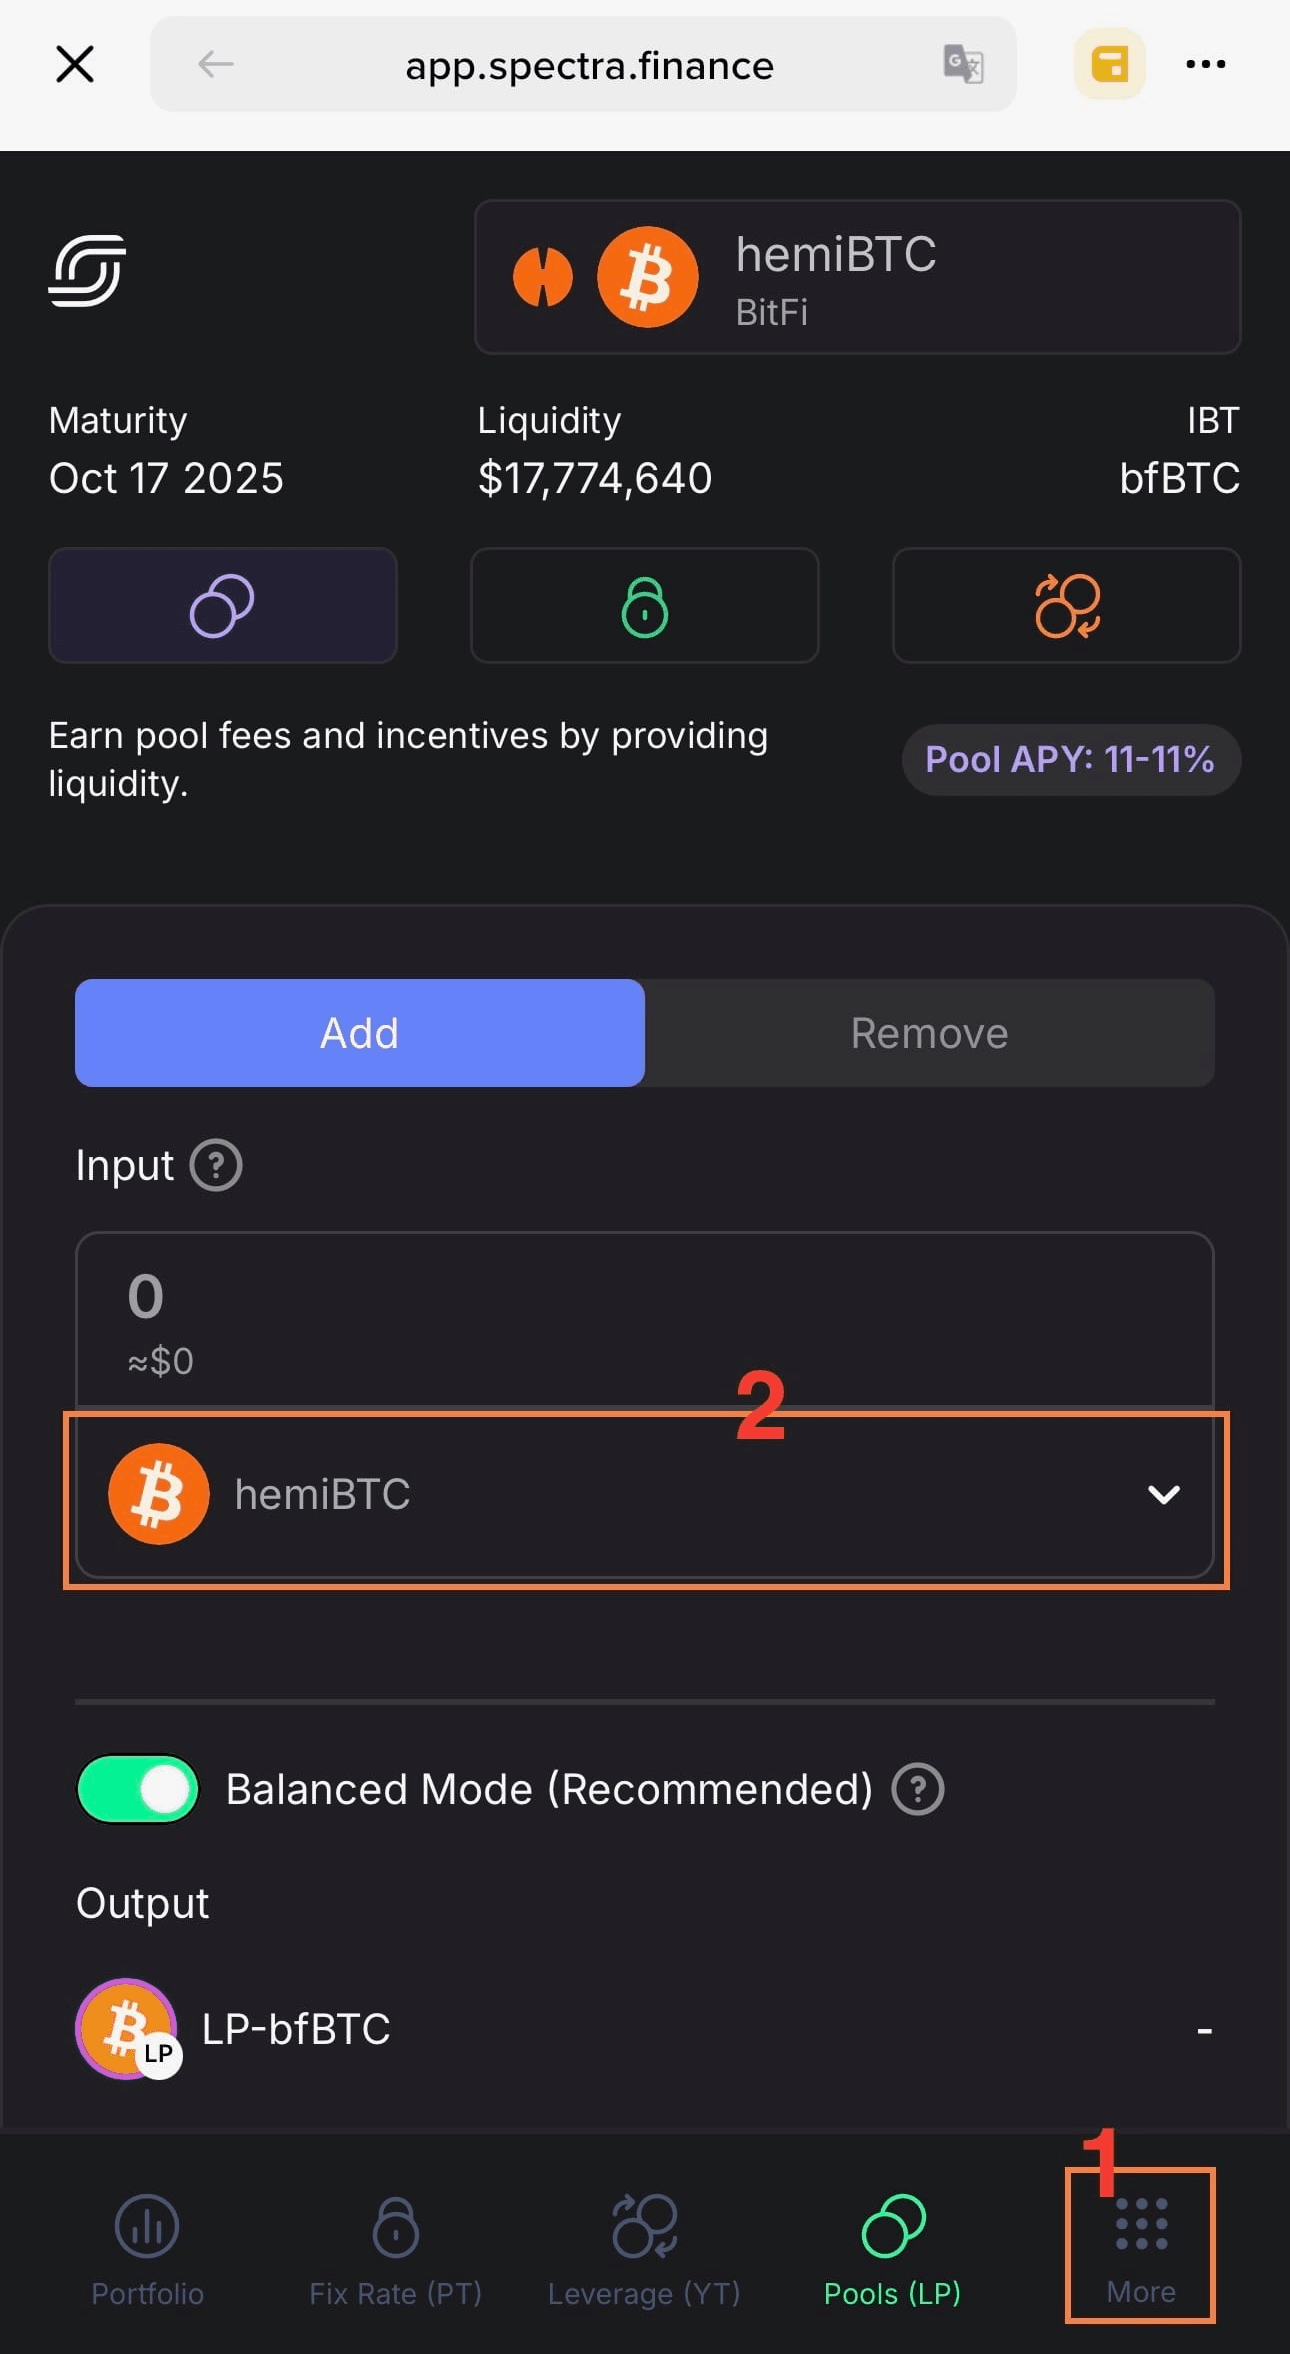
Spectra is a DeFi platform; my personal understanding is that its core is still the liquidity pool (LP), and many derivatives have been developed on this basis. We jump from the task to Spectra, as shown in the image below. First, click on position 1 to confirm that the Binance wallet is connected. Then confirm that position 2 is selected as hemiBTC. You should now see the hemiBTC that was just exchanged on Sushi. Input the corresponding amount, scroll down the page, and click 'Add Liquid' to add liquidity. OK, this task is complete.
GearBox
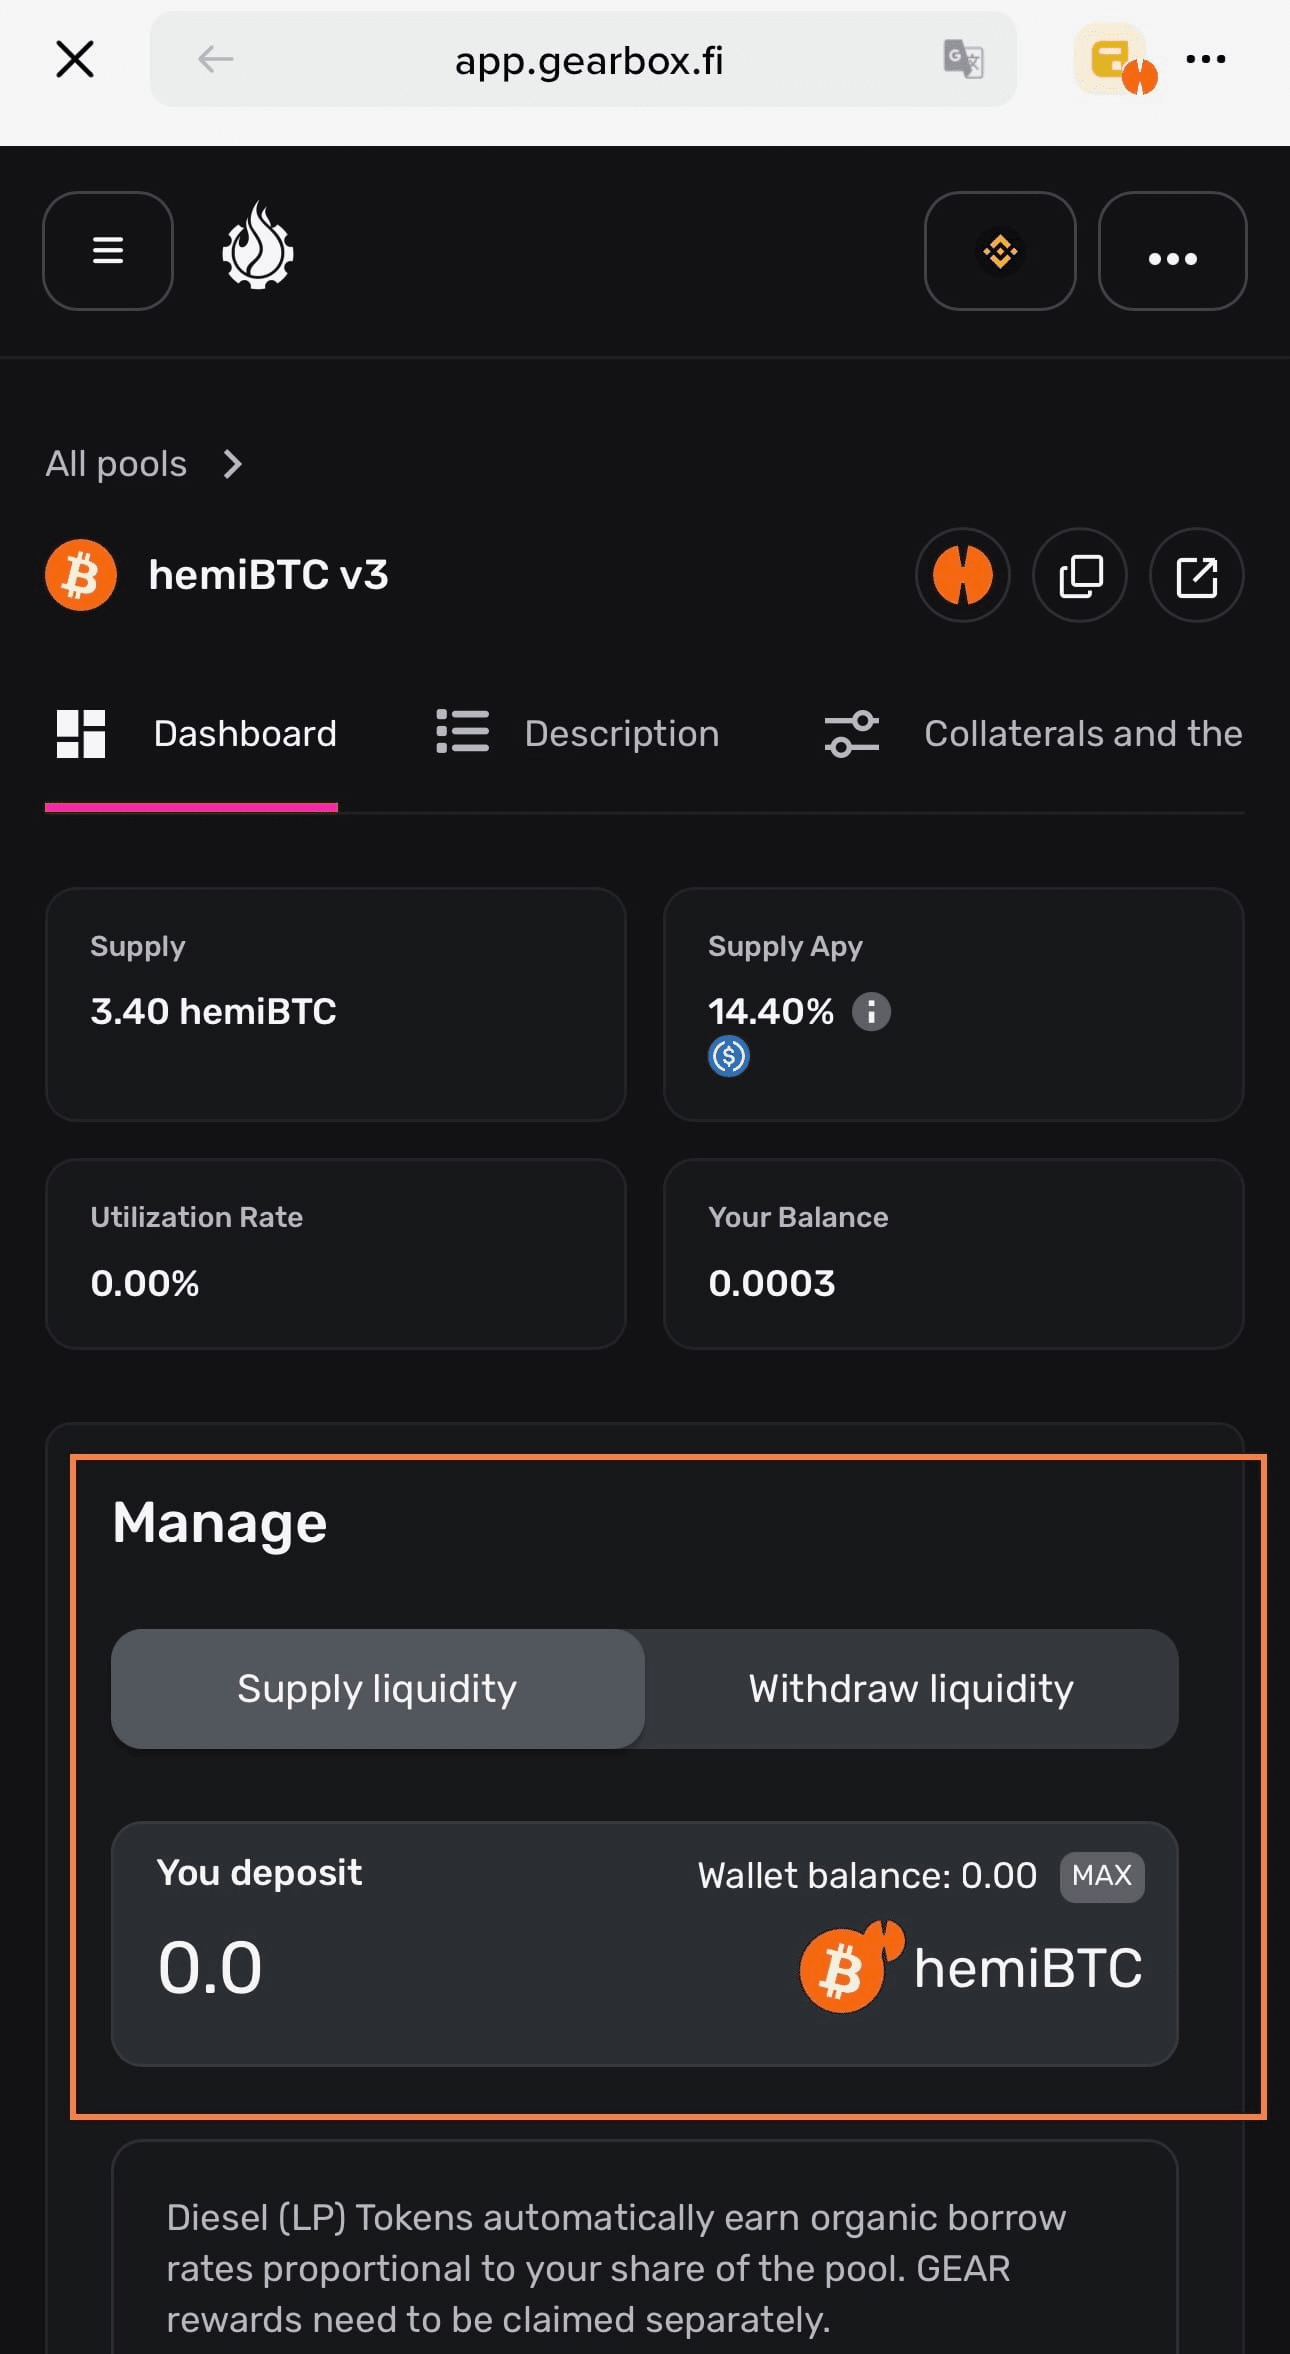
After completing Spectra, GearBox is not very difficult. Input the amount of hemiBTC you want to deposit within the box range shown in the image below, and then click the submit button at the bottom of the page.
The above two liquidity provision tasks need to be stored for 24 hours before validation. So after completing them, just wait for a day. Honestly, the APY for these two pools is still decent (both over 10%), so if you are not in a hurry to use the money, you can hold it for a while. This is my plan, at least to earn back a bit of gas fees.


