
Today’s video age is such that video is perhaps the best medium to highlight your brand, company, or product. But the good news is that you can do it all without costly software or knowledge of video editing. You can employ CapCut Desktop and make high-definition promos that look like they have been professionally designed and without spending too much.
Whether you are marketing a business, launching a product, or just want your videos to be seen more, this is a step-by-step tutorial for creating a promo video using CapCut on your laptop. No technical jargon, just useful tips and easy-to-follow instructions. If you’re also looking to narrate your video, consider using a reliable text to speech tool to bring your script to life.
Why Use CapCut for Promo Videos
CapCut is also incredibly popular because it boasts very strong editing capabilities alongside an interface that is easy to learn for beginners. CapCut does not watermark your videos like some other free editors do, and also doesn’t reserve vital features behind a paywall.
Here’s why CapCut is great for promotional content:
It is completely free to use.
It has pre-built templates and effects.
You can record videos in all available formats (square, vertical, and landscape).
It features text animation, audio editing, transitions, and filters that bring your content to life.
Step-by-Step Guide to Making Professional Videos
Let’s jump into the step-by-step process of making a professional promotional video.
Step 1: Plan Your Promo Video
Even before you can launch CapCut, take a seat and think about what your promo video is going to be.
Ask yourself:
What am I selling? (A product, service, event, etc.)
Who is my target market?
What do I want the audience to do once they have finished viewing? (Visit a website, purchase something, follow a page, etc.)
An easy model to emulate is:
Hook (grab attention within the first few seconds)
Value (explain why your product/service rocks)
CTA (clear call to action—what do they need to do next?)
Make a rough draft or bullet points, so you stay on course when editing.
Step 2: Open CapCut and Start a New Project
Download and install CapCut Desktop from capcut.com if you haven’t already. Once opened:
Press “Create Project.”

Step 3: Import Your Media
Then, move all your content over to CapCut. This could be:
Product clips
Customer feedback
Voiceovers
Music
Branding and logo assets
B-roll footage (background shots, stock clips)
You can just drag and drop all these into the media library or use the Import button.
Tip: CapCut also features a stock audio and footage library you can access within the app if you need more visuals or music. If you want to automate your visuals, you can also try using an AI video generator to speed up content creation.

Step 4: Build the Foundation – Add and Structure Clips
Drag your main footage to the timeline and begin trimming the clips to keep only the best.
Here’s how:
Trim: Grasp ends of a clip and draw in to remove excess.
Split: Split clips at a point using the Split tool (Ctrl + B).
Drag clips around the timeline to rearrange the order.
Start strong—those first 3 seconds matter big time. Think: bold fonts, dramatic camera angle, or a problem your product solves.

Step 5: Add Text and Messaging
This is where you define your offer clearly.
Select the Text tab, and then pull in a preset or create your own.
Employ titles, subtitles, and callouts to highlight important information.
Modify fonts, colors, and animation style to match your brand.
Here is a sample text flow:
“Having trouble staying organized?”
“Meet TaskMate – Your Smart To-Do App”
“Free for a limited time – Download Now!”
Keep text short and easy to read, especially on mobile.
Step 6: Use Movement and Transitions to Make It Interesting
Between your clips, add smooth transitions so that the video flows smoothly.
Add effects like swipe, zoom, fade, or spin using the Transitions tab.
For text or logos, apply motion effects (e.g., bounce or typewriter) to draw the eye.
Don’t overdo it—use 1 or 2 styles for a clean, consistent look.

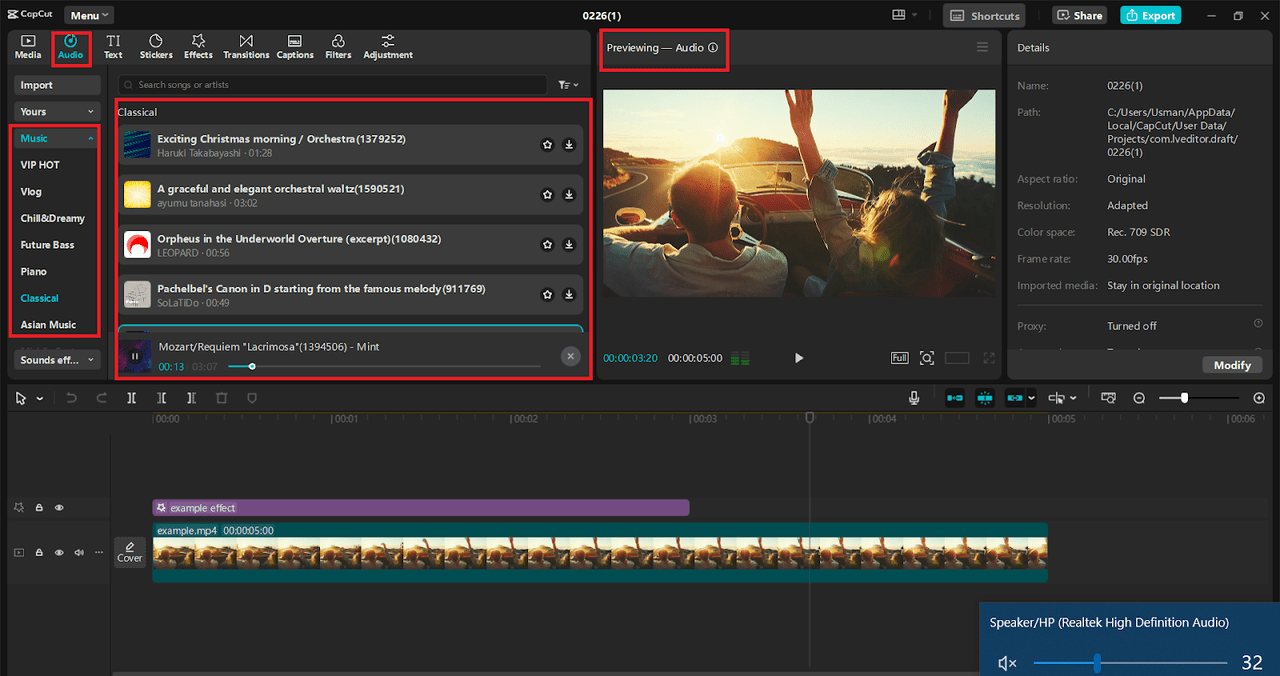
Step 7: Add Music and Sound Design
Background music can change the mood of your video.
Choose a tone appropriate for your message (hype for new product releases, calming for testimonial videos, etc.).
CapCut has an integrated royalty-free music library.
You may also upload your tune (ensure that it’s copyright-free in case it goes public).
Drag the music file into the audio timeline and normalize the volume under the “Audio” tab.
Use sound effects (e.g., clicks, swooshes, or dings) to highlight text or make transitions smoother. You can even play with your voiceover using a voice changer for added flair or comedic effect.
Step 8: Add Your Logo and Branding
Drag your logo image onto the timeline and place it in the corner for the whole video, or just on the outro.
You can scale, fade it in and out, or animate it with keyframes.
Want your colors to match your brand? Use the color picker when editing text and elements.
Your brand must be seen, but not noticed.
Step 9: Add a Call to Action (CTA)
All successful promotions conclude with a definitive CTA. What do you want others to do next?
Some concepts:
“Order Now at OurWebsite.com”
Stick with us for further news
Download the app now – for free!
Utilize bold text, voiceover, or a combination of both. Even animate a button graphic to reflect an actual CTA.
This is your opportunity to drive conversions—do. Don’t miss it.
Step 10: Final Touches: Filters and Color Correction
To get everything to match in looks, use filters or color settings.
Go to the filters or adjust the panel.
Lighten or introduce a touch of contrast if your clips appear flat.
Use one filter to maintain consistency unless your concept requires more variety.
These minor tweaks can make your video appear much more professional.

Step 11: Export Your Video
When you are happy with your promo:
Click Export (top right).
Choose resolution—1080p is suitable for most platforms.
Save as and select where to save.
Wait for the export to finish, and then upload it to your website of your choice!

Conclusion
Producing top-quality promotional videos is no longer dependent on complicated software or costly tools. With CapCut on PC, you get all you need—from easy-to-use editing options to advanced effects and export functions—all in a single free and easy-to-use platform. Whatever you’re selling, promoting a product, a brand, or an event, this step-by-step guide will assist you in creating compelling, professional-looking videos with ease.